|
|
Post by owdlvr on Jul 10, 2023 22:27:48 GMT -8
On the way down to the Volksfest show, I noticed the tach needle would occasionally jump, like an electrical issue or spike. The Rally Bug has always run pertronix inside a 009 that has a roughly two-year habit of causing this sort of issue. Where pertronix usually dies instantly, in the rally bug it gets 'noisy' for two weeks and then dies. I carry points in the glovebox, but figured I could limp it home or swap them when it died completely. Now, keep in mind that I had a 40min wait at the ferry (which I didn't take) and then a 55min wait for the Hwy 4 single-lane closure. I had plenty of sitting time to swap out to the points.  When Mark saw me dead in the water at the traffic light (which had turned green) I almost got rear-ended twice, at speed, while trying to get the Rally Bug to re-start. Turns out Fuel Pump #1 had died, and I simply needed to flick the switch to pump #2 and wait a moment. Of course, by this point the famous exhaust gasket had also blown out completely...so orange flames shooting out the tailpipe become a standard 'feature'  The exhaust leak causes the fuel injection system to go full rich, so the combination of randomized spark, and fuel injection computer completely confused, made for a bit of a rough final leg home. Got home, popped the distributor cap, and...would you believe it? Damned thing is running points. They had simply closed up, a quick adjustment and the ignition is stable again. Whoops!  As for that exhaust leak, the double gasket obviously isn't working...so I needed a new solution. Step one...draw up the part. Second step, pull out the CNC Plasma cutter...  Clean it up a little...and this should be good to go.   Basically, instead of running a double gasket I'm simply just going to run the steel flange as the gasket...and the little bit of leakage that will occur I'll compensate for. This exhaust system only has to make it to the end of the driving season before my 'next plan' kicks in...so the band-aid fix is just fine. Besides, how else am I going to keep those sweet blue-flame backfires on decel? |
|
|
|
Post by owdlvr on Jul 16, 2023 9:53:28 GMT -8
Finally got the rear ride-height to be where I want it:  Which creates a whole 'nother world of problems. When I did the coil-over conversion, the suspension was setup to work best at stock ride height and more, for rally. Setting it up this low means there is a disproportional amount of suspension droop available, and not enough travel for bumps. The spring rate, which was technically always a problem before, is also now a much bigger problem. I need something in the 325-400lb per inch rate at the beginning of the stroke, but 600-700 at the end of the stroke. Normally one would just buy a progressive spring, but they don't make them in the short spring height I have available to me. So I started thinking about stacking two springs, and what springs I would want.  Now, given that the red spring is 8" long, and they make 4" springs, it seems like a simple conclusion. Put a 350lb and a 700lb spring in the 8" space, and call it a day? I bounced the question off of a couple of racing buddies of mine, and then spent the last two evenings going to spring-physics classes with links they send me on the internet. Spring physics get absolutely brain bending. If you stack two springs in series, you don't get a curve that starts at the lower spring rate and finishes at the higher rate. Instead, you actually get a single linear spring rate that is wildly different than you anticipated. Stack a 4" 350lb spring ontop of a 4" 700lb spring, and together the two will act as though they are a linear 233.3 lb spring. The top springs is multiplied by the bottom spring, and that is divided by the top spring plus the bottom spring, to arrive at your linear number: (TSxBS) / (TS+BS) = Spring Rate. In our case (350x700)/(350+700)=SR -> 245000/1050=SR -> SR=233.33 HOWEVER if one of the two springs reaches coil-bind, then you'll have the non-coil-binding spring acting at is 'normal' rate. So if we could make a 2" tall 350 spring, and a 6" tall 700 spring, at some measure of stroke the 350 spring would coil bind (ie: compress fully) and you'd go from a 233.3 linear spring rate to a 700lb spring rate. Hmmm... In offroad racing, this is done by something called a crossover ring. This ring threads onto the shock body inside the springs. The spacer that is between the two springs cannot slide past the crossover ring. So as the springs compress, eventually the spacer will hit the crossover ring essentially stopping the top spring from moving any further -> now you have a bottom spring acting on it's own, thus it's now acting at it's labeled rate. So, put the 350 spring on top, with a crossover ring inside, and the 700lb spring on the bottom. The suspension will have a 233.3lb spring-rate until it compresses enough to have the spacer between the two springs touch the cross over ring. At this point it will transition to a 700lb spring rate. Moving the crossover ring up and down changes where the spring-rate change happens. We're getting somewhere now. Now, I happen to know a 233.3lb spring rate is going to be much too soft to start with, as the car sinks to the bump stops on 300lb springs. So we need something in the 375-400 range to start. How the heck do I find a combination of springs that will do that? Wouldn't you know it...there are handy spring charts where someone has already done the excel math for you. Simply scour the chart to find a combined rates in the 375 range and... aww crap. A 600lb and 1000lb spring combo will do it! I suppose I could put the 1000lb spring on-top (presuming I can get one in 4" length) and lock it out with the collar to end up with a 600lb rate? But I honestly don't know. This is the point where you call your friend Ray, of Trial Engineering. Before moving to Canada Ray worked as a suspension engineer for a very prominent World Rally Championship team. Everyone has a Ray, right?  Fortunately for me, Ray enjoys a good noodling session. He also explained to me the problem with using crossover rings, or planning on one spring coil-binding. The transition between combined rate and single rate isn't so much a 'transition' but more of a stair-step. So, in our original example you go from 233.3lb to 700lb rate almost instantaneously. Not a significant issue on a long-travel off road impact (think jumps in Baja) but potentially significant on a road car. You don't want to be setup and halfway through a tight mountain corner, suspension loaded almost to the crossover and then hit a compression. It could cause some handling issues. Ray needed more info, so the suspension came apart for measurements once again:  The spring length as measured with the car at rest, along with wheel-to-fender distance. The suspension was reassembled without spring, and I cycled through full droop full compression taking measurements of the wheel-to-fender gap. All these numbers were sent to Ray, who started on some calculations. First off, he figured out the ideal starting spring rate for maximum comfort and compliance, while still holding the car off the ground at the desired ride height. He then used my ideal maximum rate (based on questions he asked about the cars handling in rally) to figure out what the ideal finishing rate would be. Then he came back with some suggestions on modifying the car. I have way too much droop, and not enough travel. Raising the car 30mm would be ideal, which is hilarious because I just spent two weeks getting it DOWN 30mm! The bump stops are trimmed as much as they can be, and the shock is dangerously close to nearing bottom-out. So, my only other option is to move the lower shock mount. This will reduce the droop, but allow us to trim the bump stop further for more upper travel. Commercially available springs are compared:  So far, Ray thinks he has found the best of the worst-case scenarios. One solution is to combine a progressive tender spring with a longer linear spring, planning for the tender spring to reach coil bind. The downside is how the car may handle at the transition. The second option is to simply get a custom spring wound in the desired progressive rate, not sure what that will cost me. The third option is to combine a shock extension with a custom lower spring perch to get me more room for mounting an off-the-shelf progressive spring which is (currently) too long to fit on my shock. OR I take these rear arms off, mount up a spare set of factory arms with mounts, and look at what setups the German Look guys are using. My current setup uses 2.5" inner diameter springs, but I understand a lot of them are using 1 7/8" springs, which allows them to use the factory lower shock mount (just moving the hole lower). Definitely more research to be done here. |
|
|
|
Post by owdlvr on Jul 31, 2023 12:28:24 GMT -8
Oh gee, let half a month go by already... Okay, quick trip to the Family Heirloom Project. Milled up some steering rack spacers in aluminum, so I can play with the front suspension geometry and start getting that dialed in to a point I'm happy with. It fixes the bumpsteer the system ships with, but also puts the tierods into a spot that won't interfere with the front a-arms during suspension droop. With my dimensions sorted in aluminum, I can get a set of steel ones made while I'm traveling or working on other bits.    The fuel tank also arrived, which fits around the suspension wonderfully, and inside the trunk area. It's plastic, so no rust issues in my future...but full of drill shavings from installing the fittings. Sigh. Nothing comes "ready to go" anymore The "feed" fitting is going to be an absolute nightmare to get to, or at least I suspect it is. Will need to think about how I run the stainless steel lines (that don't flex a tonne) very carefully.  Moving onto the Rally Bug! In lowering the car, we've discovered a unit problem due to my custom rear end. It was only ever built to be 1/2" lower than stock, to 2" higher than stock. In it's new lowered position, I have tonnes of droop travel, but run out of travel on compression. New shocks allow me to move 20mm of droop travel into compression travel, which is significantly better (and actually causes us to need to map out the ideal springs again). Yes, we're at the point where there is value in moving 20mm of suspension travel around. Who would have thunk?!   One of the items I've been meaning to address for a long while is the wear in the oil pump. Shortly after I built the car, Bugpack was purchased by Empi and dissolved. The drysump oilpump that they made, disappeared along with the Bugpack name. This is slightly more than a minor inconvenience, because the body of the pump is all aluminum...which means it does wear. None of the other drysump pumps are interchangeable without me doing new oil line configurations or more. When a stock oil pump wears against the cover, you can polish them up on some glass with sandpaper. With a dry sump pump, which is actually three pumps stacked together, it becomes a little more challenging. Mine has worn to the point that the scavenge (removing oil from the engine and back up to the tank) occasionally will stop scavenging at idle. This fills the engine with 12L of oil, and then goes to zero oil pressure. Not an issue if you're driving, it scavenges just fine above 1,100rpm. But I haven't been able to leave the car at idle unattended for a long time. Taylor and I are are going to do an event in the car this summer, and having 12L of behind you at 220F in the summer heat is less than comfortable, so swapping over to wetsump while I work on the drysump oil pump seemed like a win-win solution. As it turns out, it would be rather frustrating for a day and then a win-win- WIN solution.   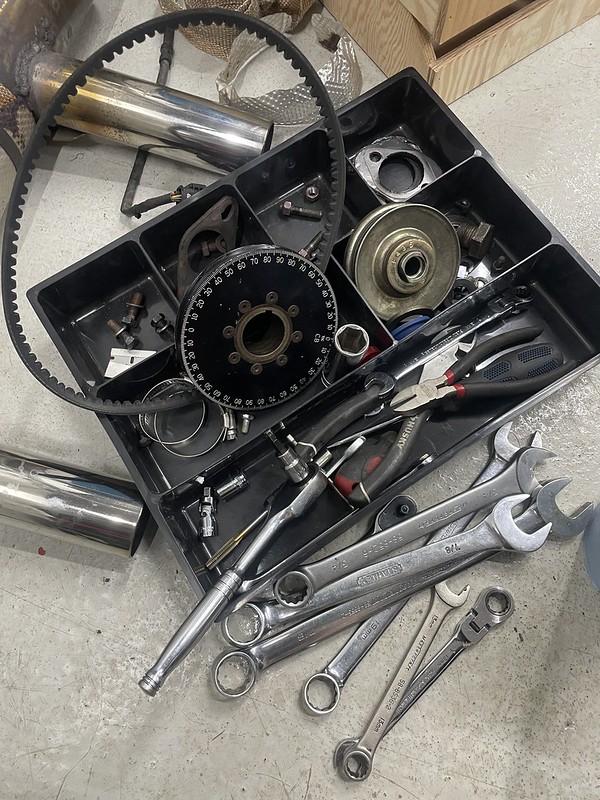 A good opportunity to snap a photo and note that this motor is running an FK-8 cam. I should probably dig up all the motor specs and put there here in one post.  The Rally Bug engine bah has always been dry as a bone. So dry, in fact, that the rear sheet metal rusts out and has to be painted every so often. This is not a trait that the German Look or '58 Beetle share. At random intervals, and in a totally mind-bending makes-no-sense manner, they will spray oil all over the engine bay off the crank pulley. Sometimes it's a light bit, sometimes you are mopping up the engine bay at each driving day end wondering how it could possibly be that bad. It's so weird, I drove the German Look beetle for a day and had almost no oil, dad drove it the next day and had to mop up all the oil in the engine bay by lunchtime! It seems to make zero sense. So, imagine my frustration after swapping the Rally Bug to wetsump, and coming home from a test drive to see this:   Over the next few days I did high-rpm highway run tests, low speed city tests, mixture tests. When the oil comes out isn't consistent in time or quantity. Even weirder, the back of the pulley is almost completely dry. Whereas on the '58 and German Look it will be soaked. Comparatively speaking, it mostly drips/runs out of the Rally Bug, but sprays all around in the '58 and German Look. The drysump pulley is significantly smaller, 5" diameter, vs the stock size that the other engines run. And very quickly I figured it out...On my wet sump engines, instead of hanging an extra sump below the engine (as is typical for VW's), I'm using a 1.5L or 2.0L Accusump. It essentially holds pressurized oil ready to feed the engine if the pickup starves. So while whipping around sustained twisty corners if all the oil ends up in the cylinder head, the accusump keeps sending pressurized oil into the engine until it uses up it's 1.5-2L capacity. Typically an Accusump is set at the idle-oil pressure of an engine, or the minimum pressure you want to see. I've always set mine to 20psi. Enough to keep the bearings alive in a full-starve situation, but should have little bleed down at idle. Turns out, at 20psi I'm probably emptying the Accusump at idle, waiting at a red light. My current theory is the oil level rises high enough to become an issue inside the case, resulting in oil pushing past the crank pulley onto the tin. If the only thing I changed was drysump to wetsump, it can't be blowby or other engine issues. So let's try a sandseal to see if that will work? Rob Frose overnighted a sandseal setup from AVR, and I went to work fitting it to the car. 250km of high-revving, 20min of idling, and any other test I could throw at it...dry as a bone. Guess I need to order some sandseal setups for my other engines My ignition issue I was experiencing on the way to the show and back had gotten worse, so I decided to swap out my CB Blackbox setup to the Magnaspark II that I'm running in the other cars. I got 85% through the swap when I found the damage in the wiring harness I use with the blackbox (user error) and the likely problem. I was already 85&% done, so I decided I would just continue with the swap. The last step is to change out the ignition mapping with the fuel injection, which was going to be a problem. The laptop I have for the car, which runs Windows XP, has had a drive failure. By some sort of miracle, I actually backed up the files and maps I had a few weeks ago. Miracle number two? I actually got the CB software running on my Macbook using Parallels and windows 11. The only problem is the mac won't recognize the cable conveniently ziptied all through the car, and I am going to have to replace it. Swapped the ignition settings, and all my problems are gone. The only issue is the map I was using is right-messed-up due to trying to tune around ignition problems, and forgetting that I have to recalibrate the throttle position sensor at every map change. Who knows what that poor computer has been trying to compensate for. So I loaded in the last known good map from a couple of years ago, and will have to work back towards a more efficient tune. I did some mileage tests on the now current-map, and then decided I would note it somewhere on the car since I seem to be forgetting more about it than I remember. Gave myself a 5 litre window too.    Lastly, I've been thinking about that upcoming trip with Taylor...and where we're going to put camping and weekend gear. Even just a little extra storage space would be nice. The battery area always seemed like such a waste of space, and I had a spare aluminum cooking sheet...so here we go. Extra luggage capacity! I think once I decide to learn composite constructions, re-doing this in Carbon might be one of my first projects.    |
|
|
|
Post by owdlvr on Jul 31, 2023 13:31:03 GMT -8
 It was just over a year ago that I blew up the Ford Falcon motor. Well, presumably. It got shoved to the side because I was busy, and then not worked on all winter because it takes up more space in the shop than a Beetle. I needed to move it a few weeks back, and thought maybe I should look into what failed. At the very least I should decide if I like the car and want to keep it, or if I should think about selling it...even as is. I popped off the exhaust manifold, took a quick look at the cylinder head, and just about kicked myself. Could it be as simple as a rotten freeze plug?!  Popped a new one in, filled it with coolant, fired it up and started bleeding. No problems at all, which really made me feel stupid. I washed the car, prepped it for a run to the lake while it cooled off, tossed the rad cap on and fired it back up. It didn't last long. Apparently the overheating was really bad, and I would at least need to pull the cylinder head. There were signs that the headgasket had been weeping before the overheating, so this wasn't a total surprise.  Based on the condition of the internals, it was probably well overdue anyways...    Cylinder head may need to be surfaced This is an exaggeration, due to trying to hold the ruler on a swinging cylinder head, but gives you an idea of how bad it was.   I dropped the head off at the machine shop on July 9th, they promised me "end of next week for sure" so it probably comes as no surprise that on July 28th I finally picked up the now-finished head after a rebuild. New valve guides and seals, a couple of seats, broken manifold bolts, a full cleaning and of course decked to be flat once again. I cleaned off the block, and checked it for flatness. I couldn't get the .002" feeler to fit anywhere and specs are a maximum of .003"...should be good to go! I did check the bores for crosshatching (minimal) and upper lip (also very minimal) but I would later kick myself for not looking further. I was so excited to finally have the head back, that I took no photos before it and the new headgasket were all in place, and the engine was buttoned up. It bled all the air out of the system with no problem.  But as soon as the rad cap is on...  The engine is watercooled...but so is number four plug.  Either the machine shop missed a crack in the head, or more likely I have a crack in the block that I missed. This stuff, though, is amazing! I'm normally not a fan of pouring the fix-it-fluids into an engine, believing that they probably do more harm than good, but in this case it's a last-ditch effort to keep this car useable for the near future. If it seals it up, at least I've bought some time while I look at other engine options or if I want to keep the car. It was recommended by a couple of buddies to try Irontite, and only Irontite. The Ceramic block sealer was suggested by one, but since it requires draining and flushing all the coolant out, I thought I'd try this first. Interestingly one parts shop in town only carries the ceramic stuff, and the other only carries this stuff. Each saying that "theirs" is the only one that works.  I added it to the cold radiator, and ran the engine with the rad cap off until the thermostat opened. Then I put the rad cap on, and watched the smoke show start. 60 seconds later, the smoke out the tailpipe started disappearing. The violent bubbling in the coolant reservoir slowed to a light bubble, than a blub...blub...blub. Took it out for a 20min drive, no smoke, no bubbling. Let it cool down, some light smoke and bubbling. Hmmm. Waited until it was fully cool, popped the rad cap off and topped up the fluid. It's definitely pushing radiator fluid into the overflow, but not sucking it back. Probably still sucking through cylinder #4. For the evening drive, I took it out for an hour long trip, stopped for dinner, and then drove another hour home. When I parked it there was no smoke or bubbling. The next morning the rad was down maybe 1/4", but I think that's fairly normal? The reservoir wasn't overflowing, so that was a good sign as well. Day two, it seems to be fully healed. No coolant loss, no tailpipe smoke. I still smell coolant occasionally, but that could honestly be from the coolant sprayed around the engine bay that I haven't cleaned up enough. I'm curious to see how long it actually lasts for. My initial thought was if this worked, I would flush the system and use the ceramic Irontite. It requires two days of driving, and then fully draining and leaving for 24hrs to cure. I'll have to do that as a project down the road. |
|
|
|
Post by Volktales on Jul 31, 2023 21:04:21 GMT -8
My coworker used some of that Irontite in his long suffering Jeep Grand Cherokee. It did actually work for him too, and was recommended to him by multiple people...
|
|
|
|
Post by owdlvr on Aug 1, 2023 7:20:05 GMT -8
Three days in, not using any coolant anymore. No bubbles, no smoke. Crossing fingers!
|
|
|
|
Post by owdlvr on Oct 22, 2023 23:06:02 GMT -8
Well, I have to tell you the Falcon didn't work out. Looking for a new motor.
|
|
|
|
Post by owdlvr on Oct 22, 2023 23:06:31 GMT -8
Rally Bug update...    Gawd this car looks awesome. Having finally pulled it out of mothballs, Taylor (my girlfriend) and I took it on the Classic Car Adventures Rush to Gold Bridge. This event is a mixed tarmac and gravel event, which goes to a different destination or challenge each year. This year we went to Bella Coola, a very remote mountain town in British Columbia. To get there, you have to take Hwy 20...a significant stretch of which is still gravel, despite it being the only road in and out. Until 1953 the highway ended 137 km (85 mi) from Bella Coola. The Government considered it impossible to make a road to Bella Coola. Residents fired up a Bulldozer (brought in by barge) and built the rest of the road themselves. 70 years later, and the road is still single lane in sections and descends 43 kilometers with switchbacks and zero guardrails or other safety items. Perfect for a classic car event!     The event was going incredibly well, all the way down to Bella Coola, and up the hill the next morning. We filled up with fuel at the top of the hill, strapped lunch to our manifolds (seriously) and made our way an hour down the road to a park where we should find lunch hot and steaming in the engine bay. For the cars that strapped lunch to the exhaust manifold, it was perfect. For cars that mistakingly strapped it to the intake manifold? Well refrigerated! Fortunately we had a BBQ waiting at the lunch spot to heat up everyone’s lunch About 200km from the fuel stop, however, and the Rally Bug ran into a slight issue.  While a couple of cars went down the road to find some fuel, I started to think about how I could have possibly ran out of fuel about 200km from our last gas station stop. I remember putting the nozzle in the car, and being stressed about making sure everyone stopped to put their lunch on the manifold properly. I remember taking the nozzle out of the car, and the fact that the gas pump didn’t give me a receipt. But what I couldn’t remember is whether I was sure I actually filled the tank. Did the pump click off right away, and I just assumed it was full? Hmph. After a road-side rescue, we filled up at the next gas station and went for the last gravel leg, a roughly 300km trip on gravel. We were running behind for dinner, but while driving I came up with a second theory besides just “I don’t know how gas stations work”. The Rally Bug has two wide-band 02 sensors. One works with the fuel-injection computer, the other a gauge on the dash I can read. When we lost the gauge on the way up the hill, I thought nothing of it. Given how long the car has been in mothballs, could be a wiring fault or a sensor failure. After a while, I realized that rocks could have taken out the sensor…wait, what if it took out the sensor for the fuel injection computer too? But the car was running sooooo well…   …until it wasn’t.  Taylor and I got to camp in the middle of nowhere on a forest road. Coffee made by the camp stove, ‘charcuterie’ of snacks, 4 hours of no cellphone or radio while we hoped our friends could find us with fuel. It doesn’t sound that bad, but when we looked at the map before they left, we all agreed it should be “about an hour” before they’d get back with fuel. We did make it out of the woods, and the next morning I confirmed that both 02 sensors had major dents from rock hits. I know back when I was running the car regularly it had shields on the 02 sensors…so where did they go?! Hmph, a mystery for another day. Limped it home, burning 2x the fuel it should (and probably washing the cylinders down).   Into the shop for some post-event maintenance!  -Dave |
|
|
|
Post by owdlvr on Oct 22, 2023 23:40:08 GMT -8
German Look Update: Back in June or July Taylor and I road-tripped the car home from Colorado, back through Yellowstone again...because why not?!  Home at last...  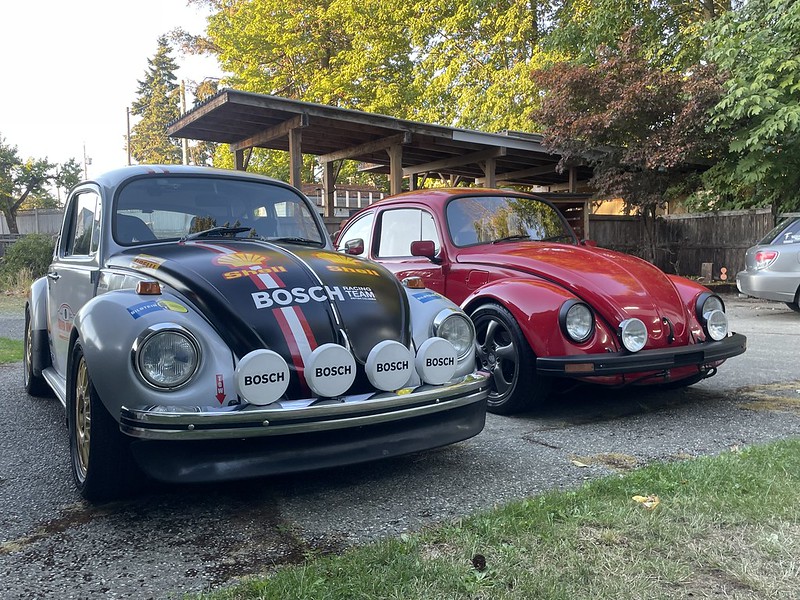 We used the car a bunch in July and August, exploring the island, BC and other stuff...but apparently I didn't upload any photos of our travels. In September Taylor and I took the car down to Portland for the Classic Car Adventures Fall Classic. Because, well, why not? Three days of driving fantastic roads in Oregon. Portland to Bend, Bend to Eugene, and Eugene to McMinnville before we headed home.   Side note: If you can't find your trouble light before leaving the shop...look harder.  We did have one oops while on the Fall Classic. We couldn't avoid some fallen tree debris in a corner...and this is the result. Not going to be easy to repair without paint!  I'm missing a bunch of events, road trips and other news...but the car did roughly another 38,000km in 2023. When in doubt, mile them up! I've got a fairly big list to tackle on the car this winter, but it's mostly minor items or niggly things that I'd like to improve. When I installed a Bug-Tech shifter this year, for instance, I had to remove the center console and cup-holders. That is driving me nuts so I need to come up with a cupholder solution. Minor items, but big list. -Dave |
|
|
|
Post by Volktales on Oct 23, 2023 20:49:09 GMT -8
Thanks for the great update, Dave! Fantastic pictures as usual, and I am sure a lot of us envy your amazing trips and using your Beetles to their fullest!
|
|
|
|
Post by owdlvr on Oct 24, 2023 10:44:06 GMT -8
68,035 total miles in my classic cars this year. That's '58 Beetle, German Look, Rally Bug, Midget & Audi combined. The bulk of that was done in the '58 Beetle, which did 46,735 miles this year. Build 'em right! ------ The list of items to tackle is vast, but when you read through it not exactly difficult. Swapping out a new fuel cap, for instance, super easy.  Untitled Untitled by Dave Hord, on Flickr Made up some replacement metal 02 sensor shields. These are only needed for use on gravel roads, I've never damaged a sensor otherwise, but clearly needed on gravel roads! Material is something I got from DCI Performance in Australia, but can't seem to find it on the website anymore. Need to figure out what it is...as I've used the last of it! 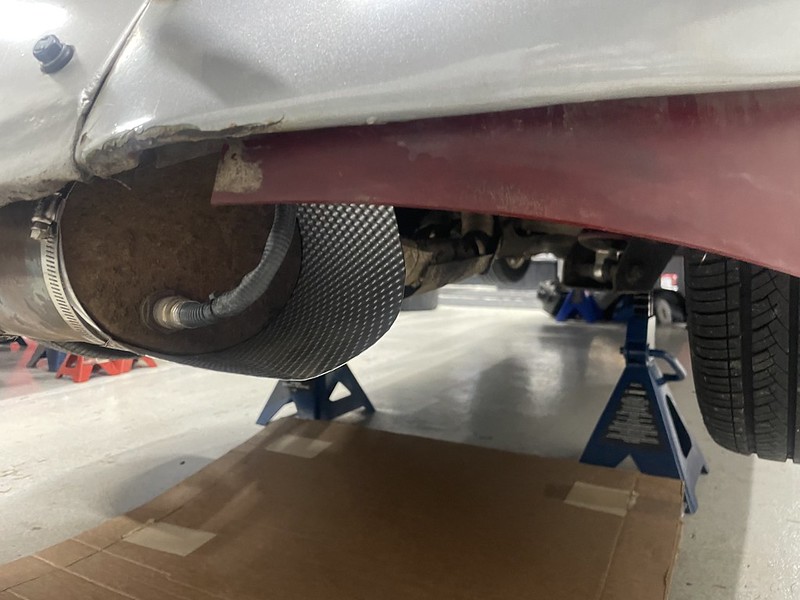 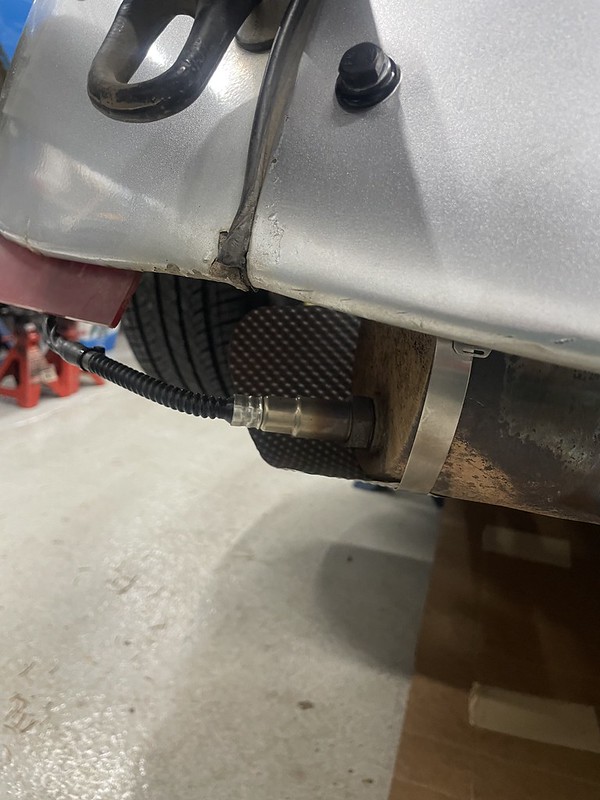 These next two images, grabbed from my IG stories, pretty much says everything...   Digging into it, it would seem that I had no less than three sets of power wires run from various spots in the car to where the Rally computer mounts. I expected two, because I used to run a Brantz rally computer, but swapped it out when it stopped functioning correctly. The Helios unit here was supposed to be a temporary mount, which may explain wiring setup number two. But then, there was a permanent set of power wires (complete with wire loom) that really confuses me. Why didn't I pull the temp set out? There were two sets of sensor wires too. One was running to a speedometer cable-run sensor, that was only half hooked up, and the other to the GPS speed sensor. My Brantz is definitely the preferred rally computer, but as it has to go back for repairs I cleaned out all the wiring and set this car up to simply use the Helios unit on the GPS sensor. From a rally perspective, this isn't ideal, as the GPS sensor occasionally takes some time to find a satellite after start up and you lose distance when driving through a tunnel. Since I don't really use the car for TSD or performance rallies anymore, just the Classic Car Adventures tours, it's "close enough". Cleaned up, and moving to deutsch-style connectors. 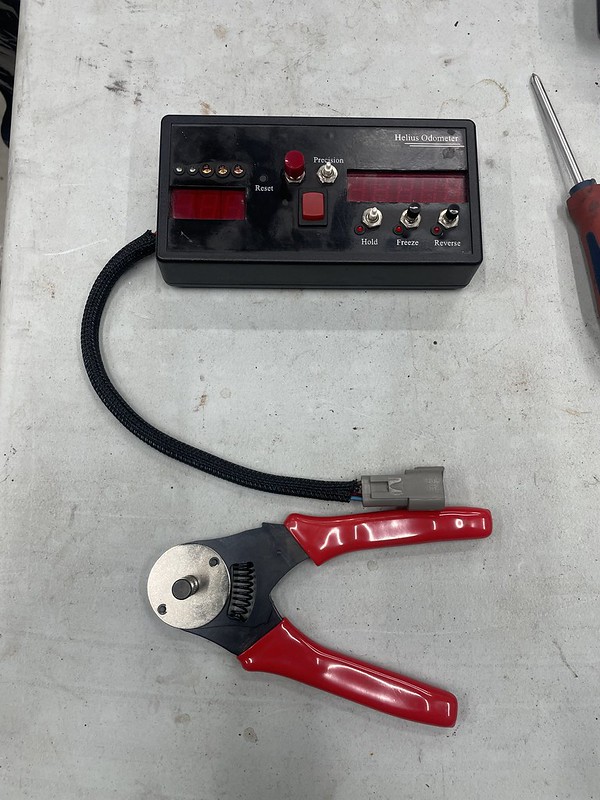  The tail lamps on the car have had issues over the years. The right tail lamp is famous for losing the running lamp, which was simply a matter of epoxying the bulb holder into the metal reflector. But on our last event I would (apparently) lose the left tail lamp at times, and then the right. But never the two at the same time. I've been sitting on a set of LED tail lamps for a few years, having not swapped them over because I prefer the authentic european lamps with the orange turn signal. Alas, the wheels are no longer Salzburg appropriate...so time we lose the tail lamps too. Popped the new ones on...  ...and promptly had a non-working left running lamp. Keep in mind, it was working moments earlier when I used it to confirm wiring colours for each circuit! Lamp off, electrical meter out, no power to the housing. GRRR. Spun all the ceramic fuses, and it worked. Moments later, it went out. Hmmm. Further inspection determined I have a fault in the fuse box, which is a bit of a fun problem. It's about this time that I started thinking heavily about just tearing the whole car down and rewiring it from scratch. I did my MG Midget last winter, made a whole new harness with deutsch connectors and a modern fusebox, and it's fantastic. No more British electrical issues. This car has had so many patches and additions over the ten years, and I'm not as big a fan of the anderson powerpole connectors as I was when I built it. Also, I know why I went with factory style fuses for the two fuse boxes...but like the wheels, it's time to modernize. I need to pull the windshield wiper assembly if I'm going to fix the pivots, but there is a whole whack of rally-related wiring and connectors in the way. I'm sure when I built the car I thought it was nice and modular and easy to pull out sections...but looking at it now, with 10yrs of wiring diagrams lost to my head. I'm not so sure! The Rally Bug needs to have a 'quick turn around' in the shop this round, as it's the car most ready-to-go for events in 2024. I need to get the '58 in and ready for California Mille, and then I'd like to prep the German Look. After that's done, I can relax a little and consider whether a two week re-wiring job is worth it. So instead, for now, it's going to be clean up where I can...ignore what I have to...and move non-critical items off the list if necessary. I managed to 'fix' the fusebox for the moment, but I'll get a 10A blade fuse ready just in case I have to bypass it It was about this point that it dawned on me. What if, the Brantz rally computer isn't damaged internally...and it was just the flaky wiring on the car? Unboxed it from the repair-return shipment I had prepared, and hooked it up on the bench. Sure enough, darned thing is working perfectly. AND I've just finished modifying the car to use the less desirable Helios! ARRRGGG! Well, I have been considering outfitting all the cars with rally odometers this winter (Taylor really appreciated being able to follow the mileage with the route book)...so I guess I have a Brantz to pop into the German Looker now. Sigh. Side note...why is it the Rally Bug that is the car that doesn't leak any oil!?!  -Dave |
|
|
|
Post by owdlvr on Oct 24, 2023 23:36:08 GMT -8
Update on the 1958 Beetle... When we last left the car, it was being stored at Hagerty Garage + Social for the summer. Picked it up in September, and used it for the Hagerty Cobble Beach Concours d'Elegance booth. We start the Sunday morning with "Coffee on the Green" which is basically coffee at 5:45am. Figured, since the '58 was in the province, I should spice it up a little! The coffee maker was quite the hit with the crowd...so much we left the car there all day, instead of moving it off the field at 9am as planned.     Then I let a bunch of Hagerty phone staff use the car as one of our Hagerty Ride and Drive cars. Staff members, who may not even be car people, are given a chance to go out in collector cars for a driving experience. To understand what our clients enjoy so much about collector cars.  Got Dad's and my beetle together, for what might be an annual tradition now  ...and from there, it was off on the Classic Car Adventures Hagerty Maple Mille. Three days of twisty Ontario roads. Parry Sound to North Bay, North Bay to Huntsville, and then Huntsville to Singhampton. The event was fantastic, and trouble free, until I basically tossed the keys to anyone who wanted to take the beetle for a spin. One of my friends, an automotive journalist, was going to be driving Porsche number 001 the next week in Monterey. When he returned the '58 though, the front corner was sticking in a compressed fashion...a problem which rears it's head occasionally. I've replaced the beam, the shocks, the bushings, the torsion bars. Gotta solve that one at home. Lift it up, grease the bushings, all good for another few miles After the event finished, Taylor and I zipped over to my favourite brewery in Canada for a celebration before I headed off to the next event.    Taylor flew home, and I was off to Quebec City! The Gull Wing Group annual convention was being held in Canada this year, and my co-worker Nick and I were responsible for hosting on behalf of Hagerty. Check out this blue 300SL...modified, and the style was absolutely fantastic.      And with October starting, I still had to get the car home. My original plan was to ship the car, but as my travel year was coming to an end I felt like I needed one more adventure. It's been five+ years since I last reminded myself how vast ontario is (and thus how brutal the cross-canada drive is) so what the heck. Lets drive the '58! I camped, swam in Lake Superior (multiple times) and discovered that the oil cooler mounts had broken, and the cooler was yanking out the starter solenoid wire over bumps. After about the fourth of fifth road side repair, I finally made an extension cable and fixed it for good    Canada's smallest Canadian Tire   ...three days later          Made it home, and the oil cooler (mounted above the transmission) is really due for a swap! It looks bad, but it's really not that terrible. I do have a wee bit of cleaning to do on the underside of the car though Since January 1st, the '58 Beetle has traveled through 17 states, 6 provinces, done 9 driving events, and clocked 46,735 miles.   -Dave |
|
|
|
Post by owdlvr on Nov 5, 2023 10:13:15 GMT -8
  This is how normal people wash their cars...right? More on the Rally Bug next week... ---------   --------- Figured I should probably get the Midget back roadworthy.   I have a header to put onto it...but how many exhaust studs are going to snap if I try and pull the manifold off? So the double-washer solution will work for now...or the next speedbump. One of the two.  -----------------   Making drastic decisions that I might regret later...  First off, I need to swap out the silver-dot 914 tach for a different one. The silver-dot is needed for the family heirloom...but the only one I have is this rough looking late model. The late model would be perfect, so time for a quick restore. Fortunately Beetle glass is just a touch smaller in diameter, but still works.      Risky choice of the day number one:  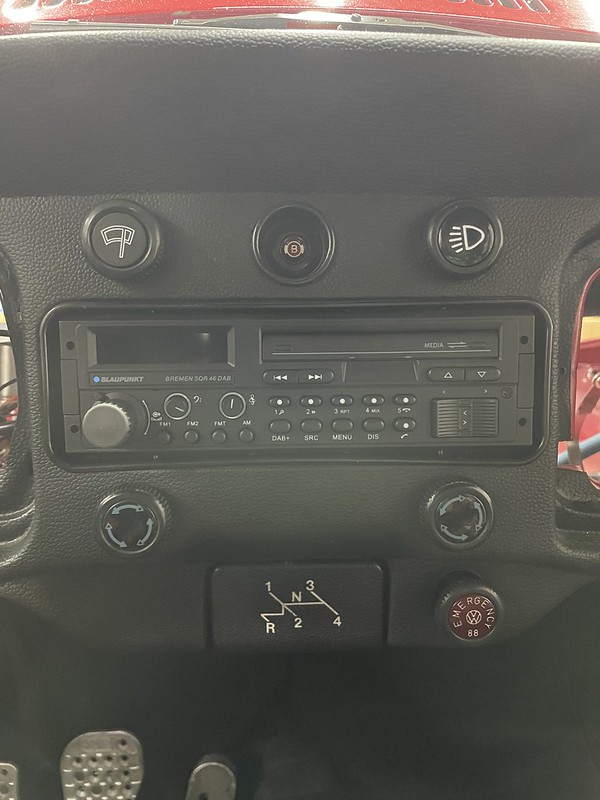 Blaupunkt Bremen, but the modernized version they sold a few years back. Tape deck has been replaced with SD/USB/Media inputs, and the radio has bluetooth. I'm not entirely sure I want the radio upfront and centre...but it would be super nice to have controls without opening the glovebox. Risky choice of the day number two: 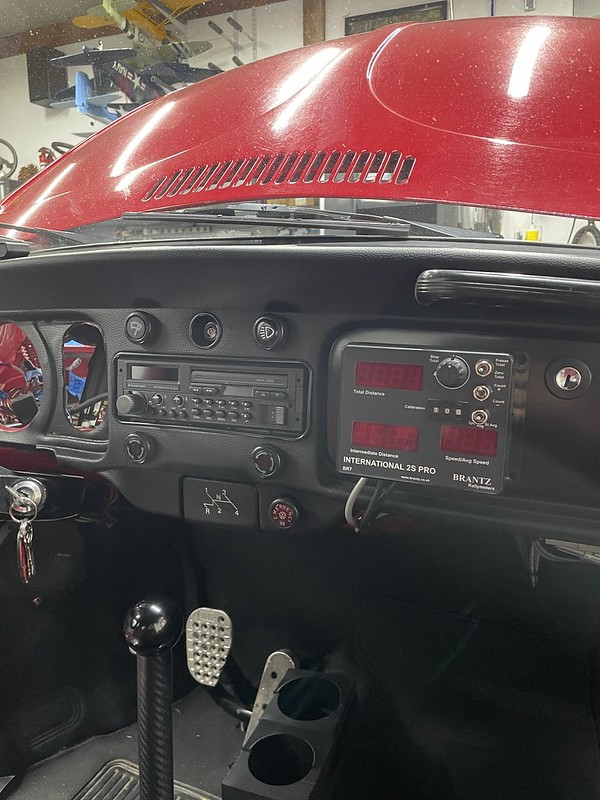 [/url] I know we want the rally odometer for events, and the Brantz is definitely my odometer of choice, but I'm not totally sold that I love it in the German Look car yet. It will grow on me, I'm sure. Possibly risky choice of the day number three:  I've been saving the Tag Heuer (and Nixon) for the Family Heirloom, and originally put them down on the glovebox just to see how it would look. Now I'm not sure. I think I may need 'loan' them to the German Look until the Family Heirloom is done... |
|
|
|
Post by Volktales on Nov 5, 2023 21:54:59 GMT -8
Nice decisions to have!
|
|
|
|
Post by Volktales on Nov 5, 2023 21:59:40 GMT -8
Your decorated '58 looked sweet, by the way. And like that radio choice in the red Beetle.
|
|


 The exhaust leak causes the fuel injection system to go full rich, so the combination of randomized spark, and fuel injection computer completely confused, made for a bit of a rough final leg home.

