|
|
Post by stude on Dec 20, 2023 10:47:02 GMT -8
Are you going to spray it with Gelcoat.
|
|
|
|
Post by ocdgarage on Dec 21, 2023 8:02:54 GMT -8
Are you going to spray it with Gelcoat. My plan has been to spray the shell/roof with high-build urethane primer (which I already have a gallon of), block sand that out, then shoot the base colour and finish with satin/flat clear. Likely be in a similar shade of blue, retaining the white roof, similar to Dutch pottery (Delftware). The glass shop suggested the windshield area will need to be in painted with urethane anyway to prevent reaction with the urethane-based windshield adhesive. Trying to complete all the repairs with 'glass/epoxy/faring compound and a bare minimal use of bondo (if any). I've owned the shell for about 20 years now and can't see it in any other colour. lol. |
|
|
|
Post by ocdgarage on Dec 21, 2023 8:23:39 GMT -8
Sorry, I only see the front page of this FB group when I follow your link, not what you are specifically referring to. I figure my $335 tail lights from C&C U.K. are expensive enough already, couldn't bring myself to use crusty old pair or buy the cheap Empi ones at this stage of the build.   |
|
|
|
Post by PICTUP on Dec 22, 2023 17:20:13 GMT -8
I sent you a PM...
|
|
|
|
Post by ocdgarage on Dec 24, 2023 21:53:48 GMT -8
Got a start on my roll cage today. Base plates are made from 2 pieces of 3/16" stock welded/bolted to where the floor meets the frame rails. The hoop's legs still need trimming and welding to the base plates. This was my first hoop involving multi angle bends, it came out nice and flat and almost exactly like the outline I drew on the floor with chalk. Next up will be a similar hoop for up front, then over head connectors, side bars, a cross brace behind the seats, etc. 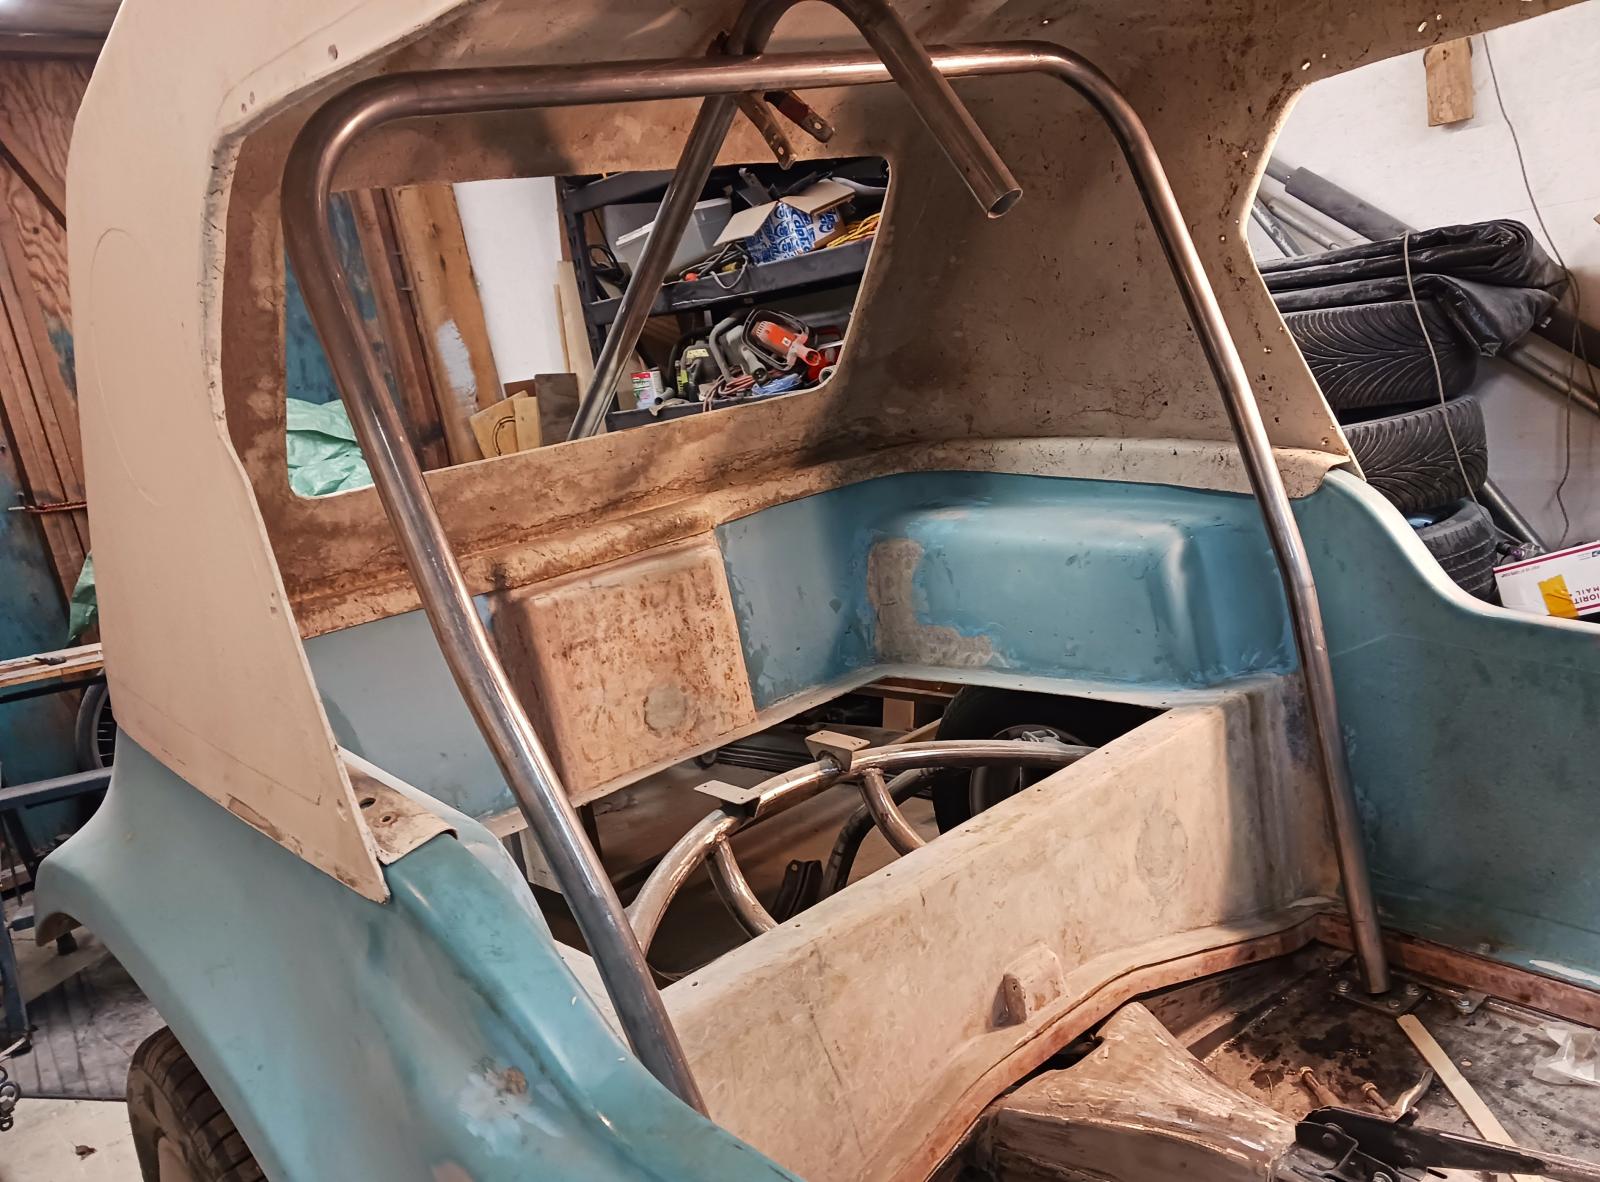 |
|
|
|
Post by ocdgarage on Dec 27, 2023 17:00:52 GMT -8
Trimmed the bottoms of the main hoop and gave each side a couple of strong tacks to hold it while I make the rest of the pieces. Temporarily loaded in the seats and compressor/tank to take additional measurements for the rest of the cage. 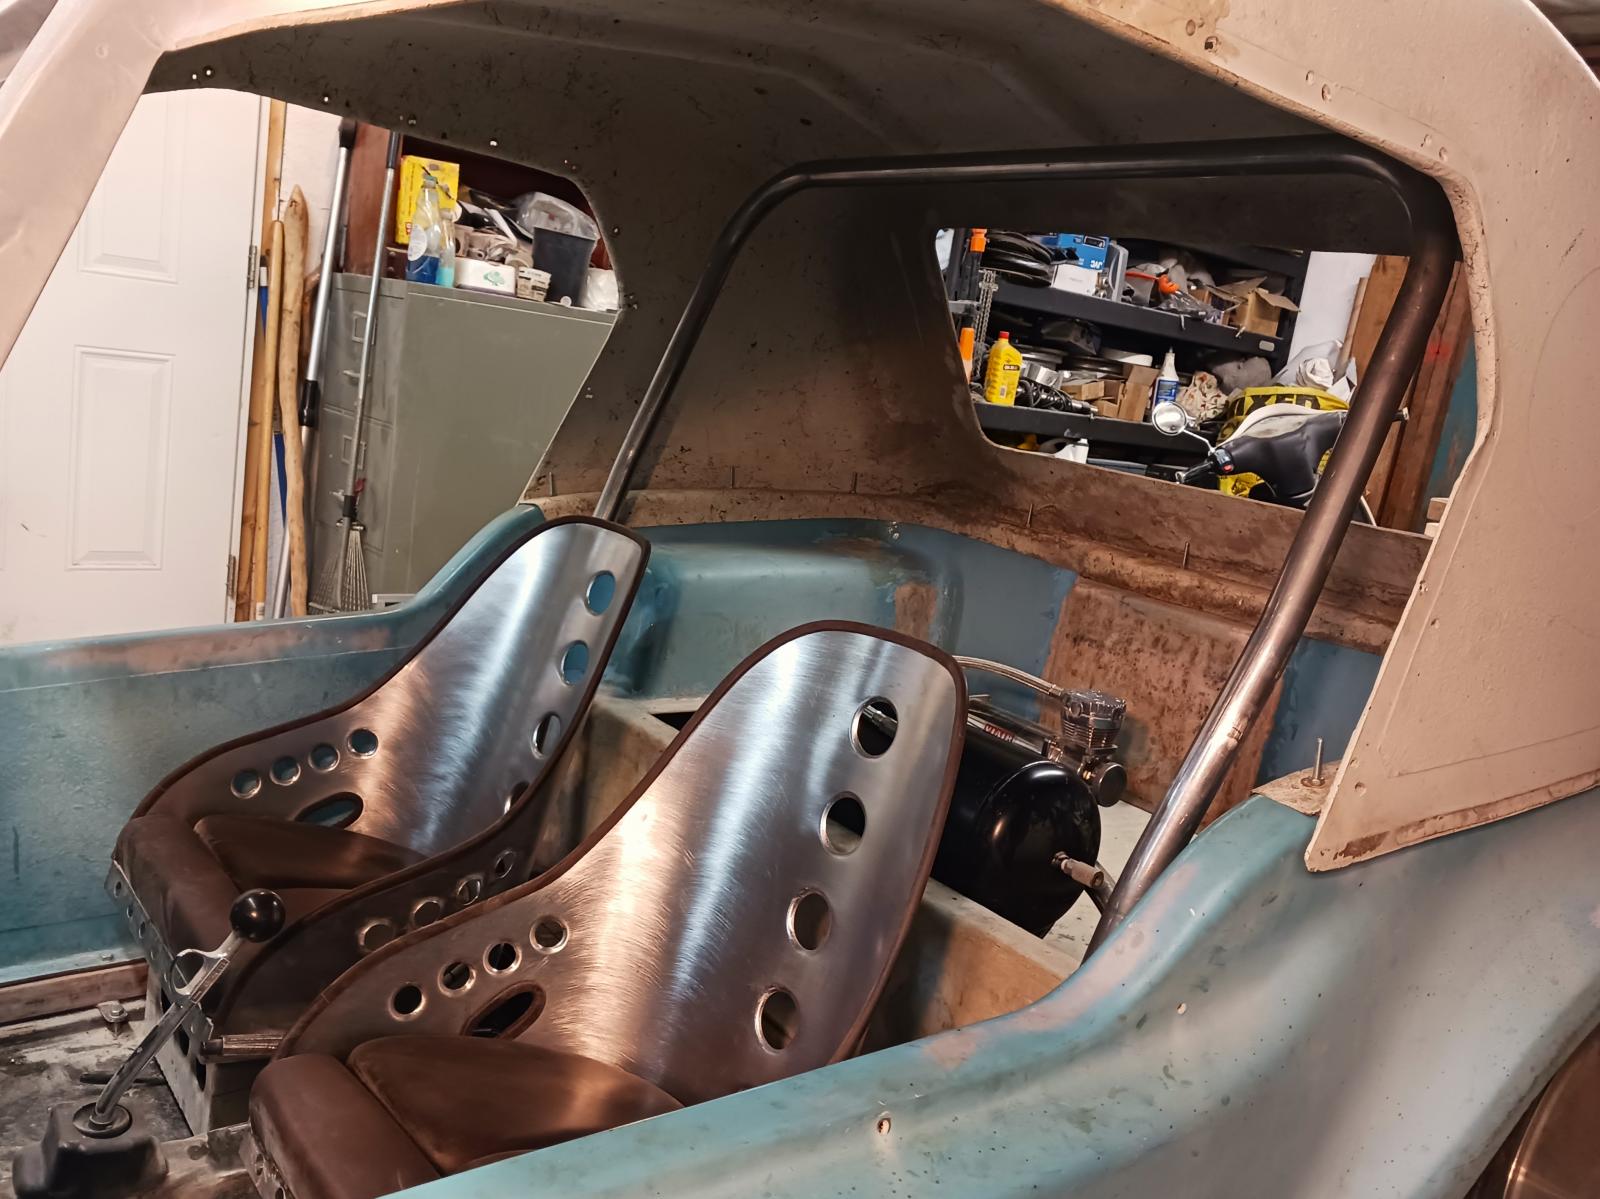 The bases for the cage are made from two plates of 3/16" material, having one part welded to the thick floor and frame rail. 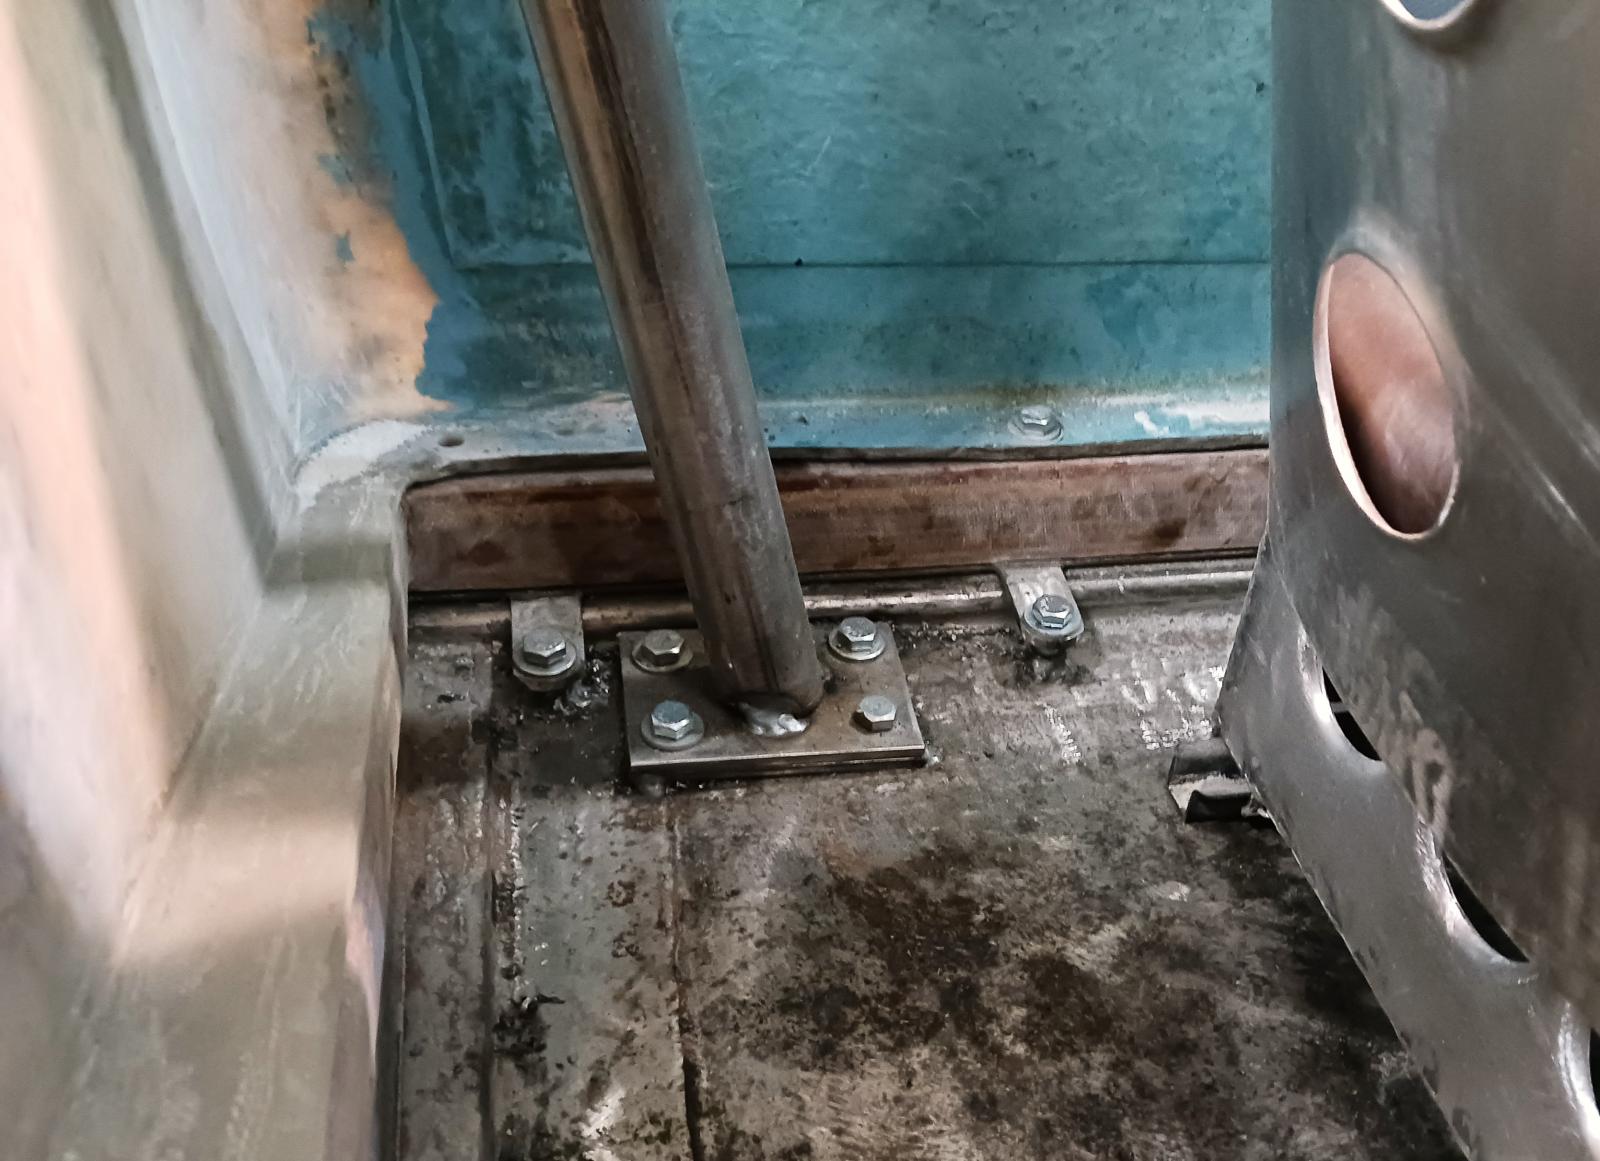 |
|
|
|
Post by 1hotvw on Dec 27, 2023 18:06:19 GMT -8
well for all the offroad builds and racing i've been involved with,the best practice is to sandwich two plates ,one below the floor and one on top.and use grade eight bolts, those bolts don't look graded.
|
|
|
|
Post by ocdgarage on Dec 27, 2023 20:40:45 GMT -8
well for all the offroad builds and racing i've been involved with,the best practice is to sandwich two plates ,one below the floor and one on top.and use grade eight bolts, those bolts don't look graded. Agreed! The 3rd set of plates will be welded on next time the buggy goes up on it's side to fab/weld/clean a number of things underneath. I could tack them in now, but I find mig is not great for overhead welding. You are correct about the bolts, they are simply place holders until final install to make sure I get all the correct numbers, lengths, etc. Front hoop is now bent and tacked in place, soon to be followed by some connectors and braces to the main hoop. Took me a good portion of the day to get it to this point, but I'm happy with the result. The cross bar is above the windshield line and the down posts blend into the A-pillars when you look forward, there's even a reasonable amount of room for our knees too. If you use chalk, is it still considered CAD? 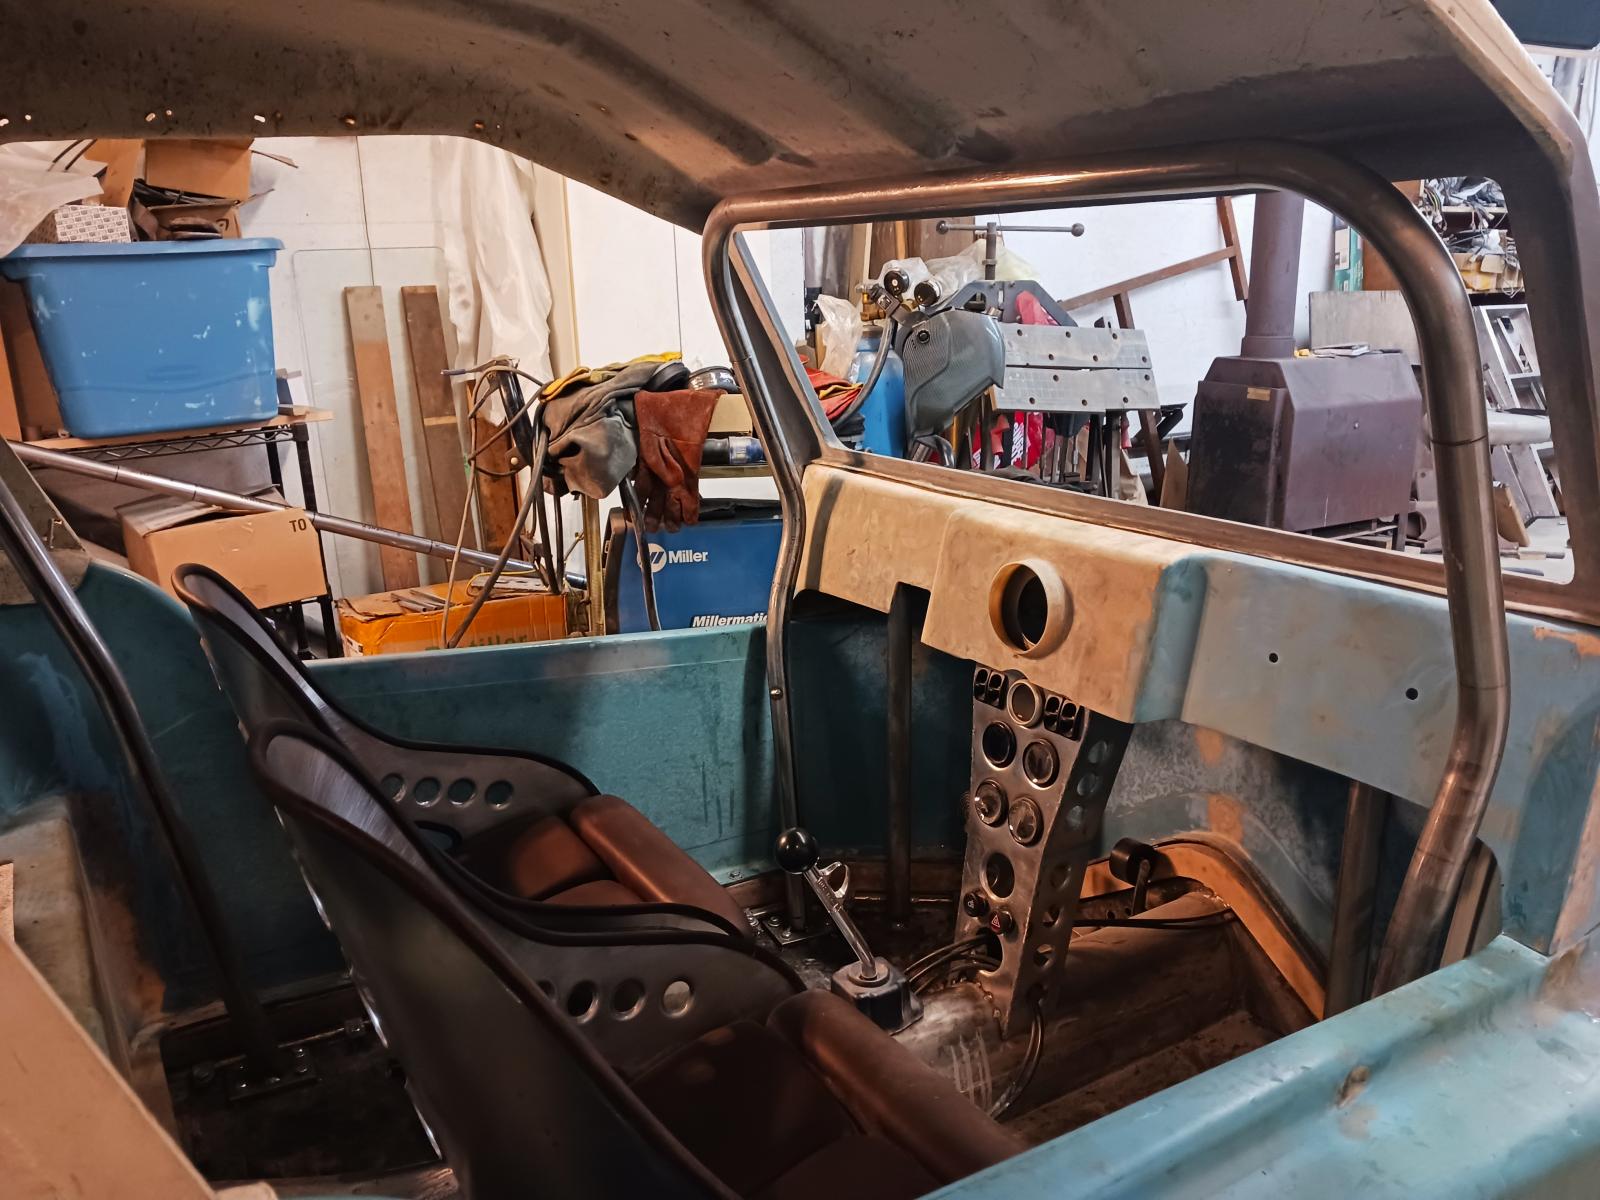 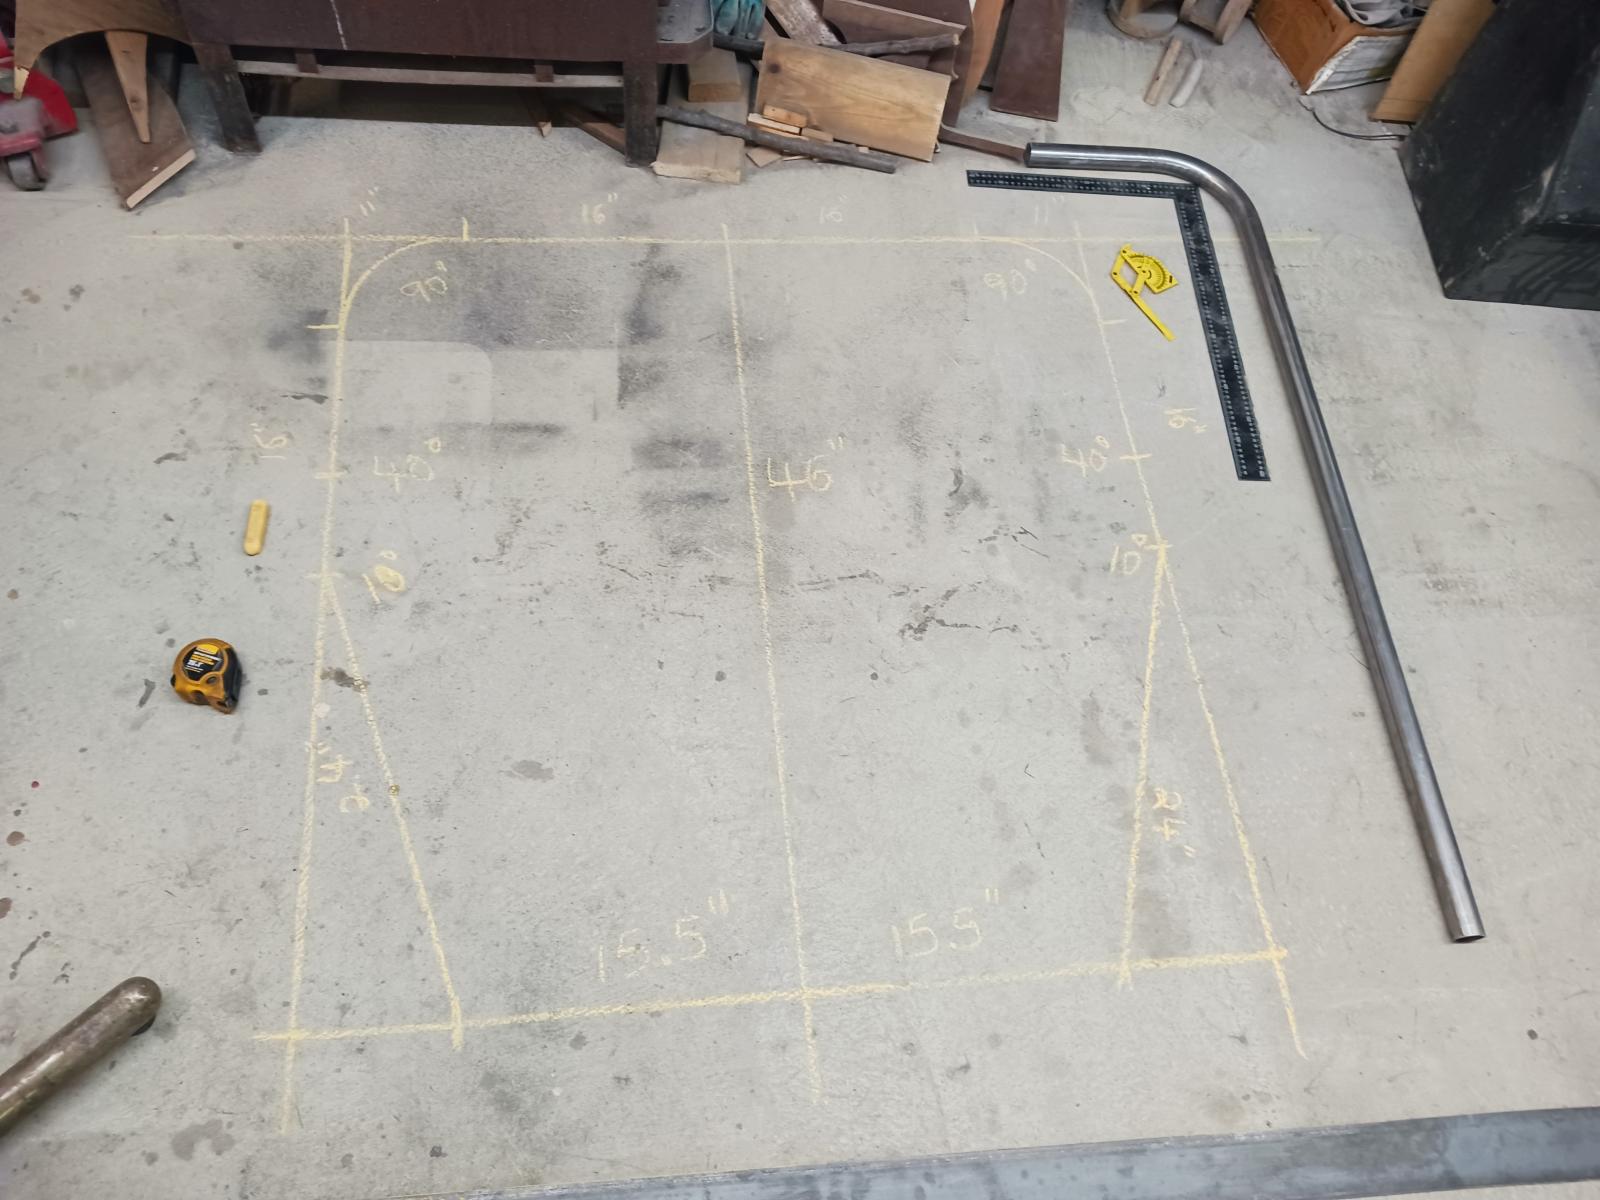 |
|
|
|
Post by 1hotvw on Dec 27, 2023 22:27:41 GMT -8
extra work is always ok,but i have never welded the bottom plate. 4 grade eight bolts that plate will not pull through.
|
|
|
|
Post by owdlvr on Dec 28, 2023 12:24:42 GMT -8
well for all the offroad builds and racing i've been involved with,the best practice is to sandwich two plates ,one below the floor and one on top.and use grade eight bolts, those bolts don't look graded. Corners of the plates should be radius'd as well. Sharp corners are more likely to tear through. Personally, I prefer to have the plates welded, and I don't trust the floor sheet metal to take the load on its own. Anytime the plate can be extended to other structures or load directions is ideal. |
|
|
|
Post by ocdgarage on Dec 28, 2023 15:14:15 GMT -8
My buggy floor is 14ga (.0747") thick, more like a skid plate, zero flex when you jump on it, not likely to pull through with 3/16" plate welded above/below the floor as well as to the 2"x3" tube side rails. I'm building a street buggy, not a race car or rock crawler. Most buggies offer marginally more crash protection in daily traffic than the average motorcycle with a faring. About 75% of buggies I see online have a single hoop 'show bar' which are nicknamed 'mouse traps' as they simply fold in a rollover. Anything solid and well braced between me and the other guy will be a welcome bonus. |
|
|
|
Post by ocdgarage on Dec 29, 2023 21:30:57 GMT -8
Side bars done, front and rear cross bars up next... 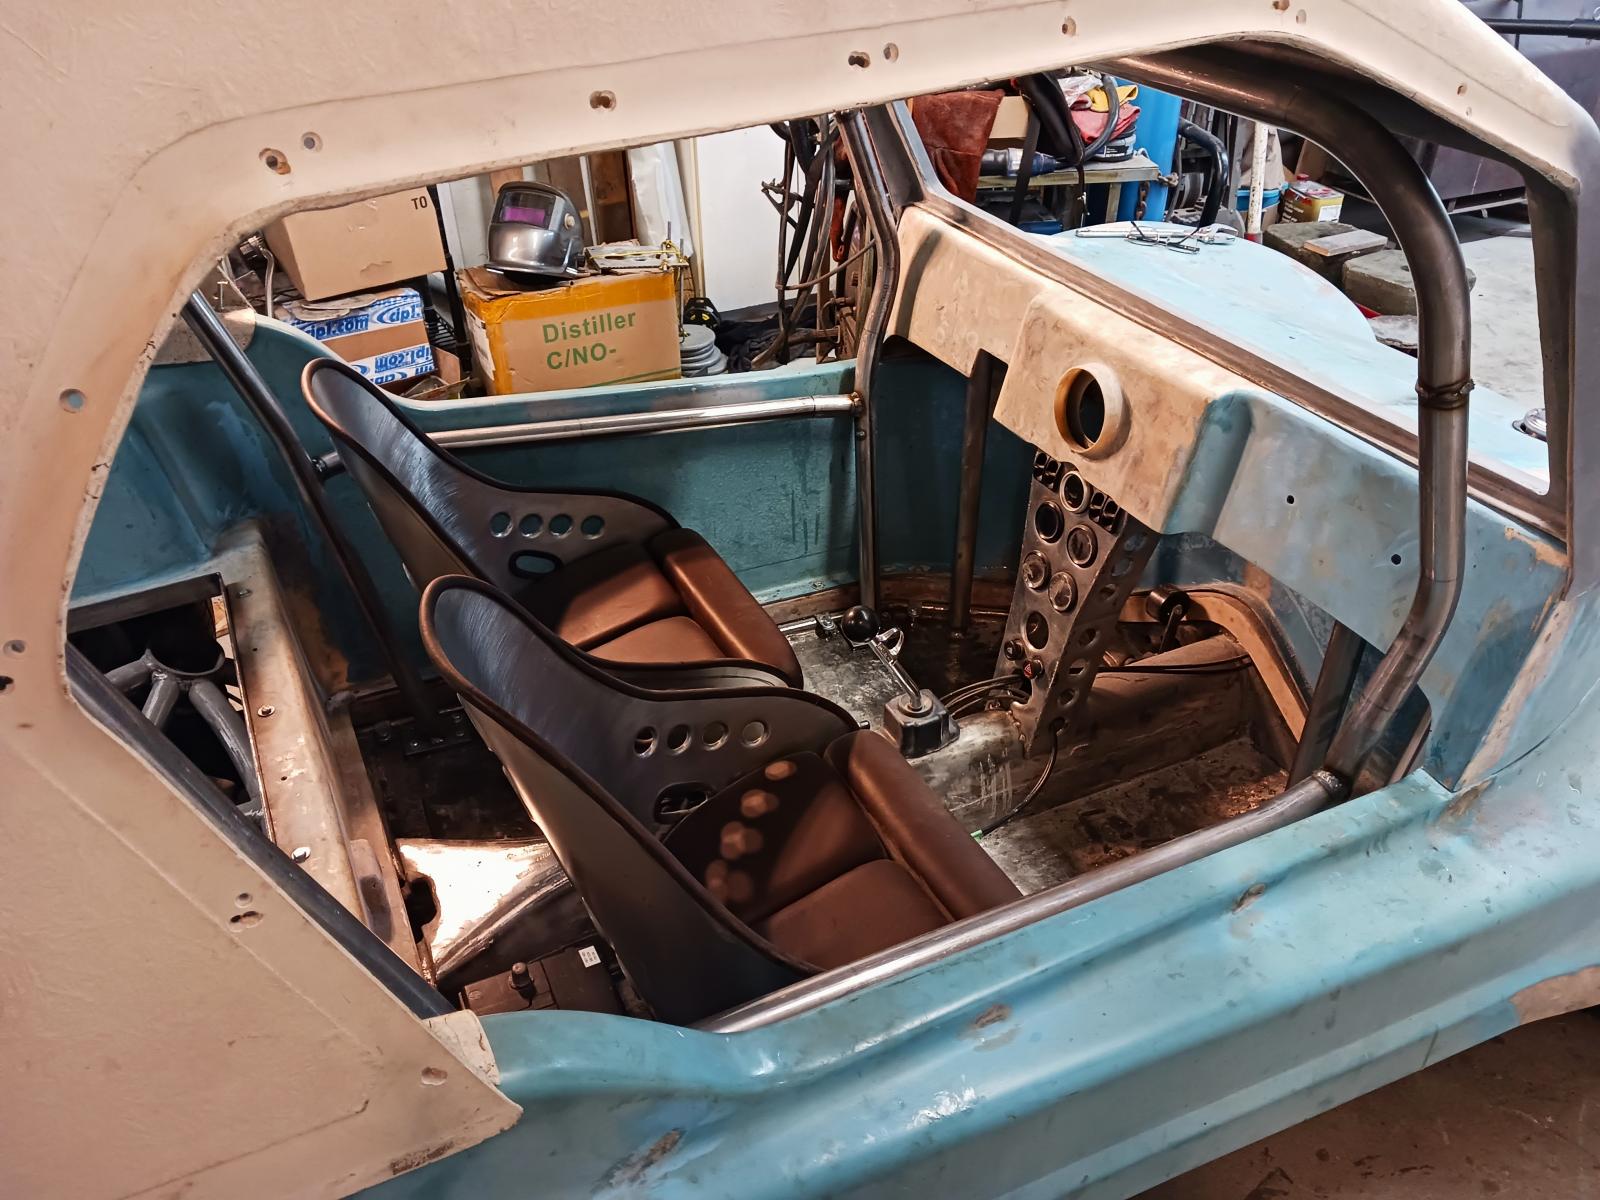 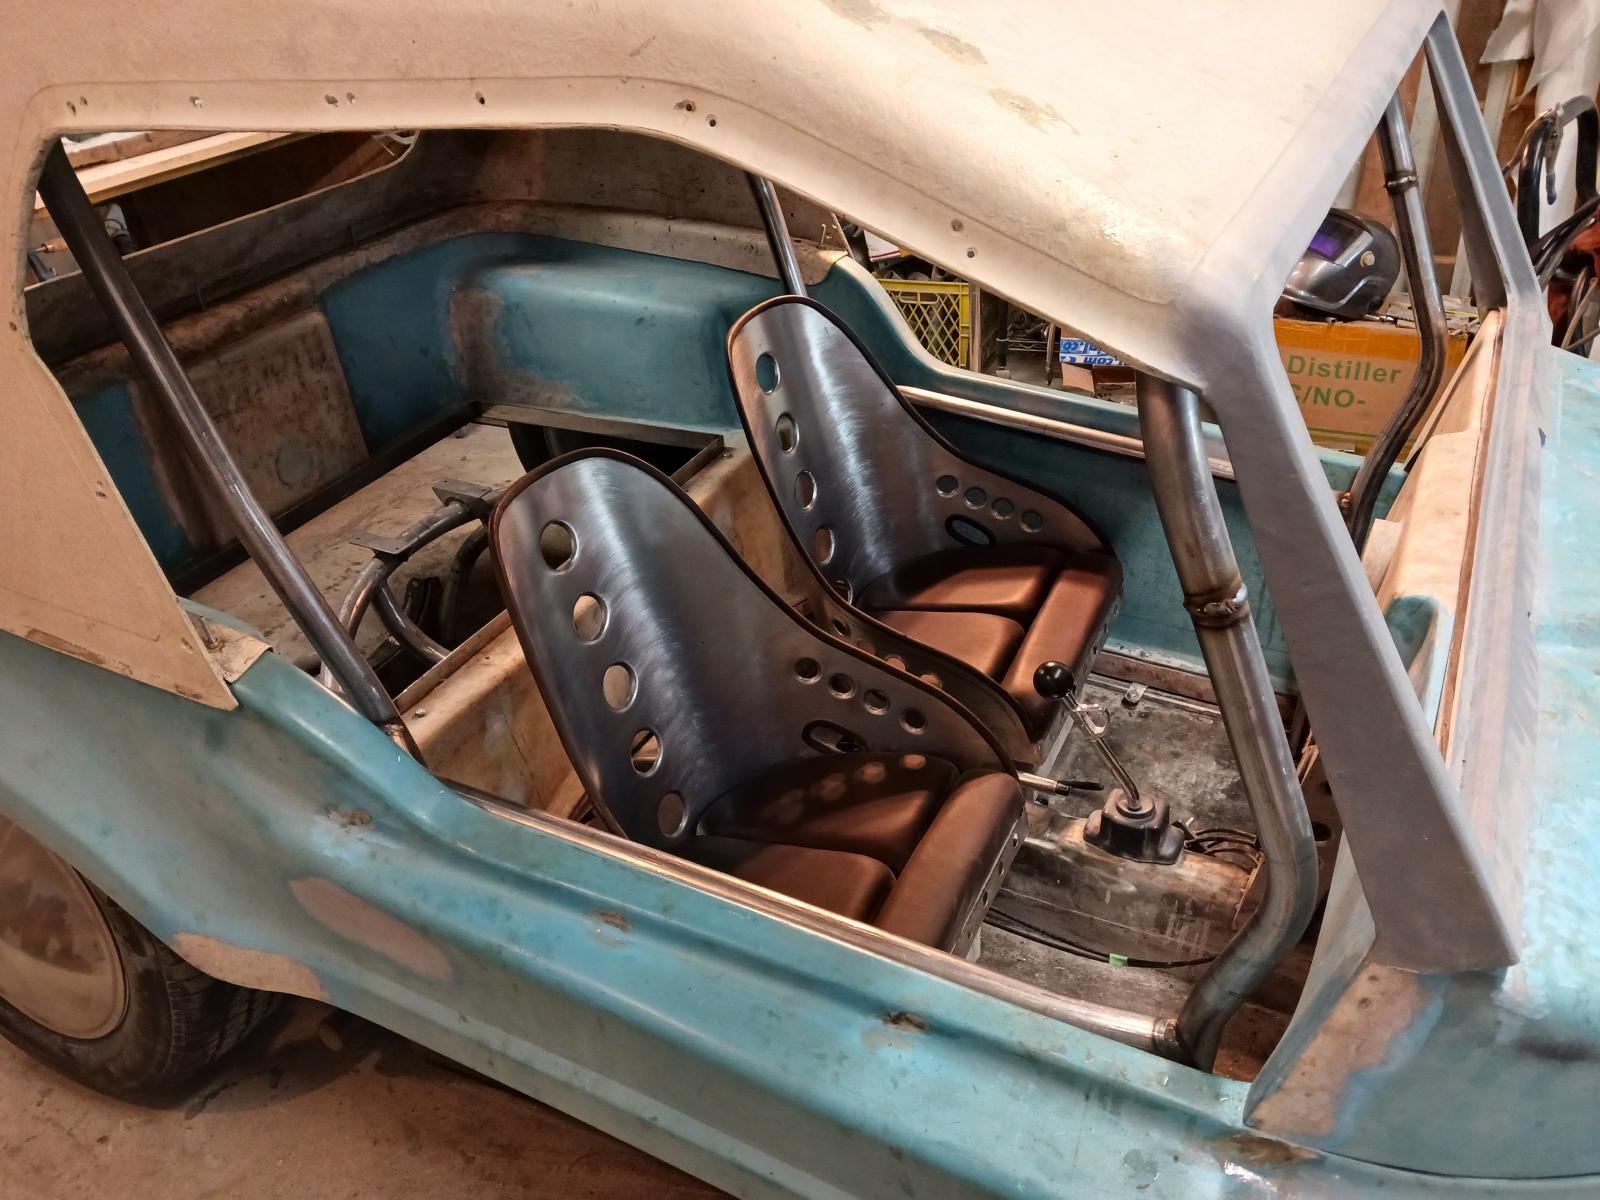 |
|
|
|
Post by ocdgarage on Dec 30, 2023 20:06:26 GMT -8
Had a chance to get a bit more done today, holidays are nearly over for this year but it's been time well spent. Added a brace across the dash and two across the main hoop. Now I will have somewhere to mount my seat belts. Lower side bars, overhead connectors, mounting tabs for seat belts and early Bus rearview mirror up next... 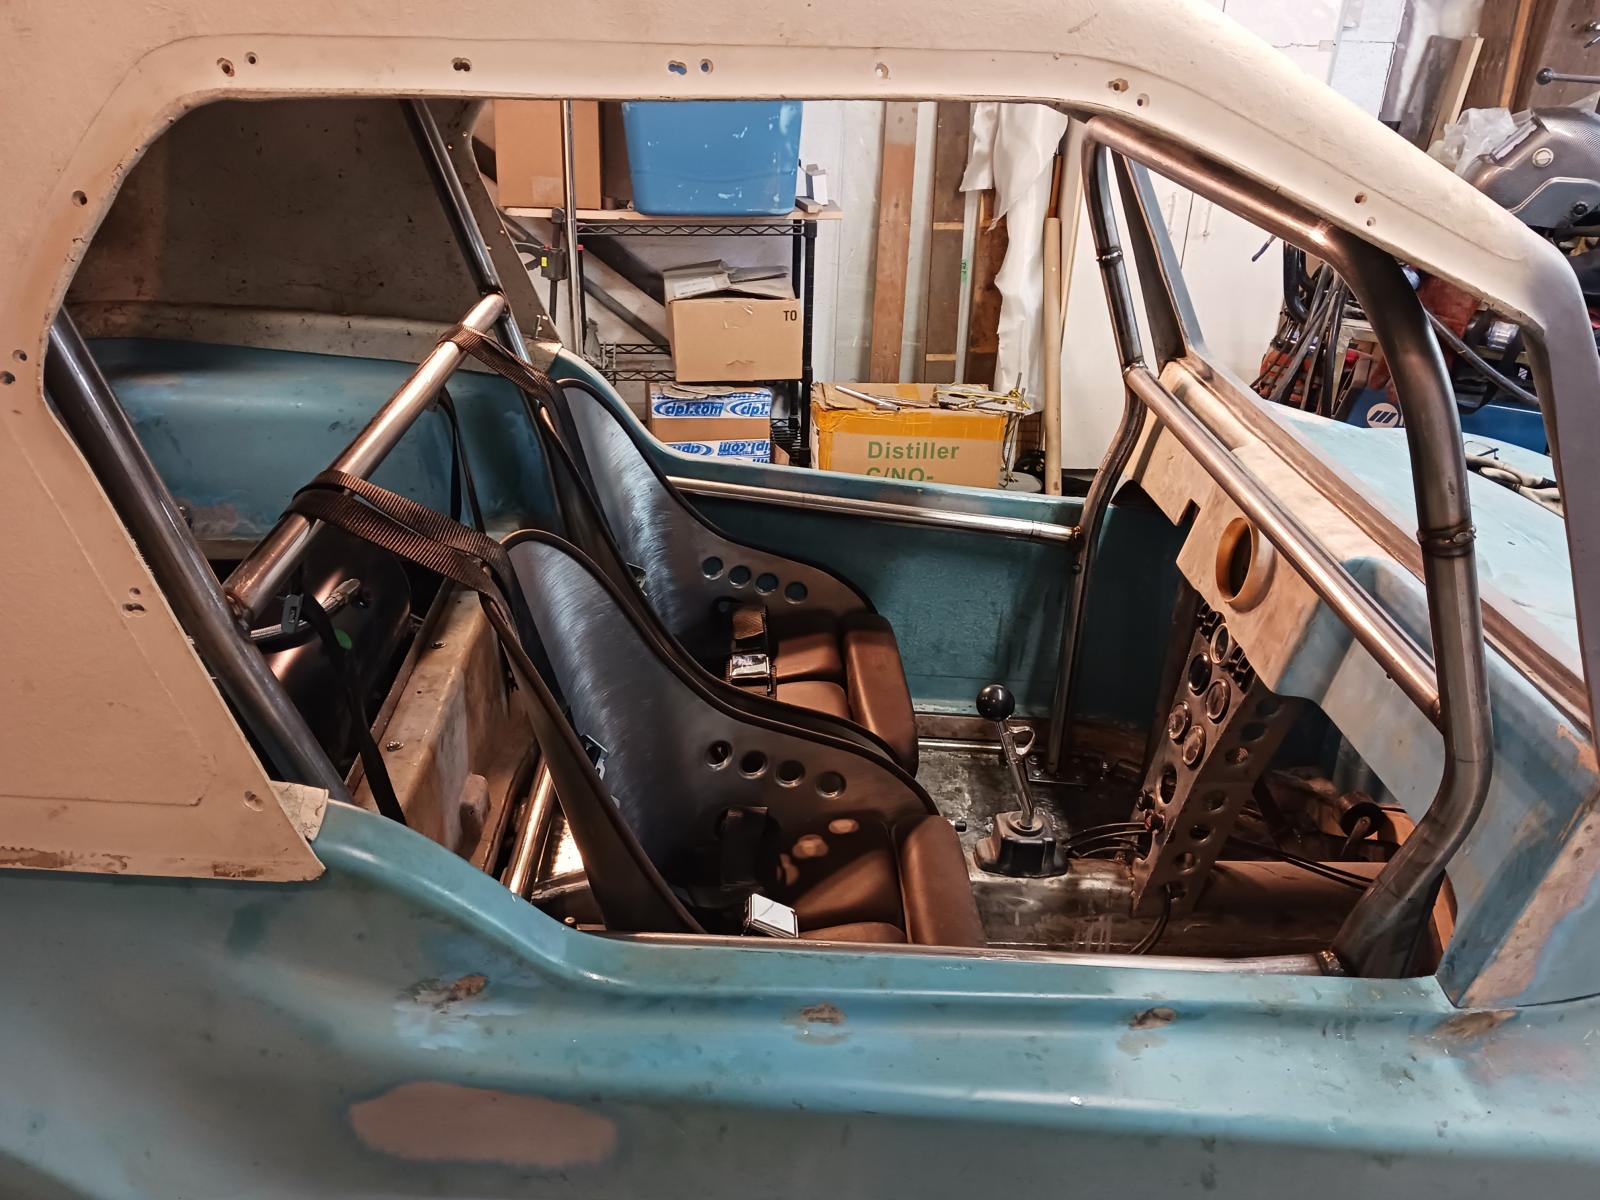 |
|
|
|
Post by ocdgarage on Jan 1, 2024 17:29:23 GMT -8
Decided to start the framework for the cover that will be over the compressor, water trap, relays, air tank, etc. Created a set of plywood stringers which will be built into a 'hump back trunk' style box from plywood. The materials are left-overs from building our woody tear drop trailer. The cover will be 8" tall to the low sides, glued together from Baltic birch plywood and covered in epoxy/'glass. I plan on having a hinged lid for quick access and the whole thing will be removable for ease of servicing. There is more roll-cage work to do in the rear, so thought it best to build this first to ensure all the clearances are correct. 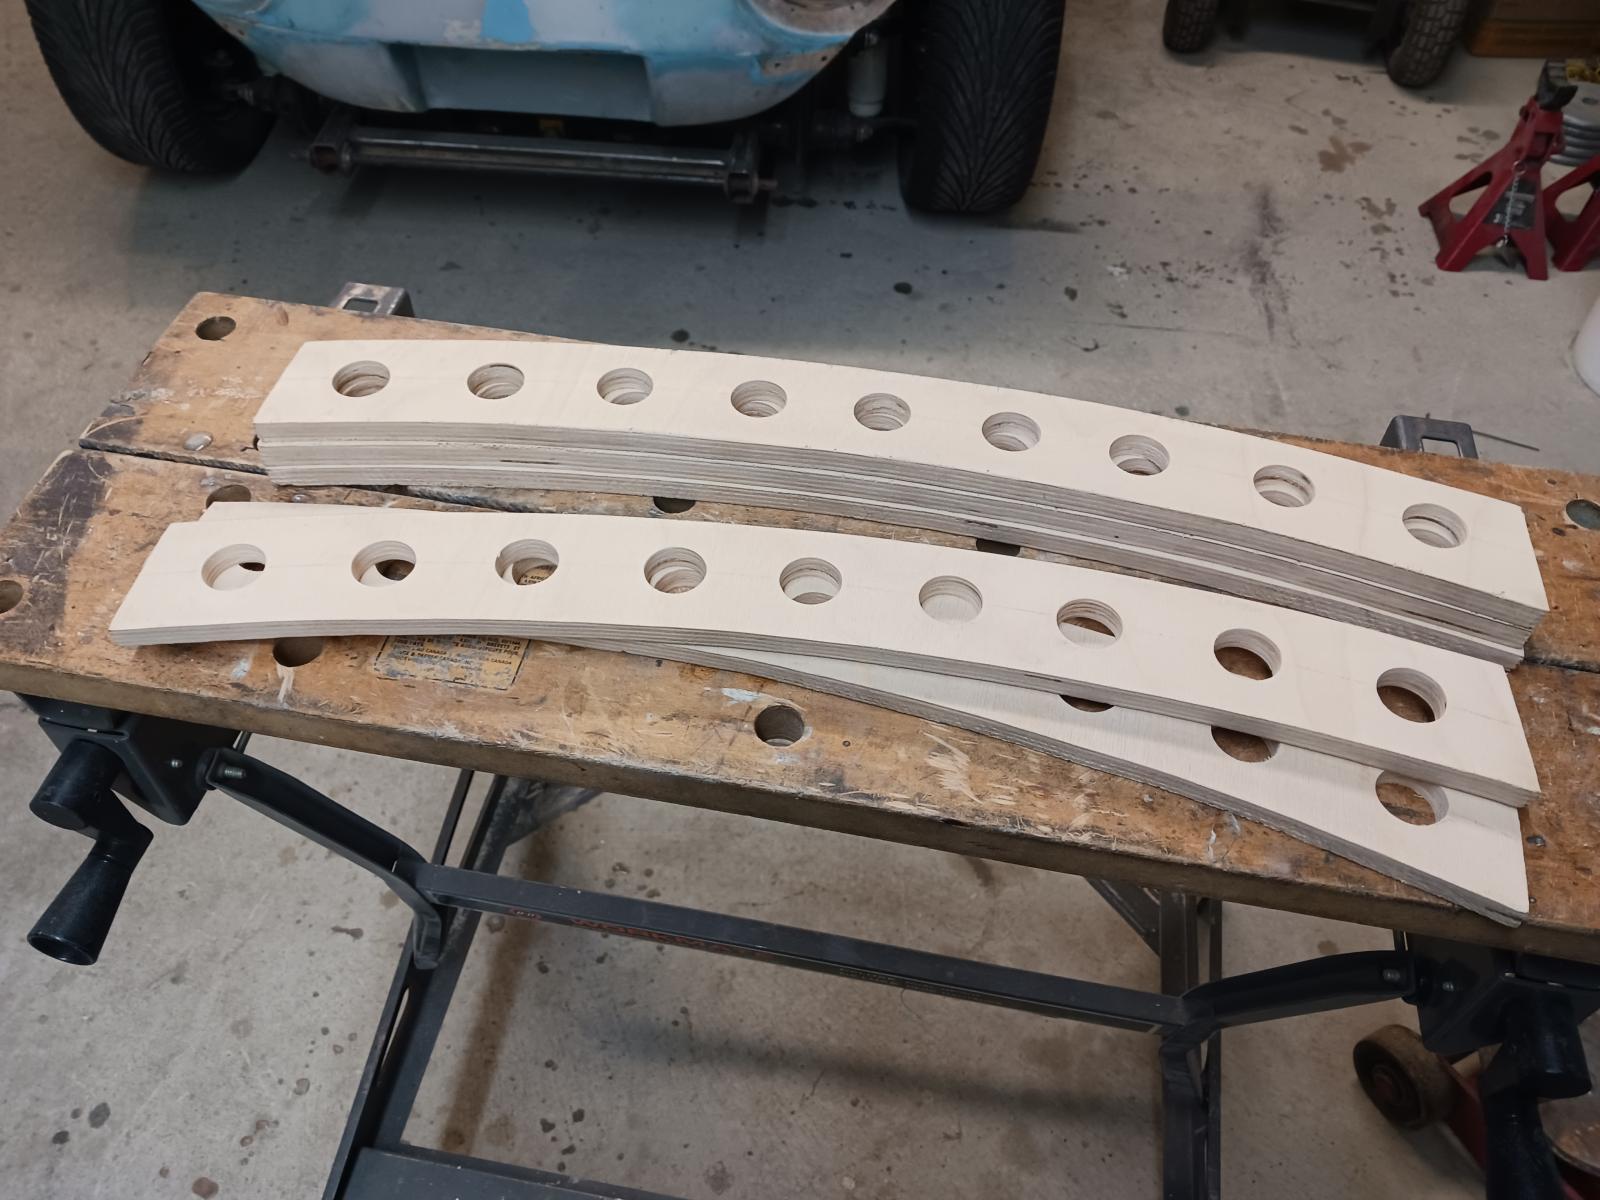 Approximate mock-up of how the stringers will sit inside the box, although likely won't line up with the compressor head.  |
|
|
|
Post by ocdgarage on Jan 2, 2024 20:09:14 GMT -8
A pic of the assembled cover, I later added a lip around the bottom to assist with sealing as well as centering during installation. The edges will be rounded, sanded and wrapped in epoxy/'glass for longevity. Once it's been painted, sound matting will be added to the interior surfaces. 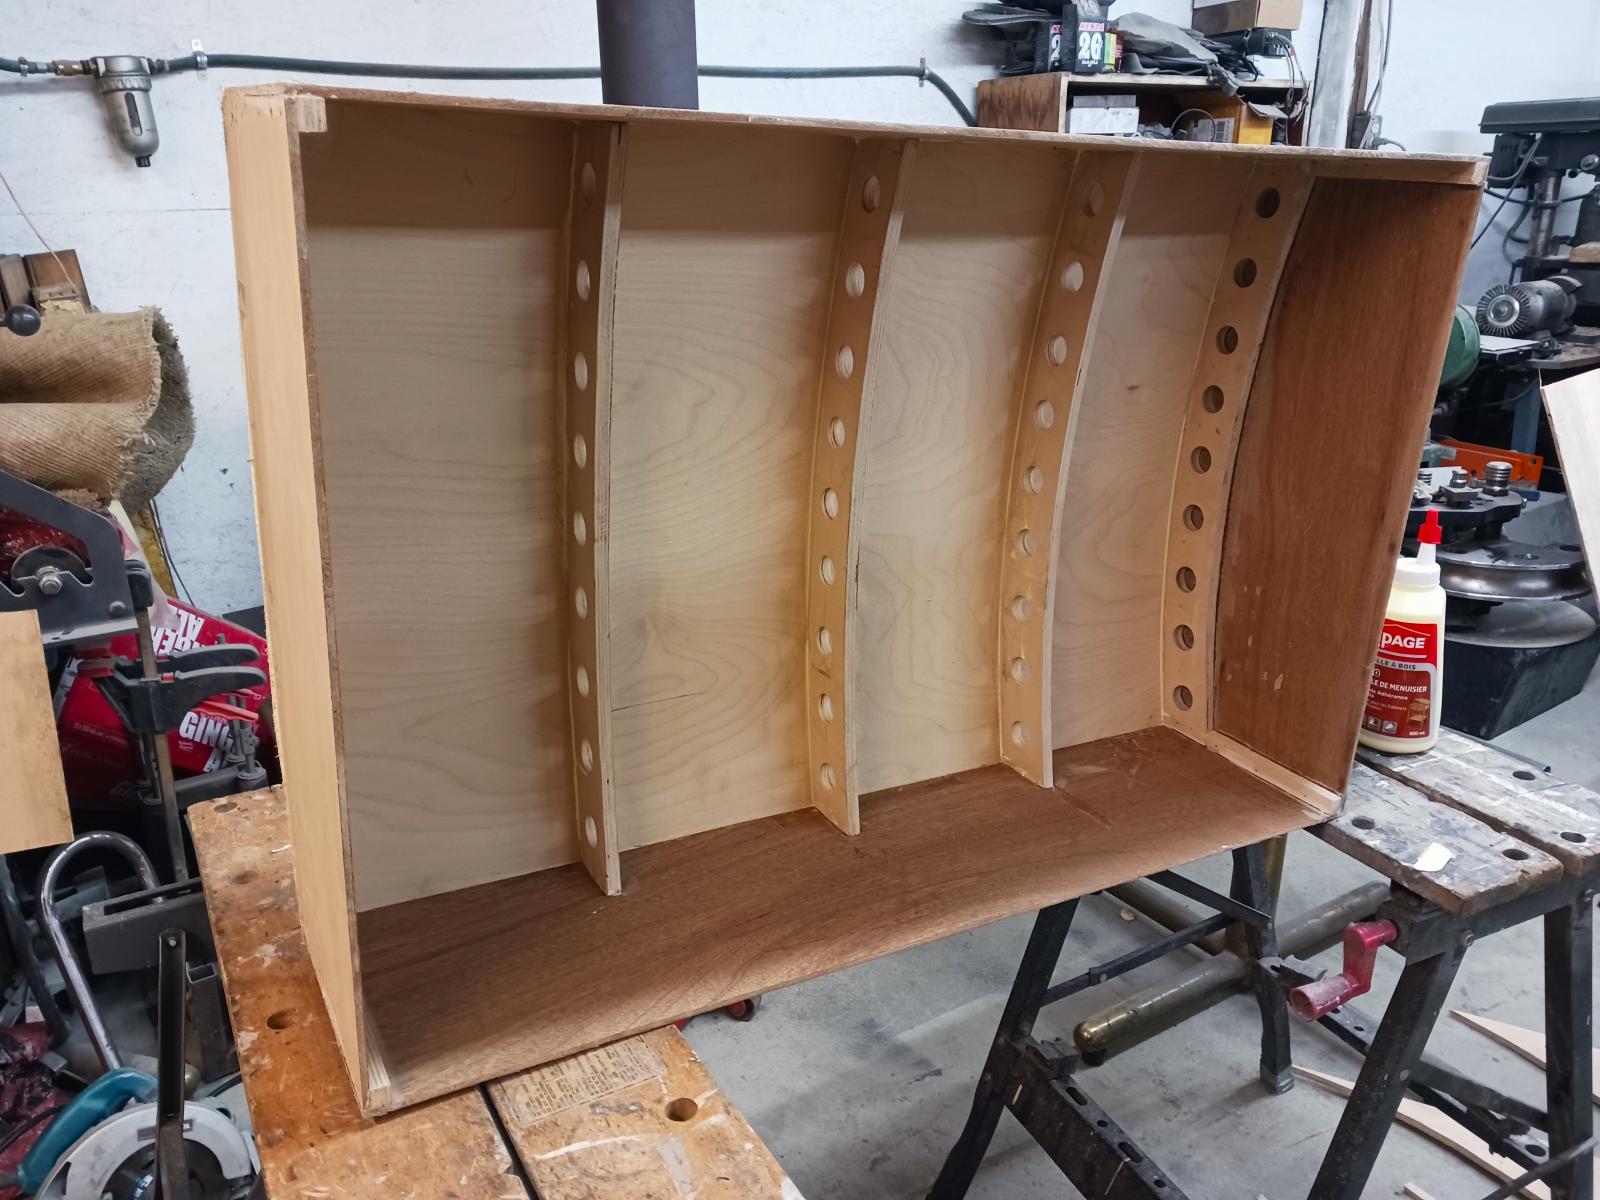 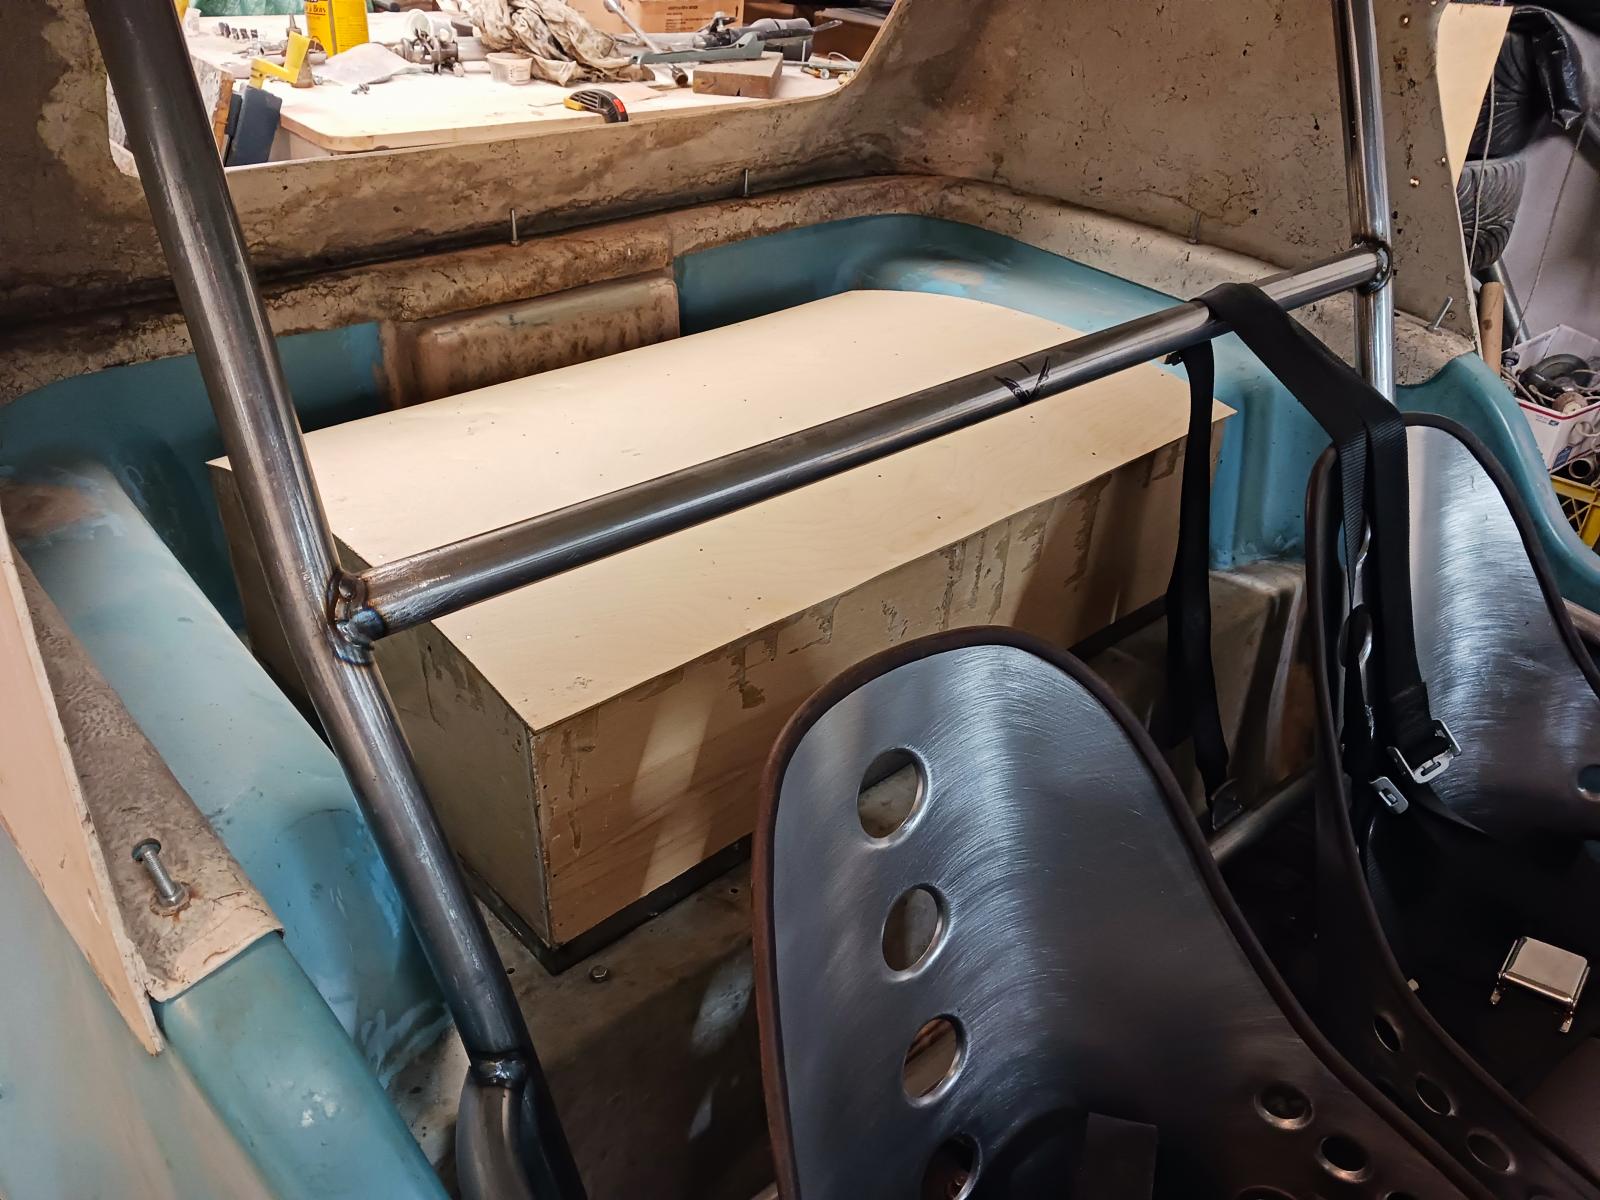 |
|


