|
|
Post by tony on Apr 4, 2016 8:15:44 GMT -8
Sniff  |
|
|
|
Post by Wongai on Apr 7, 2016 7:42:33 GMT -8
You're ok Tony, we'll get through this together.
I wish I was closer to the shop. Russ would have to designate an entire bay for a year for me to circulate all my crap through there. Looking forward to seeing that ride this summer. My little girls will be stoked to check it out. She still talks about sitting in your red one when she was a mini.
Exciting!!
B
|
|
|
|
Post by tony on Apr 7, 2016 11:08:25 GMT -8
hahaha  |
|
|
|
Post by Volktales on Apr 8, 2016 20:24:48 GMT -8
Ok, back to work again...  Don decided it was time to deal with the iffy brakes and ball joints on his single cab. First order was to remove the front drums. Apparently partially ceased wheel cylinders are the fault here. Not surprising given how long this VW sat around before Don bought it. Note two wheel cylinders on these models...  Brakes off, and you can see why the balljoints need attention. Both lower ball joints have excessive play and must be replaced. The front sway bar needed to be removed. A little bit of tapping and off the original clamps came. They are rust free and can be used again. This is a good thing, because the reproduction versions are absolute crap. Ask Brent how I know this... The spindle/knuckle assembly was removed next after marking the position of the eccentric in the upper ball joint. A few good whacks with the hammer and the spindle popped right off.  Here Don is removing the locking nut that secures the grub screw. This screw holds the torsion arm to the "springs" in the front axle. The lower torsion arms are not under tension with the spindle assembly removed and the shock absorber unbolted.  Here is the torsion arm being slid off the spring leaves. It just pulls off.  The normally unseen bearing surface of the torsion arm, and the spring leaves sticking out the end of the tube. Don's torsion arms are in fine condition. They can become unusable with wear in high mileage or poor maintenance.  Mr. Bus is happy so far... Note that shock is still attached to lower torsion arm. This is because the shock bushing was stuck to the stud; a common problem.  The arm was put in the vise, and the shock twisted off. The inner bushing was gently heated with a propane torch, and it released its grip on the stud. The bushing was reinstalled in the shock with the vise. The shocks are the original BOGE units, and are not leaking. Don will paint them up and reinstall. He is continuing with the cleaning and painting. If everything goes well, it will all be reassembled on Sunday... |
|
|
|
Post by tony on Apr 8, 2016 20:48:02 GMT -8
for some reason Jack Nicholson in the Shining comes to mind!  |
|
|
|
Post by Volktales on Apr 9, 2016 6:58:10 GMT -8
Good thing I don't have any axes lying around!
|
|
|
|
Post by PICTUP on Apr 9, 2016 7:34:16 GMT -8
I've got a bunch!! And a whole host of sharp chisels too  I knew I would regret that photo  |
|
|
|
Post by PICTUP on Apr 9, 2016 20:35:49 GMT -8
Some of the pieces have got some attention. First some bead blasting. I won't make these original VW shocks smooth, but at least they won't be rusty! 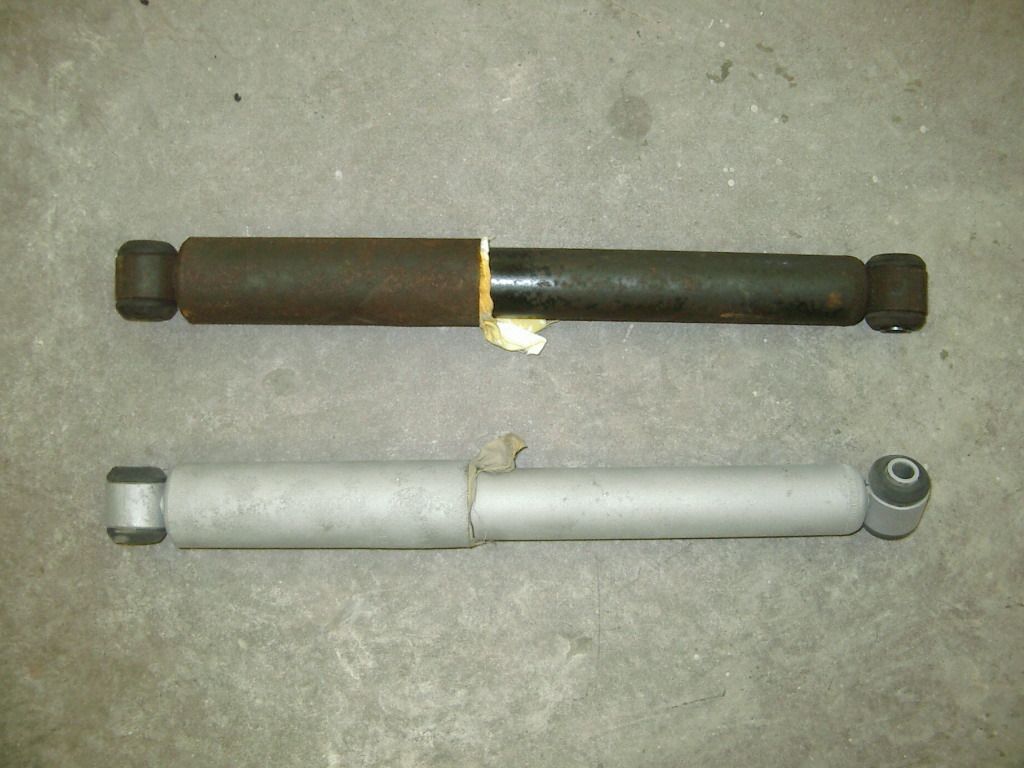 Ugh, what a mess 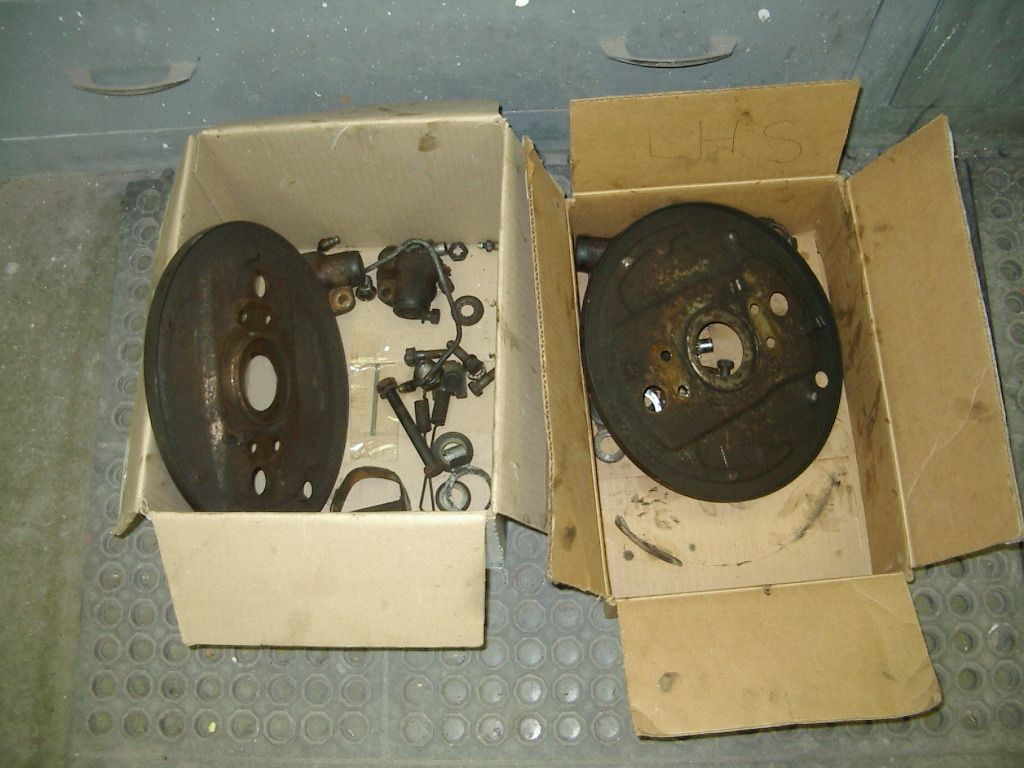 That's looking better 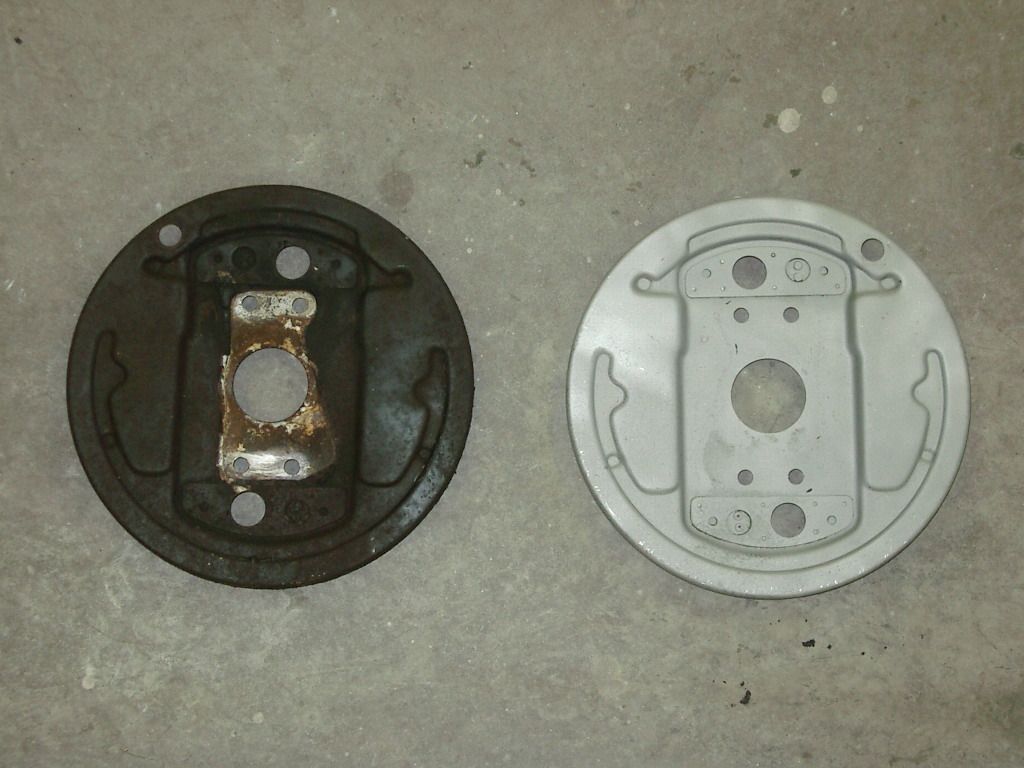 Got Garry to prime them with two part primer 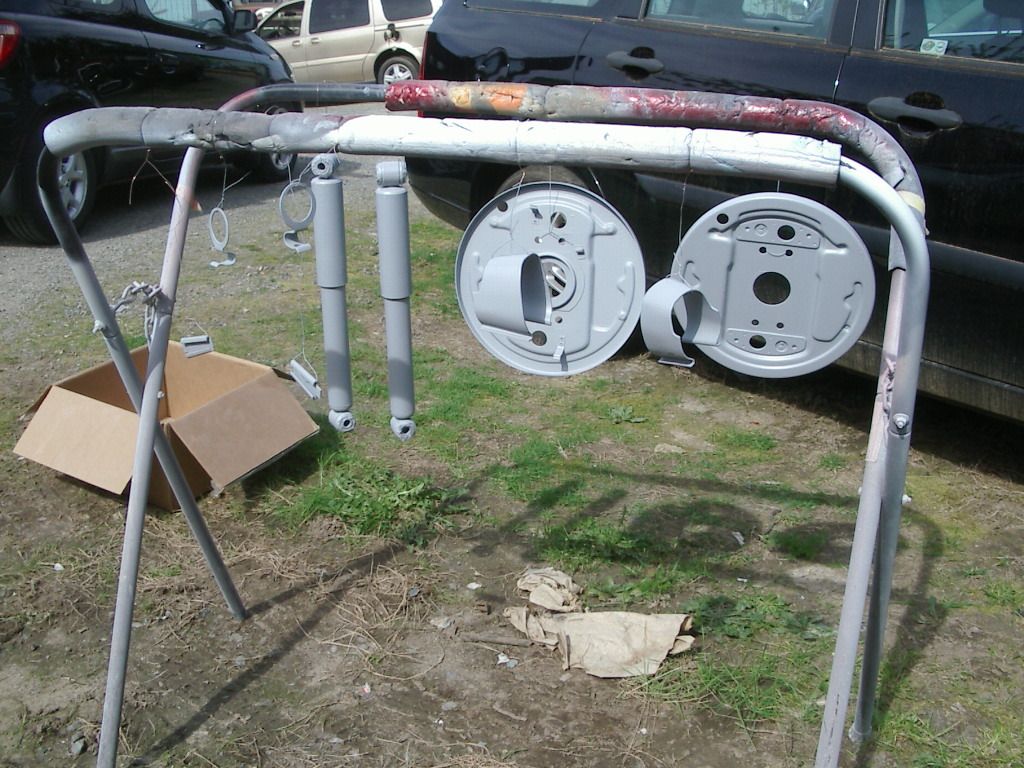 Changed the wire wheel and did the rest of the bits. At this stage those on the right are done. Paint tomorrow…a day later than planned. 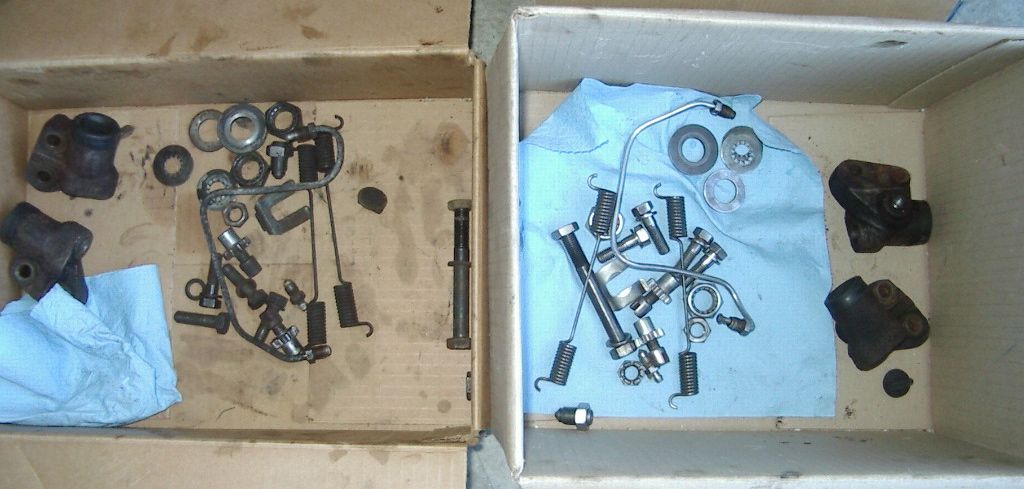 |
|
|
|
Post by Volktales on Apr 17, 2016 20:32:25 GMT -8
Ok, so "someone" has finally finished up the cleaning and painting, and it is time for some reassembly. First up is installing the new boot on the left upper torsion arm. Before this was possible, it was necessary to remove the eccentric from the upper balljoint (used to adjust camber when aligning the front end). Luckily the eccentric popped out with a "pickle fork" type splitting tool.

Here Don is installing the boot. It can be somewhat tricky to install the retainer ring over the boot lip, but he got there in the end.

Installing the lower torsion arm is just a matter of pushing it in place while wiggling it a bit. Then install the grub screw and the locking nut. Straight forward so far... And check out the original Cosmoline on the inner fender structure. Nice!

The next step was a bit tricky. We first thought we should at least snug up the bottom ball joint. As the new joint was stiff, the stud portion had to be held with a wrench while the nut was tightened. In reality we should have held off on this for a bit. Getting the upper torsion arm balljoint to start in the hole in the spindle assembly required some creativity. We had to put the floor jack under the lower torsion arm and jack it up until the upper balljoint was close to go into the hole. This still required the use of large pliers to ease things together. Once the jack was high enough, it was possible to start the nut on the upper balljoint.

And there is the left side together. Care was taken to ensure the eccentric position was installed as before. Note the brake hose holder attached to the upper balljoint stud. I was not aware these were designed to turn freely as the steering is turned. A special stepped washer under the nut allows this to be possible.
Continued... |
|
|
|
Post by Volktales on Apr 17, 2016 21:01:06 GMT -8

Now on to the dreaded sway bar clamps... Actually given that these were the original German parts, they slid on like butter!!! This picture shows the clamp installed with just a bit of squeezing on the edges with pliers. The locking piece on the bottom simply pushed on that far by hand!

Don did not want to scratch his pretty paintjob, so he tapped the locking piece on with some handy "wood". Really this took a few minutes to install the clamps. Try doing that with the absolute garbage aftermarket crapola available today...
The next step was to reassemble the front brakes. This is where things became highly irritating; enough that I forgot to take pictures... Don had bought four new wheel cylinders for this project. These are an unusual design in that they are not dual piston type, like most every other wheel cylinder in existence. It is quite normal for new wheel cylinders for the pistons to be installed in the wrong position. You just simply turn the pistons with a screwdriver, until the slots line up with the brake shoe. Doing that to these cylinders, caused the pistons to push in slightly more and then lock up! After much swearing, it was discovered you could pop the pistons back out by inserting a tiny screwdriver through the brake fluid bleeder hole, and prying. It was apparent that the bleeder hole was drilled after the internal wheel cylinder was machined. A bit of swarf from the drilling procedure was locking the piston in place if the piston was attempted to be turned. In the end a bit of filing fixed the situation. I am pretty sure that if the pistons were installed straight, everything would have been OK. The drilling causing the problem was at the very bottom of the bore, and would not affect the seal on the piston. Regardless, this wasted a lot of time, and again should not have happened in the first place...

With the braking problem figured out, it was onto the wheel bearings. One of Don's bearings had a couple of tapered rollers that were looking a bit iffy. They were not the factory ones anyway, given that they were made in the US by a company I have never heard of... We found some replacements in my stash of stuff too good to throw away... Here is Don's fingers in lightening action re-greasing the outer bearing.

Everything back together, Don is finally happy that he can drive his single cab back home! The brakes felt good, and the ball joints were not excessively stiff. This is a common occurrence with some brands of ball joints these days. A little bit of choke tweaking, and the truck was good to go.

But looked what showed up just as Don was ready to leave. It was Gord in his project '67 Beetle. It is now prowling the streets!

It looked pretty tough in black primer. Gord has put a lot of time into this VW, once owned by some guy named Frank. The bead rolled alloy interior panels were made by Gord, and nice they looked. BRM's are still a favourite of mine...

And look what is hiding in the back! The red cooling tin really pops as it has a high metallic content. Provides a good contrast with the black. Gord must have a bit of a smile on his face when he drives this beast... He still has some more work to complete it, but definitely coming along...
Now what will the next VW to enter the garage be??? |
|
|
|
Post by PICTUP on Apr 17, 2016 21:36:56 GMT -8
Now that Twig's hot bug has upstaged a wimpy SC, maybe nobody is interested in what the brakes looked like after the backing plates were on….But here it is anyway 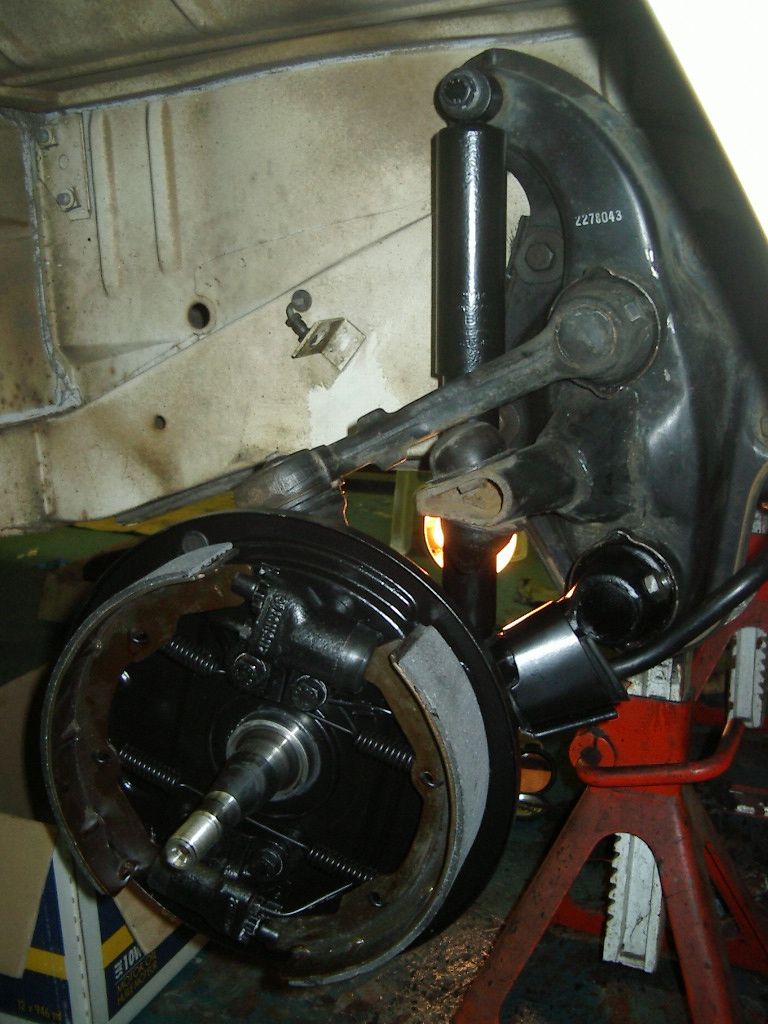 And the finished product. Yay, no more ripped boots! That front end hadn't been greased in some time!  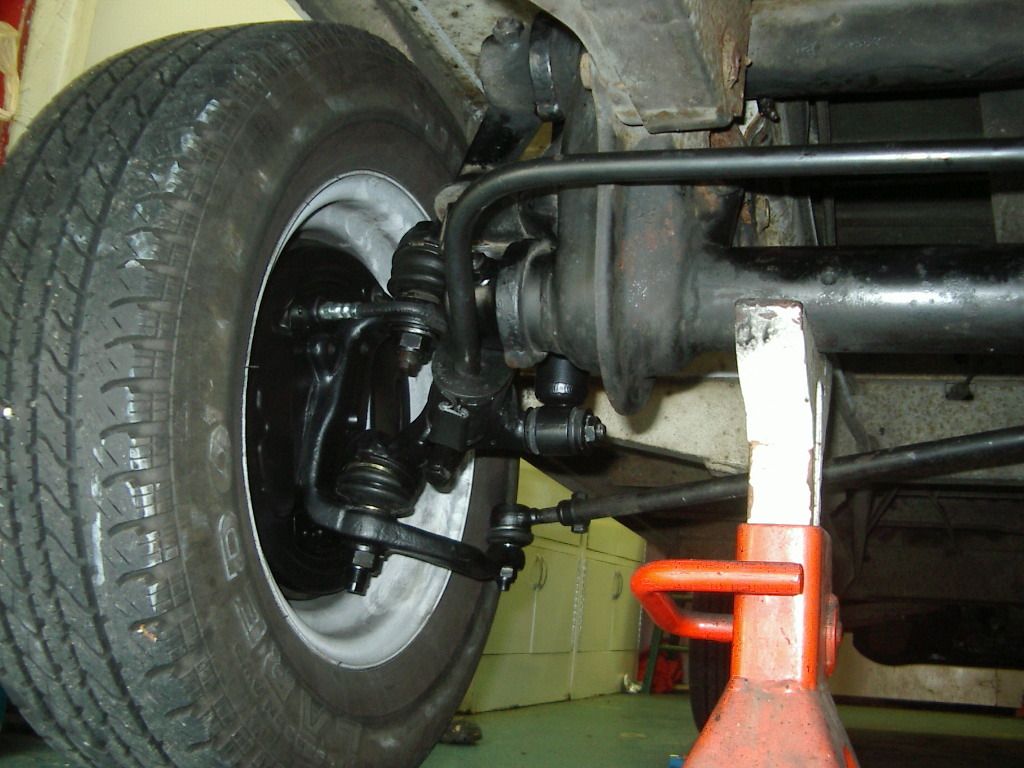 Turned into Grand Central Station at Russ' Twig's friend Tim with his huge rimmed Chevelle  Then Russ' Dad  Engine 1 meet engine 2…or Black Bug meet White Ghia 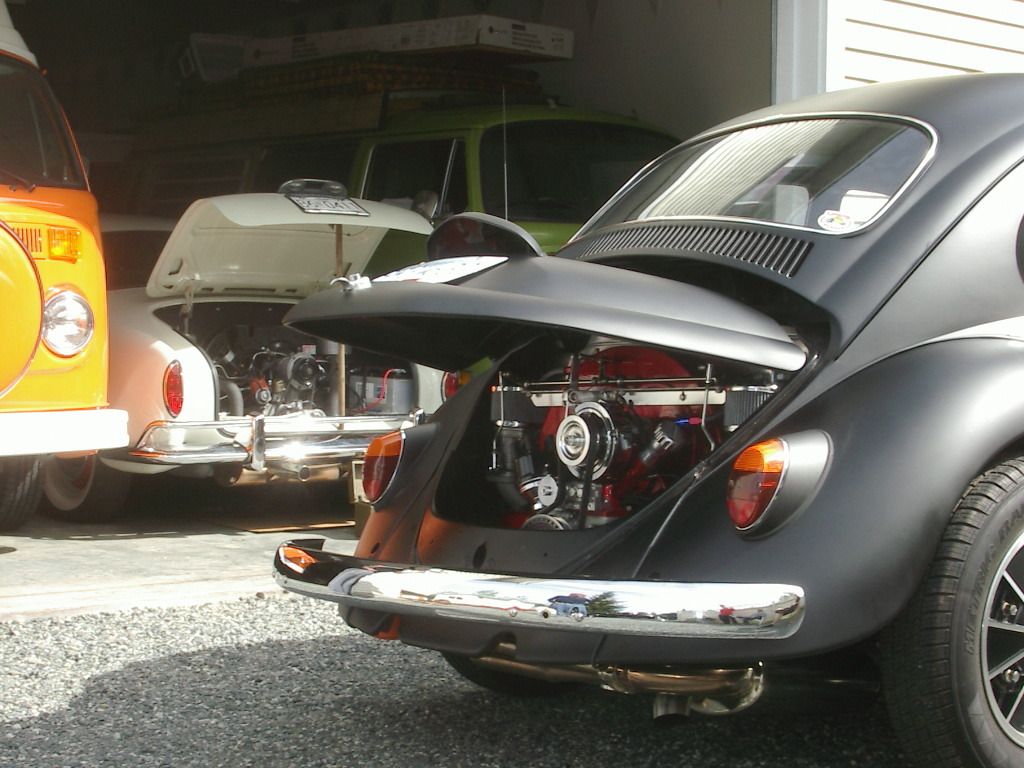 |
|
|
|
Post by Volktales on Aug 4, 2017 17:43:41 GMT -8
Pictures now restored. Don's single cab is patiently waiting for him to finish 8000 other projects first before the restoration will begin...
|
|
|
|
Post by Volktales on Jul 3, 2018 21:36:30 GMT -8
 So here is something nobody has seen for a loooong time. Yes it is Don himself, actually working on a Volkswagen again! After completing his epic house renovation, it was finally time to give his beloved '70 single cab a bit of attention...  Why is the motor coming out? Because the clutch seemed to have failed in a spectacular way.  Look at that ring on the pressure plate. Half of the fingers had basically collapsed, for no obvious reason. Because of this , the clamping force was weak, and the clutch was rough and slipping.  He was still smiling at this stage. That was to change later...  In addition to the clutch job, it also seemed like a good idea to adjust the valves. We also had to search out a replacement mount for the mustache bar, as one was completely broken. Luckily Don had one in his stash. Also the brakes felt worse then he remembered last time he drove it, and the fluid was on the low side. This turned out to be a combination of two things. The new brake linings installed last year had seated themselves into the part worn drums, and needed a fair amount of adjustment to get the pedal up high again. Also his master cylinder turned out to be seeping a bit a fluid, and this will be a future job...  Everything went relatively smoothly, except for the valve cover gaskets. These were replaced when the valve were adjusted, but the right one refused to seal properly. Despite not seeing anything obviously wrong with the new gasket, we had to resort to re-installing the old one, which did not leak fortunately. The pictures shows Don covered in VW grunge, the grubbiest I have ever seen him before! I guess it was a successful day... |
|
|
|
Post by PICTUP on Jul 4, 2018 20:18:49 GMT -8
Geezuz, who is that dirty old fart? Oh wait, it's me! You didn't mention my now cracked ball joint boots after 2 WHOLE YEARS  |
|
|
|
Post by Volktales on Jul 4, 2018 20:55:29 GMT -8
Do you remember the specific brand of balljoint, or boots themselves? More CIP goodness???
|
|


 I knew I would regret that photo


