|
|
Post by ocdgarage on Feb 25, 2023 16:11:22 GMT -8
Working on the seat cushions now. Made bases from 1/2" plywood and had the foam shop cut 2" high density foam to fit them. I used an air grinder to tidy things up and shape the edges. 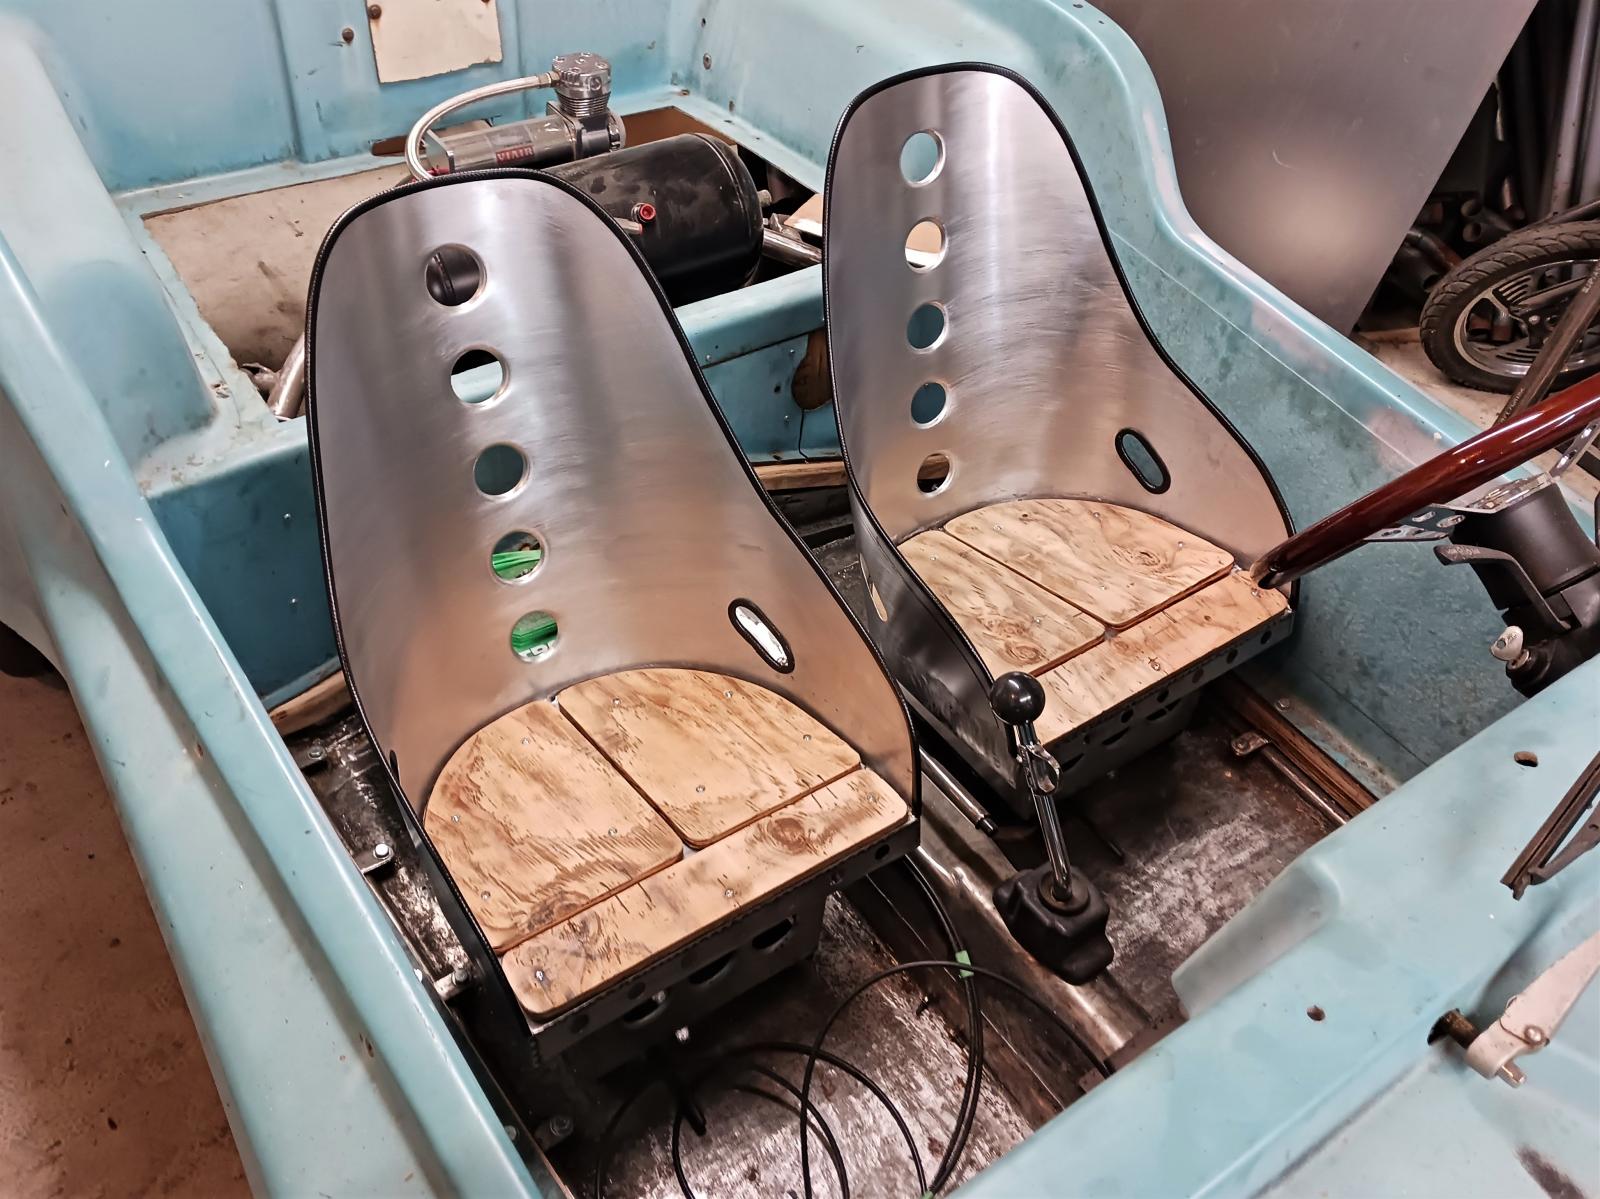 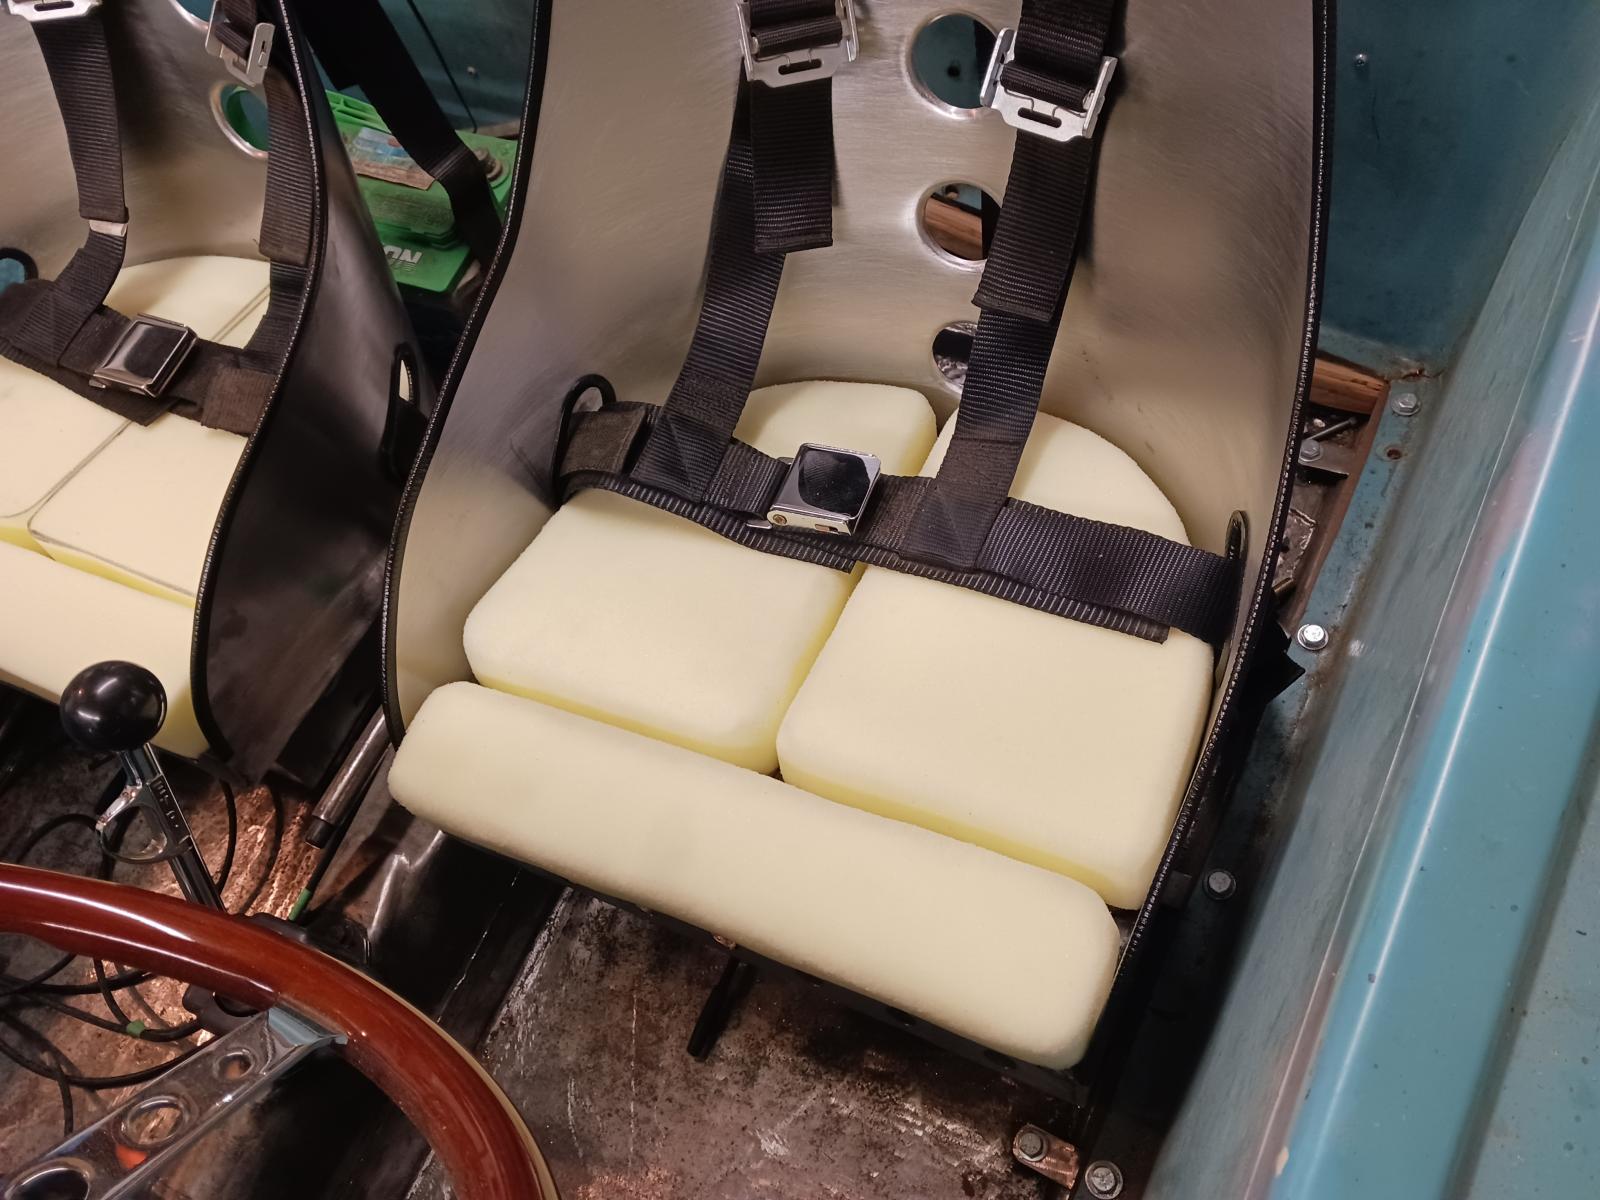 |
|
|
|
Post by ocdgarage on Mar 5, 2023 17:38:34 GMT -8
Decided to punch a few more holes in the seats before considering the fabrication done. Still need to polish, then matte clear the seats and wrap the foam bases.  |
|
|
|
Post by Volktales on Mar 5, 2023 19:44:50 GMT -8
Looking pretty sweet!
|
|
|
|
Post by ocdgarage on Mar 16, 2023 6:02:09 GMT -8
Thank you. As we all know, it takes a lot of work between posting the pics to make it look easy. lol.  |
|
|
|
Post by ocdgarage on Mar 16, 2023 6:04:39 GMT -8
Upholstery update: completed the 2 piece bucks which help to mold and shape the leather seat coverings. ![]() 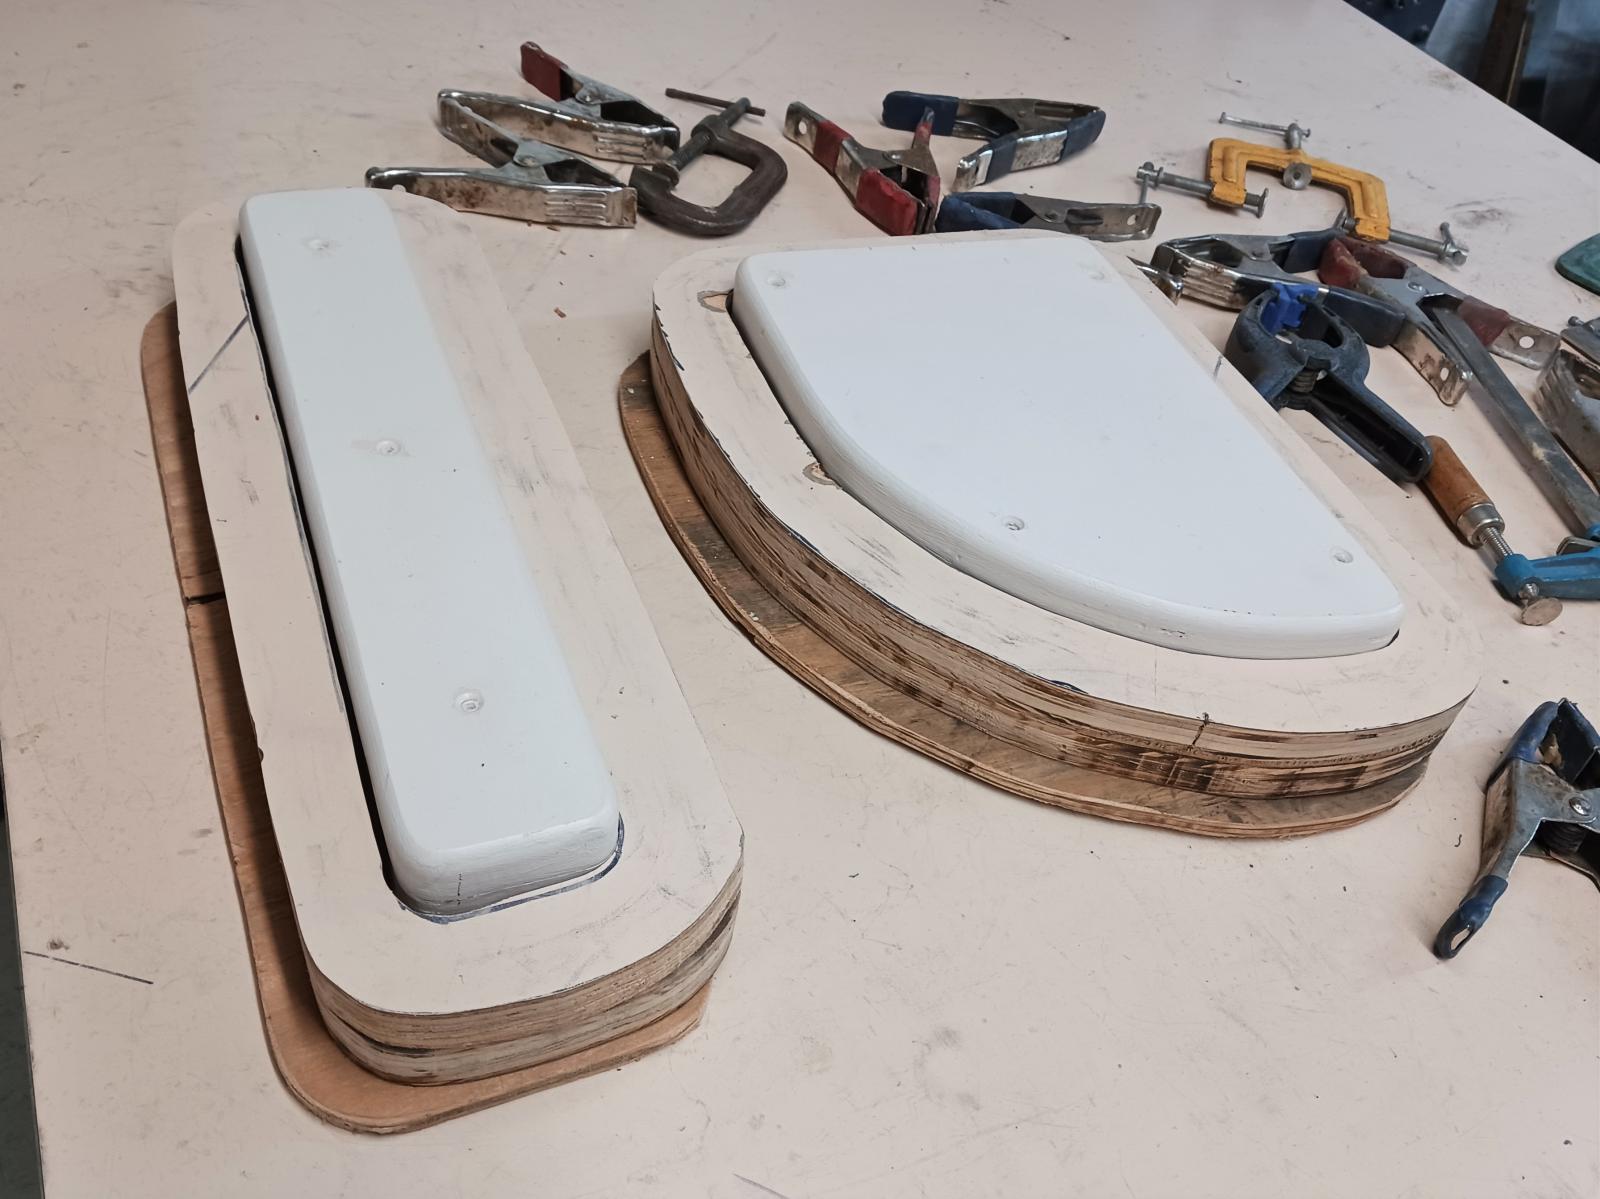 Glove leather is the grade I'm using, it's an off cut from the bargain bin at the local leather store. The material was soaked in water for about 20 minutes, wrung out, then molded to shape by hand. The outer sections of the bucks were then pressed down while trying to pull out wrinkles, clamped and left to dry for 24 hours.  Looking like huge slabs of chocolate, these are the molded leather pieces over their shaped foam. After another coat of paint on the seat bases, they'll soon be ready to mount. If there are enough leather pieces left over, I'll likely try to wrap the trim around the seats and seat belt cutouts as well.  |
|
|
|
Post by Volktales on Mar 16, 2023 19:14:15 GMT -8
Mmmm, chocolate! Those look very nice and very cool how you made them like that!
|
|
|
|
Post by ocdgarage on Mar 18, 2023 7:14:46 GMT -8
It's amazing what you can learn to do on Youtube. Stole the technique from someone who made leather catch-all trays. Now to wrap the leather/foam over the seat bases...
|
|
|
|
Post by ocdgarage on Mar 19, 2023 16:42:11 GMT -8
|
|
|
|
Post by ocdgarage on Mar 25, 2023 15:59:46 GMT -8
Small update: the seats are done. Trimmed the edge lacing and seat belt holes with leather, a little surface work, a shot of clear and done. Will be working on the battery hold down next.  |
|
|
|
Post by ocdgarage on Apr 1, 2023 14:54:34 GMT -8
Nearly finished with the battery tray. It will be using a truck-sized side post battery which will reduce the chances of accidental shorts from dropped tools, etc. The upright chrome tubes will be shortened to fit the new battery. I decided to use brass wing nuts/washers for a touch of nostalgia. With the passenger seat pulled back almost contacting the battery my feet can't reach the bulkhead. 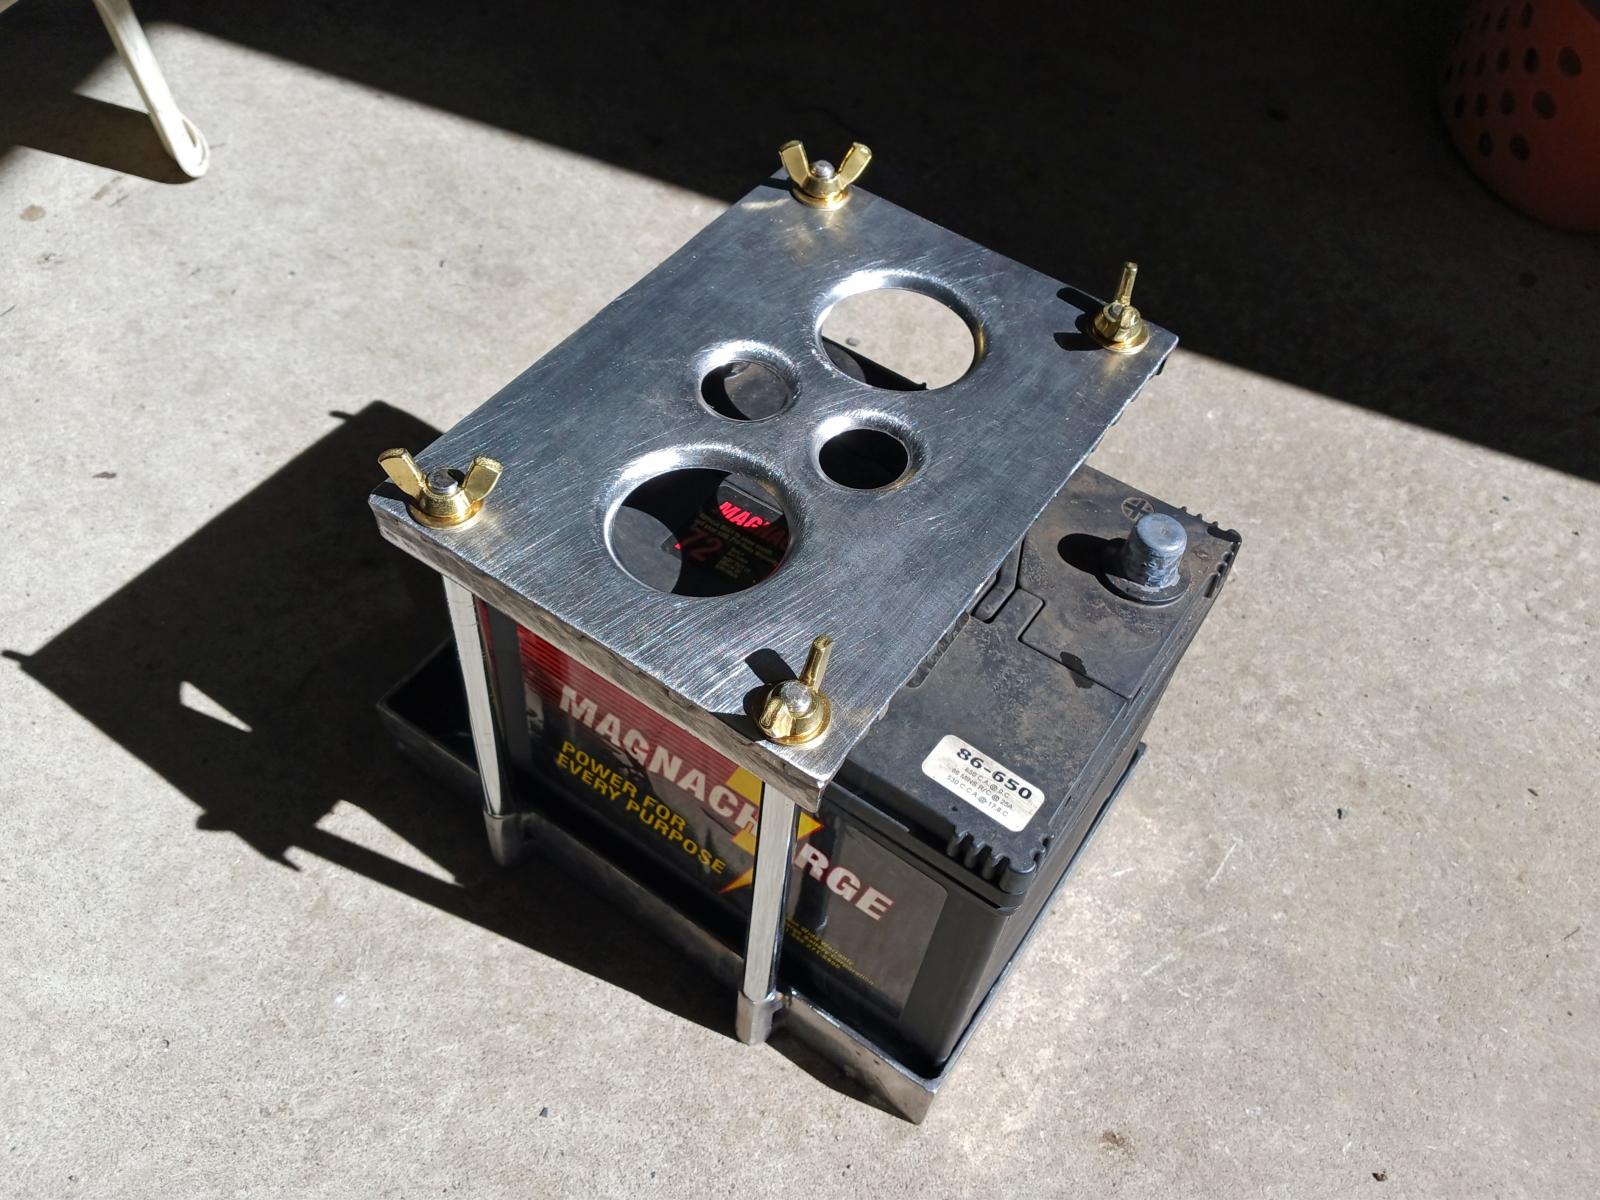  |
|
|
|
Post by Volktales on Apr 2, 2023 11:20:43 GMT -8
Looks neat.
|
|
|
|
Post by ocdgarage on Apr 7, 2023 11:58:21 GMT -8
|
|
|
|
Post by ocdgarage on Apr 15, 2023 17:50:15 GMT -8
The weather in our corner of BC is nearly warm enough for me to start repairing the body. The 1.5" x 1.5" angle iron will form a brace for the body as well as the inside lip of the cover for the air ride components. I had originally set it up to run a turbo charged, intercooled Suzuki drive train, but decided to revert back to the more nostalgic air-cooled VW. Previously, areas were cut out to clear the mid-engine drive train and instrument cluster, but will now be filled in and tidied-up. 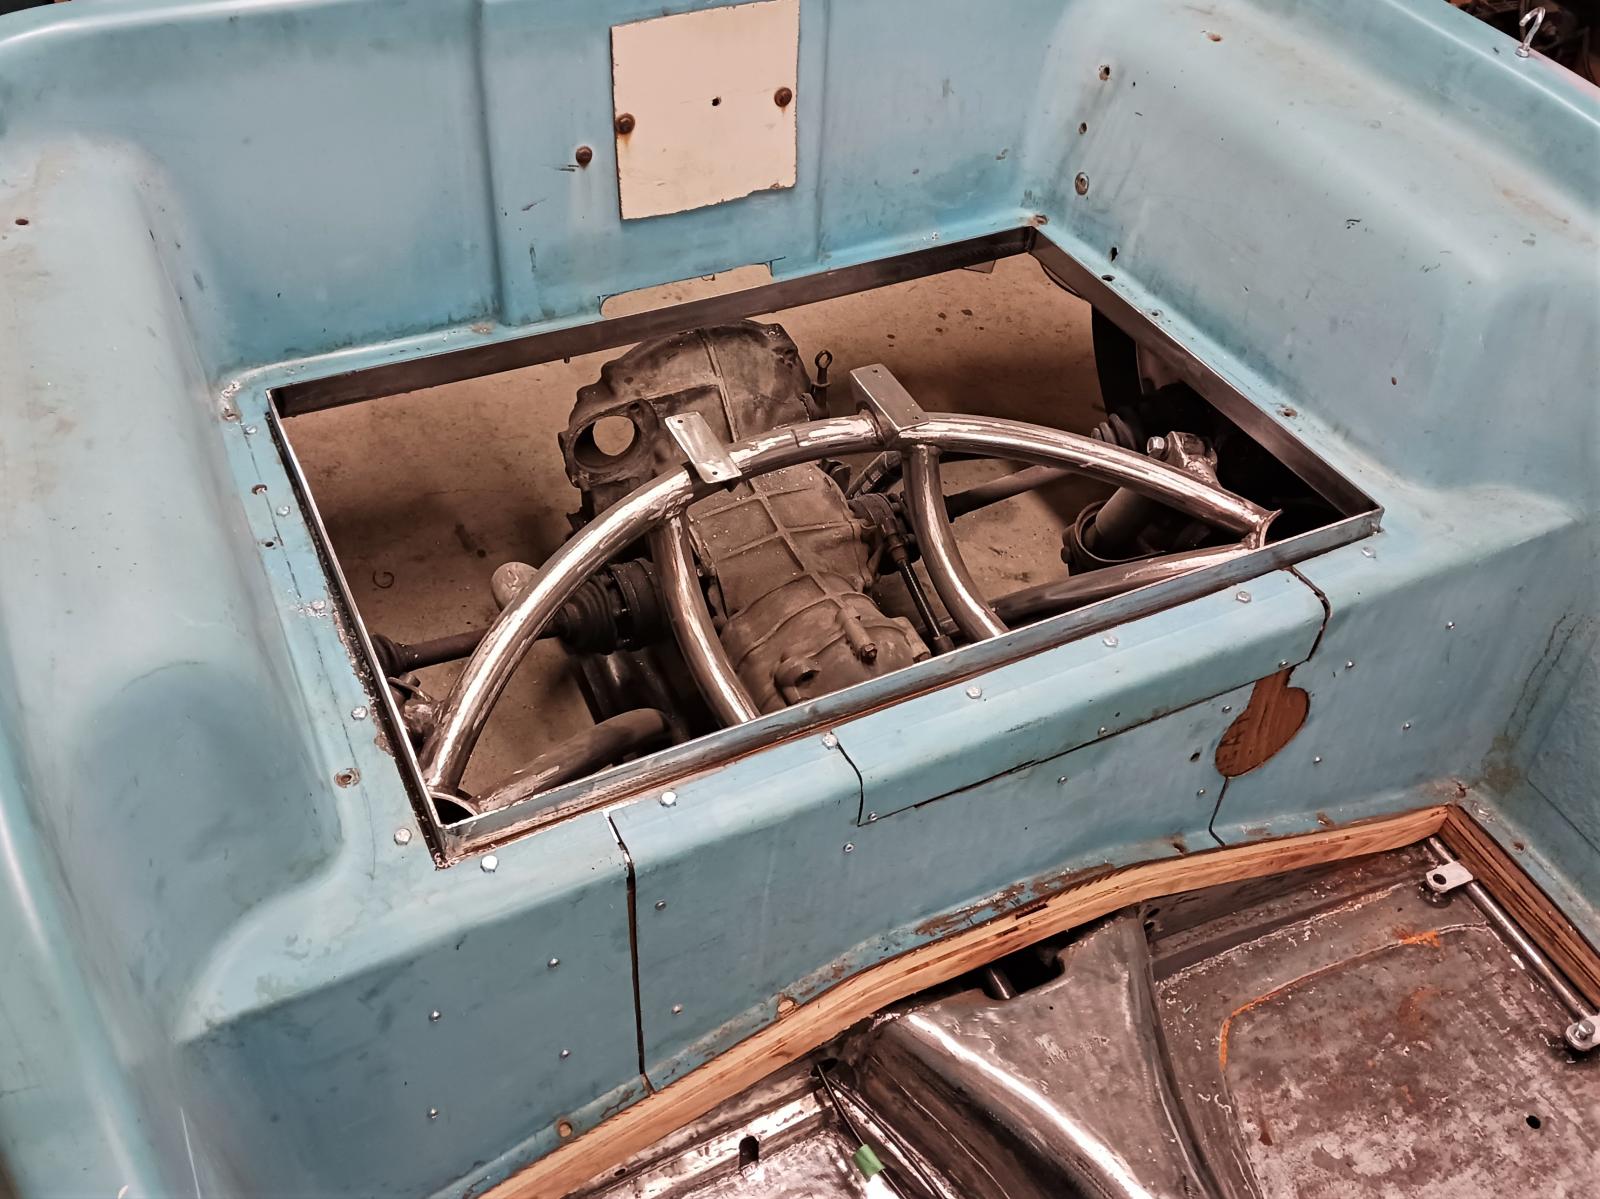 |
|
|
|
Post by ocdgarage on Apr 22, 2023 16:21:09 GMT -8
Finishing off the rest of the fabrication on the beam. Air shocks were relocated 2" at the top rather than grinding control arms for clearance. Also, pic of how I installed u-joint into column by shortening the collapsible section. A local machinist welded a stub from Cip1 onto the stock VW input shaft, I welded a second one into the end of the column and used their u-joint.  0  |
|
|
|
Post by ocdgarage on Apr 28, 2023 11:50:00 GMT -8
First layer of fiberglass is on and things are taking shape. Still needs a few more layers in the low spots, then a couple more over the top to add additional rigidity to the panels. There's lots of work to be done to bring this old shell back to where it should be. Work ahead includes 2 sets of turn signal locations, holes for mirrors, various gauges, non-VW windshield wiper spacing, rear mud flap mounts, a few holes drilled for no apparent reason at all, plus the usual dings and chips from hard use. I also plan to delete the fiberglass windshield frame from the top so I can drive with/without it. I can see how it may hold the motor noise in somewhat and a bikini-style top would keep most of the sun off anyway.   |
|


