|
|
Post by ocdgarage on Sept 24, 2023 10:51:04 GMT -8
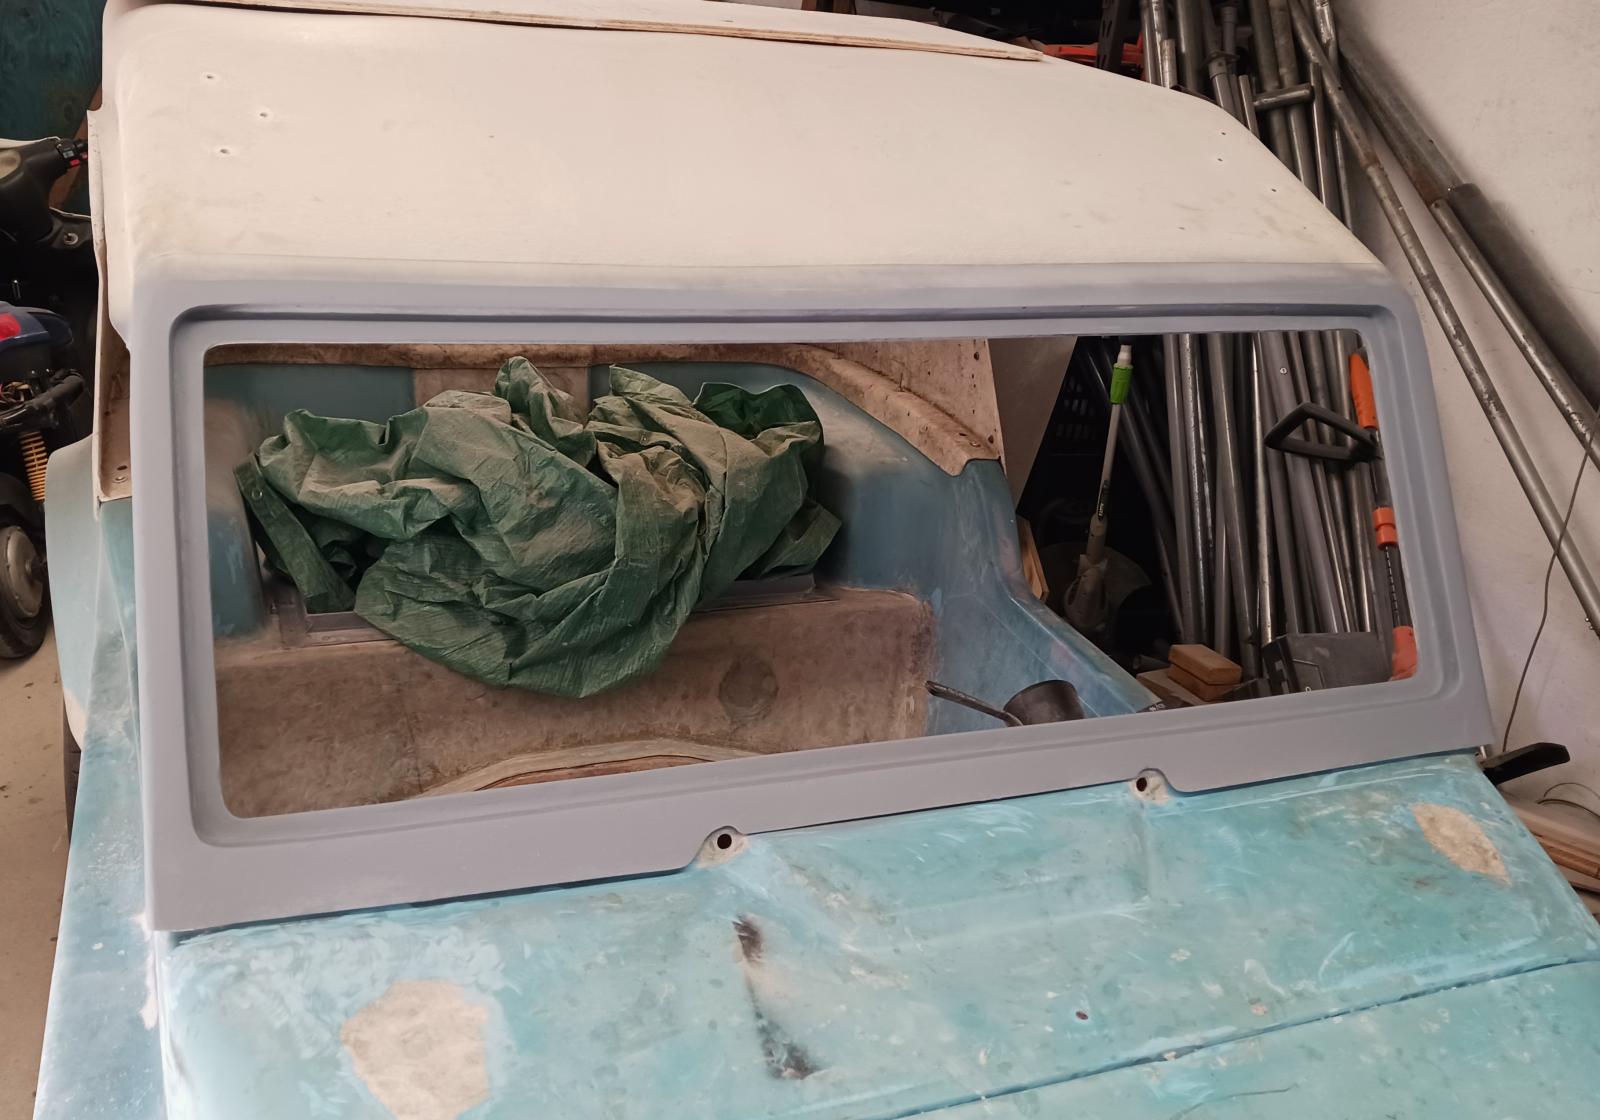
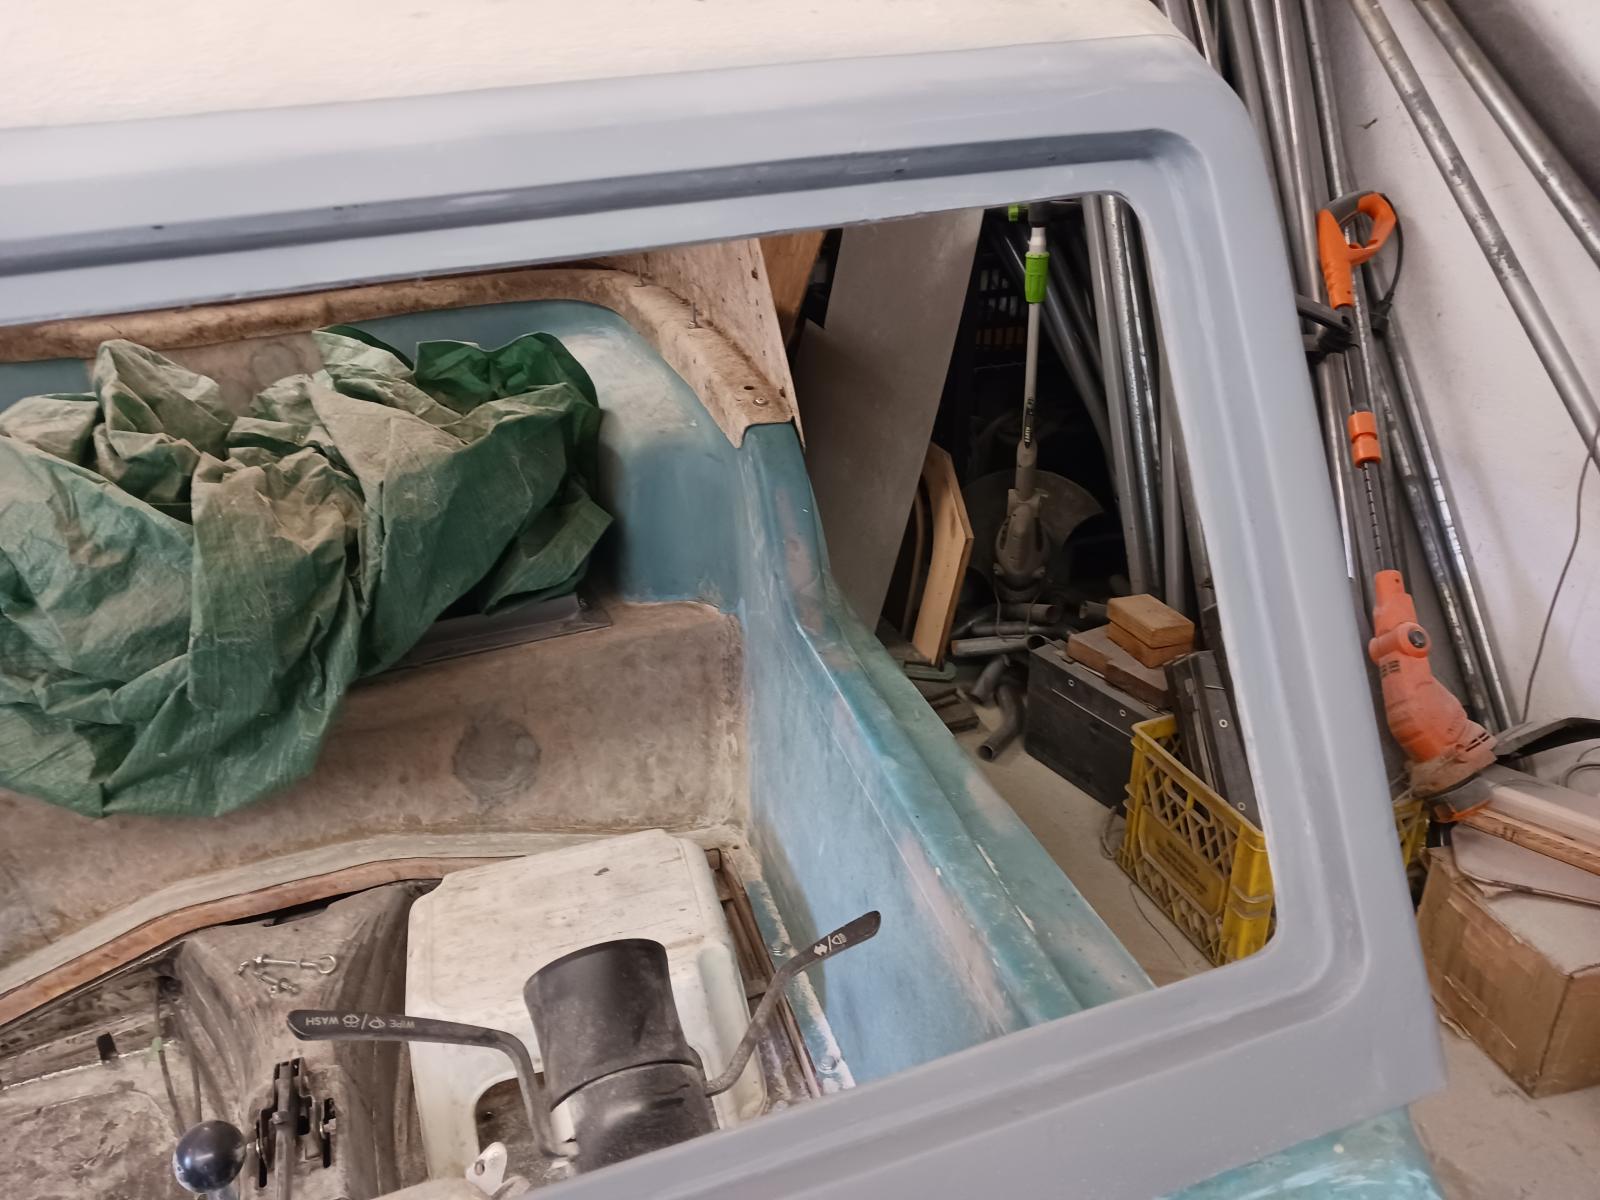
Nearly finished this part of the build, a little reinforcing from the inside of the top and the windshield conversion should be done. I've created a pattern of the windshield which fits snugly in the channel, the glass tech should be able to cut the glass from that, allowing clearance for flexing/expansion/etc.   |
|
|
|
Post by Volktales on Sept 24, 2023 21:42:09 GMT -8
Hope that window goes in better then the one on my Ghia that didn't!
|
|
|
|
Post by ocdgarage on Oct 8, 2023 7:12:06 GMT -8
I had to change the windshield on a Ghia that I owned many years ago, similar to a beetle with the rubber gasket. I remember it being a wrestling match and of course, you have to worry about the headliner too. This is planned to be a straight glue-in install using urethane glue/caulking. Should be easy enough to run a bead of sealant around the frame, press in, wipe off excess then add some trim around the perimeter. At least that's the theory.
|
|
|
|
Post by ocdgarage on Oct 8, 2023 7:17:43 GMT -8
|
|
|
|
Post by Volktales on Oct 9, 2023 20:03:45 GMT -8
Your pictures were not working for me tonight...
|
|
|
|
Post by PICTUP on Oct 10, 2023 21:05:42 GMT -8
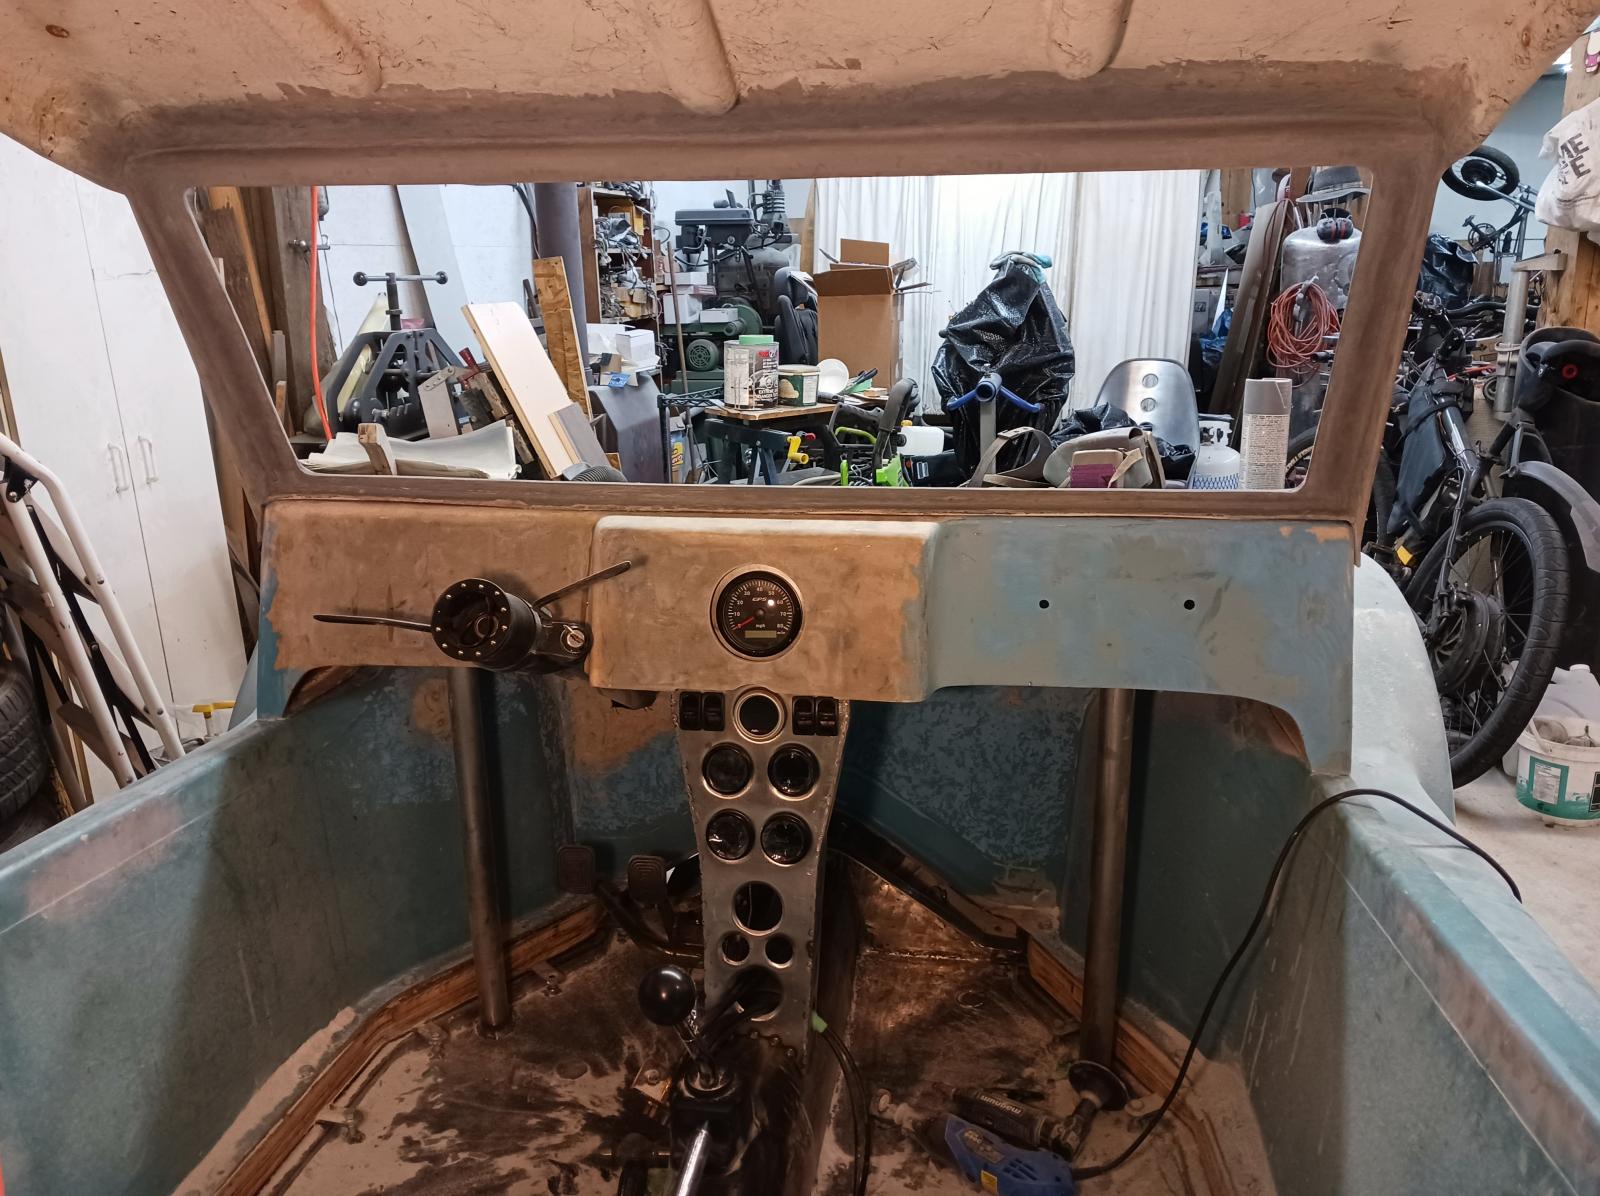
They were working earlier. When I cast a flat aluminum panel for my gauges in my '68 Double Cab(over 30 years ago, gulp!), I needed to add a visor over the panel because of the gauge light reflecting off the windshield at night.So you might find your visor has two functions  |
|
|
|
Post by ocdgarage on Oct 14, 2023 20:17:43 GMT -8
|
|
|
|
Post by ocdgarage on Oct 21, 2023 18:14:04 GMT -8
Got a start on the bump out for the rear bulkhead this weekend. These bodies were designed/produced for the 1200/1300 beetles in the late '60s. The later 1600dp dog house cooler is known to benefit from an extra inch or two clearance for the motor fan/oil cooler to breath due to the extra size of the cooler. I cut the panel out leaving 1" of the floor attached, flipped it and leaned it closer to vertical to increase the depth to 1.5". I made plywood bucks on my router table and covered them in duct tape to give shape for the first layers of fiberglass.  ![]() |
|
|
|
Post by ocdgarage on Nov 1, 2023 16:44:01 GMT -8
First couple layers of 'glass laid down on the bump out and some initial shaping done. I cut out the old piece including the floor, flipped it inside out, then upside down and glassed it back on adding depth and rounding the edges, similar to elsewhere on the shell.  Hard to tell from the under body pic, but the base of the rear wall is now about 0.75" ahead of the edge of the bell housing, tapering up to 1.5". You can see where the flat part of the original shape was cut out and extended inward away from the motor. That should give the fan a little more breathing room.  |
|
|
|
Post by PICTUP on Nov 2, 2023 19:28:19 GMT -8
So I guess you aren't using a doghouse fan shroud then Looks good. Fibreglas just doesn't agree with me. I itch for days, even if I have proper gear on. Ugh  . That's why I was attracted to wooden boatbuilding, not even composite... It will be great to see all this work one colour some day  |
|
|
|
Post by ocdgarage on Nov 9, 2023 7:04:42 GMT -8
Actually, I will be running the dog house cooler. My online contact Mike from 100 mile houses' father was a friend of the original builder of these shells (made in Vancouver BC). Although the new style cooler/fan do fit in this shell, there is not a lot of space between the center of the rear bulkhead and the fan intake. His advice to me (and his family have 7 or 8 Hill Billy's) is to increase the depth of the original bump out by 1-2" as theirs have experienced overheating problem due to lack of fresh air coming into the motor, especially when performance mods are added. I'm so far into the repairs/mods of this shell I didn't want to ignore good advice as I certainly don't want to do it later once the body is "all one colour". I have a genuine desire to put a Berry's Blowers low profile kit on once complete. 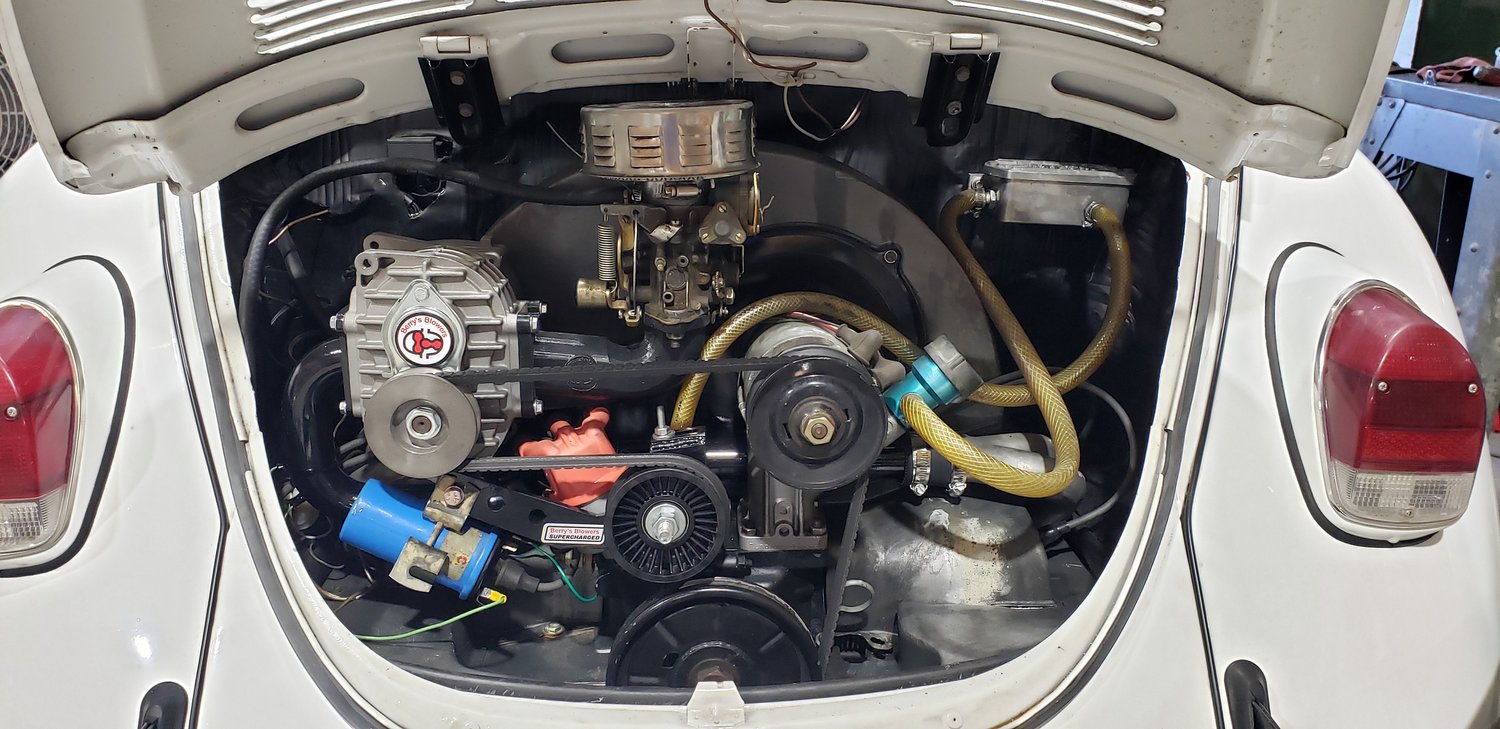 |
|
|
|
Post by ocdgarage on Nov 9, 2023 7:10:21 GMT -8
It's a race against the weather as temperatures are dropping, necessitating the use of an electric heater and a tarp to speed up the curing process. Glad I'm working with epoxy not polyester resin. 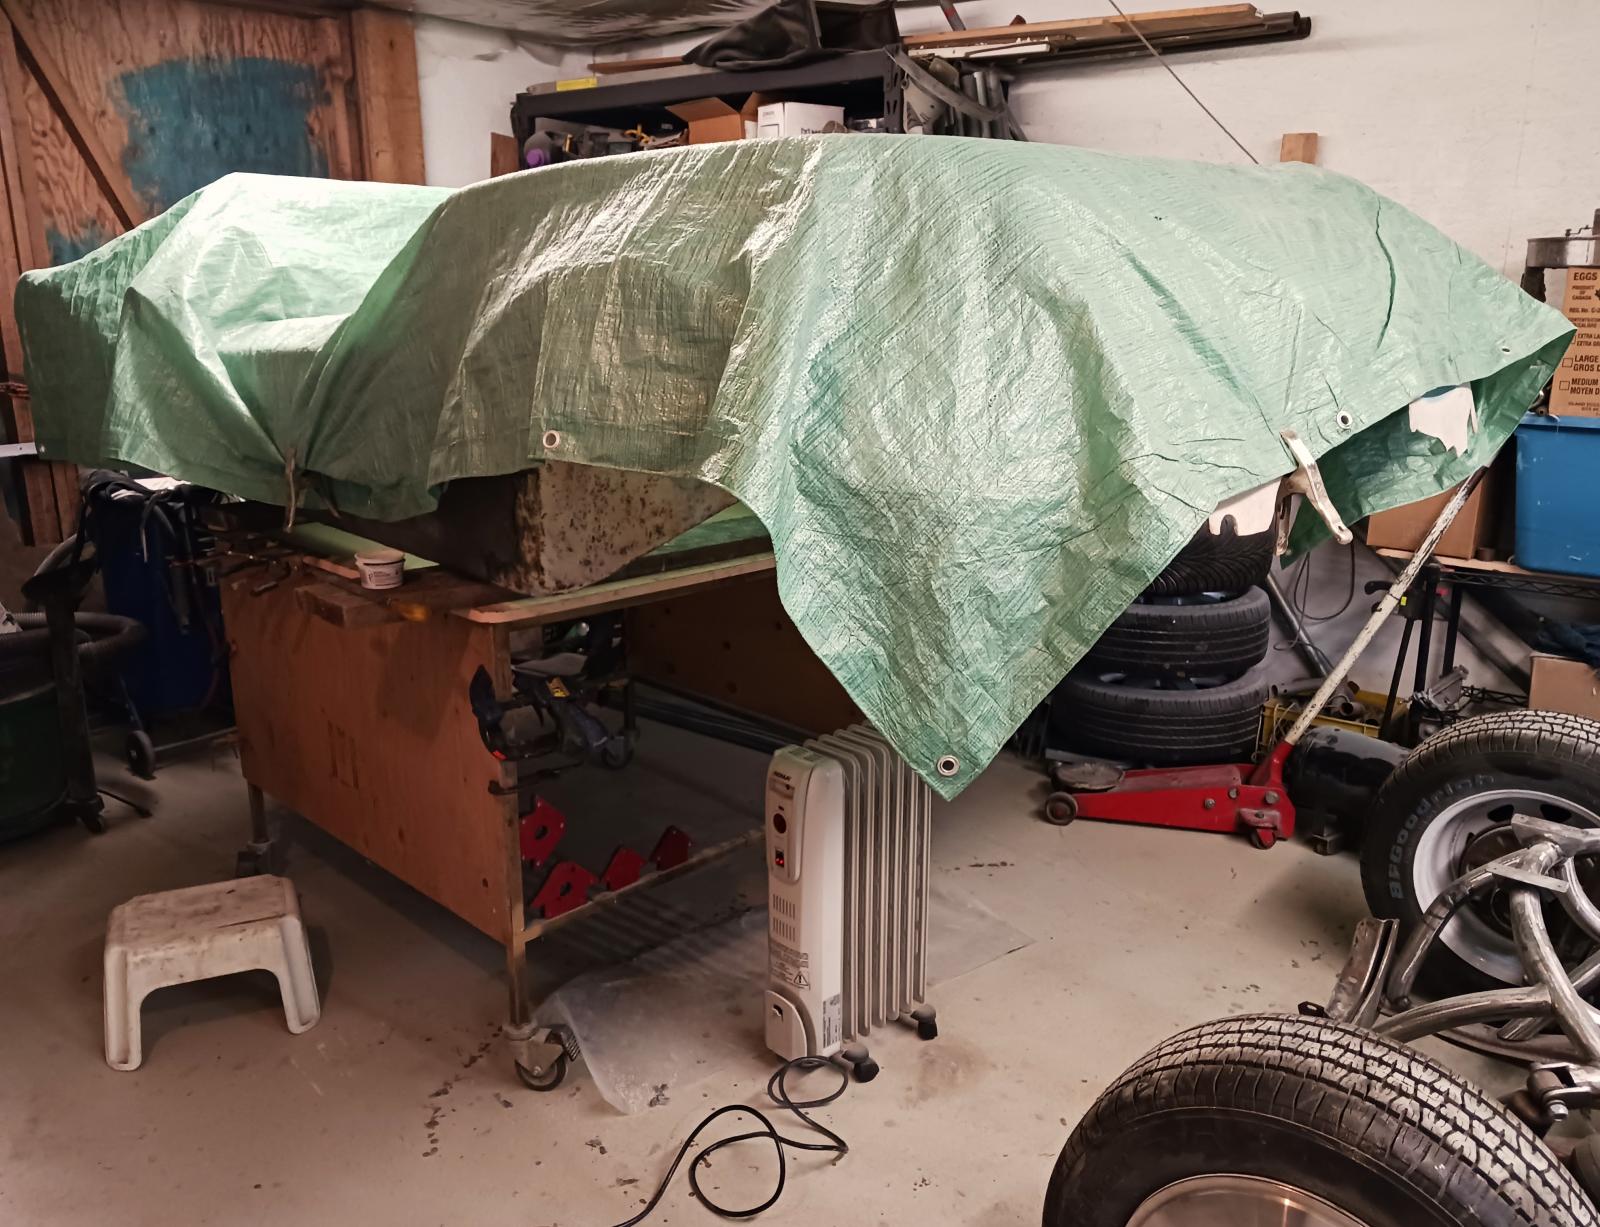 Not completed yet, but the little bump out for shifter clearance is now roughed in. Imagine that, a 3 inch motor/trans raise causing extra work. 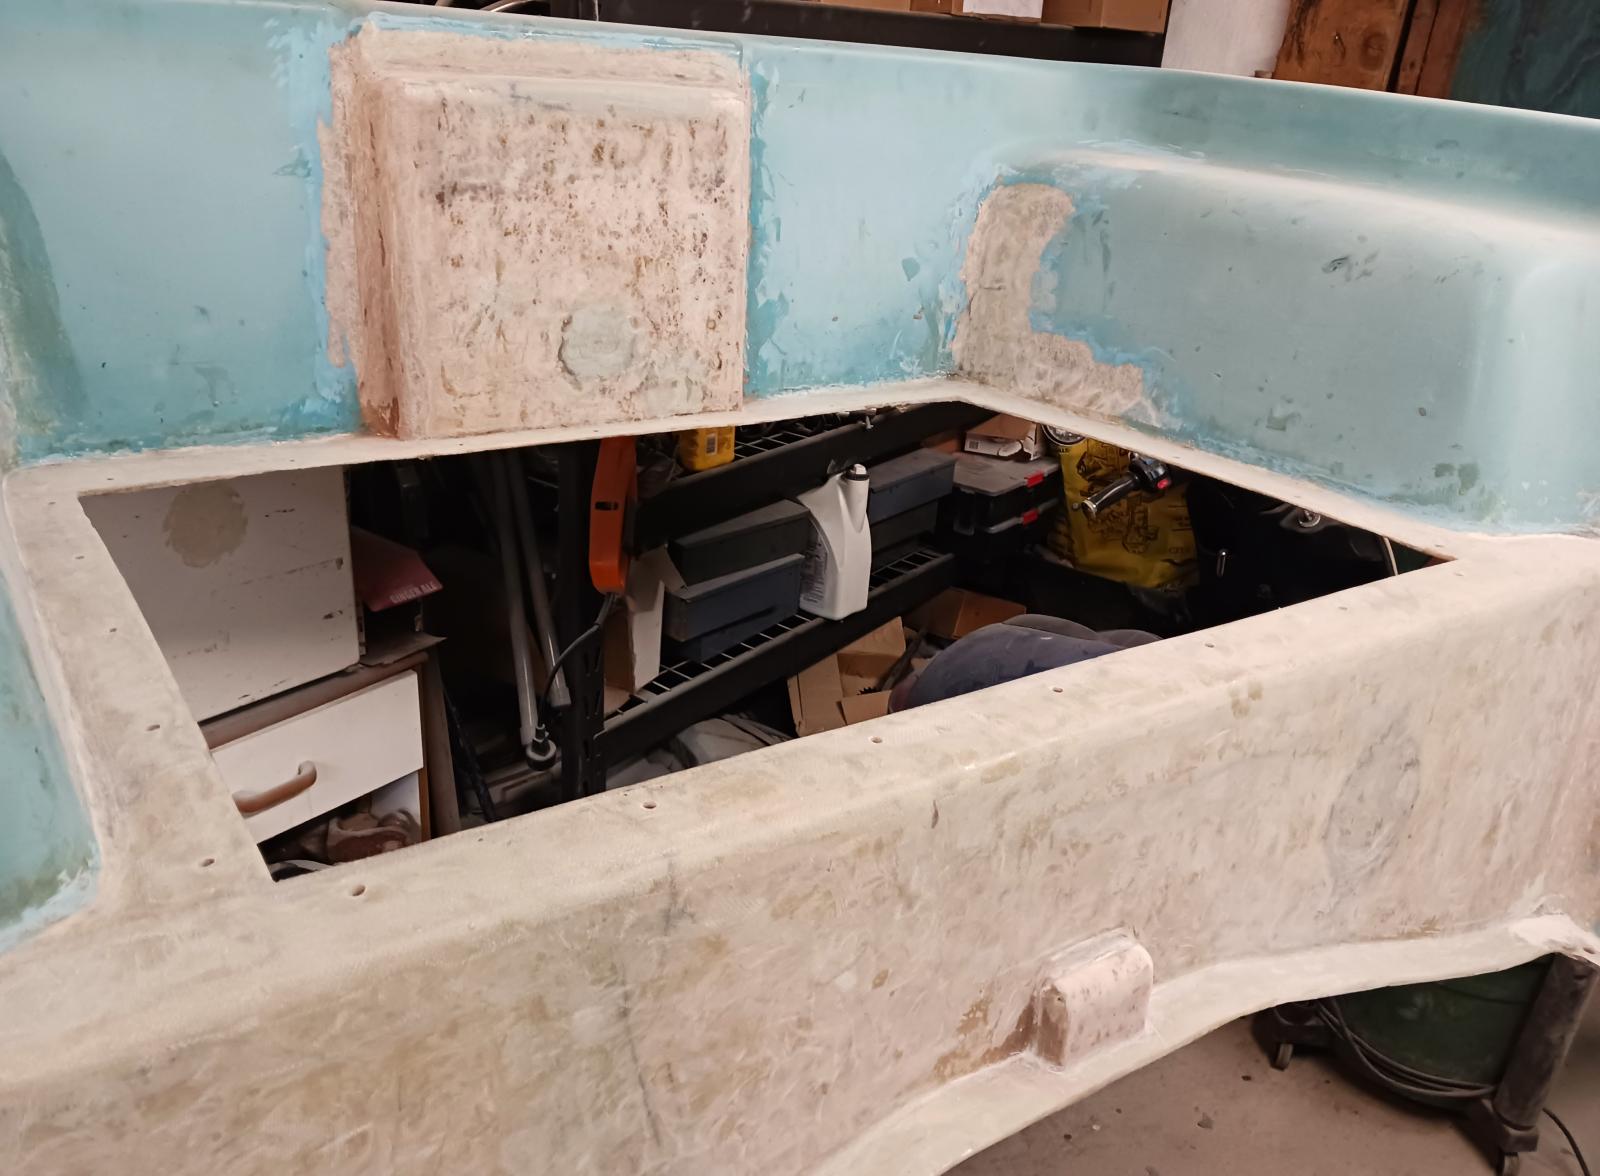 |
|
|
|
Post by PICTUP on Nov 9, 2023 10:58:41 GMT -8
It's a race against the weather as temperatures are dropping, necessitating the use of an electric heater and a tarp to speed up the curing process. Glad I'm working with epoxy not polyester resin. Well, with polyester one can just make a "hotter" mix, but as you know, one must never be tempted to try that with epoxy as it is a completely different system(mixing/curing). This thing is gonna really scoot with all your well-thought-out mods! |
|
|
|
Post by ocdgarage on Nov 10, 2023 8:05:35 GMT -8
The buggy was originally put together with beetle tail lights, that was easy to see in the faded gel coat. I'm mixing a few genres together in this build, so originally added the early Ford tear drops as a nod towards my love of old school hot rodding. These days I am thinking they're a bit overdone and under lit. Lately, I've come across a couple buggies with early bus tail lights and feel they fit in well with the vintage vibe I'm going for and are also rounded top/bottom, having a similar foot print to a beetle tail light. The modern reproductions run both an 1156 and 1157 so the additional bulb will add an improved safety factor. The bus lights are nearly flush mounted and don't bulge out from the body like the early beetle ones, which I like. My rear deck being larger, should make these look a little smaller than in the pic of slayer61's (Samba member) buggy shown below. I've got the old tail light holes filled back in as well as the large roundish hole that may have been for an air filter + a lot of other random holes from mud flaps, maybe a scoop over the air filter hole, etc. The rectangularish holes along the bottom edge will be filled in, I assume a cage bumper came through there at one point. I'm not paying $900 for a cage bumper from Cip1, so I'll build something custom that comes out just below the lower edge of the shell. The semi circular holes are where the exhaust currently passes through and will be somewhat larger to prevent melting the body.  My new proposed tail lights. These are a lot more expensive than the cheapest versions but the further into the build you get, the less you want cheap looking reproductions. Perhaps I will 'french' (old school term for recess) them in so the lenses are more flush with the body, I sure seem to like dreaming up more work for myself.  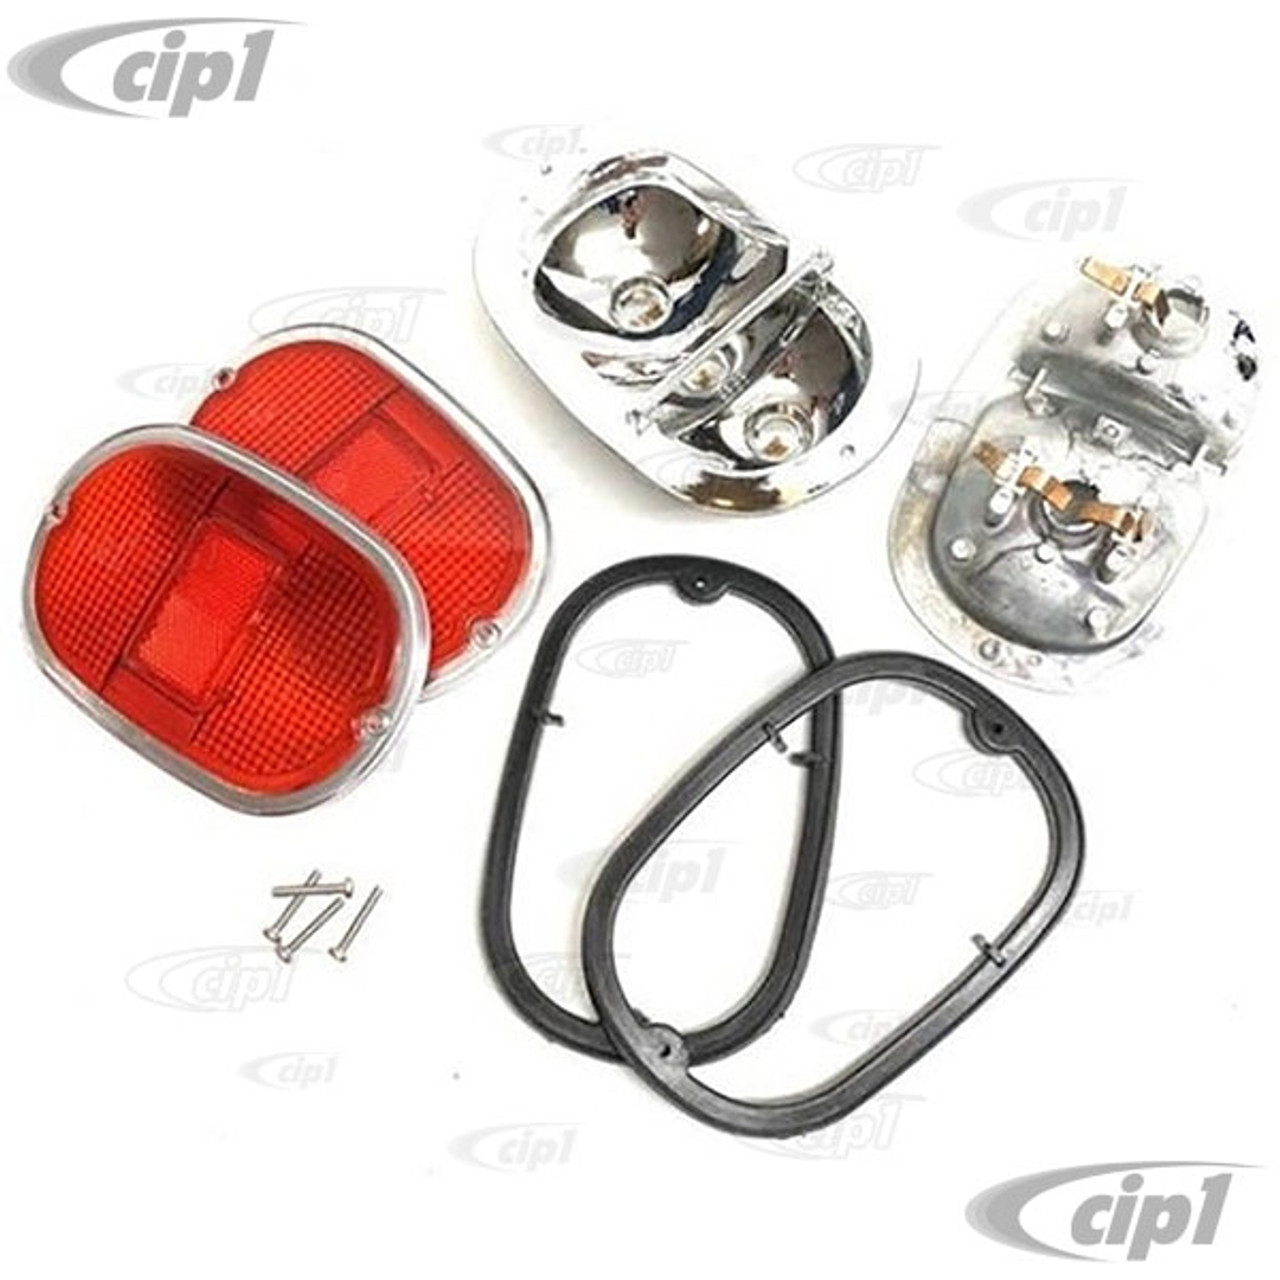 I think they look good/clean on this buggy and should look a bit smaller on my build as my rear apron has quite a bit more surface area.  This is how tight the motor fits under the body, may have to create a hatch to access the carb. Hope I won't have to pull the body off to do a clutch.  ![]() |
|
|
|
Post by stude on Nov 10, 2023 11:48:52 GMT -8
I like the beetle taillights they would sit on there just right no big holes to cut out.
|
|


 . That's why I was attracted to wooden boatbuilding, not even composite... It will be great to see all this work one colour some day

