|
|
Post by Volktales on May 1, 2023 22:05:52 GMT -8
Mmmm, nothing like the smell of fibreglass resin curing...
|
|
|
|
Post by ocdgarage on May 5, 2023 17:17:33 GMT -8
I prefer to use epoxy resin over polyester, virtually no VOCs (odor) plus it's generally much less caustic. When you mix up fiberglass resin the whole neighbourhood know what you're up to....  |
|
|
|
Post by PICTUP on May 7, 2023 17:40:49 GMT -8
I prefer to use epoxy resin over polyester, virtually no VOCs (odor) plus it's generally much less caustic. When you mix up fiberglass resin the whole neighbourhood know what you're up to.... I have used epoxy on a number of stitch-n-glue small boats I have built. Yes, less VOC smell, but still some say to wear a respirator. I never did. Not sure if it shows or not, lol  . It is a much different animal from polyester and as long as one sticks to proper measurements, it will set up fine. Might be less caustic, but please do wear gloves. |
|
|
|
Post by ocdgarage on May 8, 2023 17:00:43 GMT -8
Repairing more holes as part of the ongoing restoration of the shell. When sanding anything, especially fiberglass, always wear your respirator for sure! I was referring to the fumes only. Gloves are mandatory unless you like using acetone for washing up...not! I'm currently using West Systems 105 (along with fast hardener) which have pumps, ensuring the correct mix ratio.  |
|
|
|
Post by PICTUP on May 8, 2023 18:36:30 GMT -8
Yeah, I have always found West System to be reliable. System 3 was okay, but the West System pumps sure made things much easier. I had a friend who became sensitized to epoxy, but that is mostly due to him doing exactly as you suggest not to do, and that is clean-up with acetone. Ugh. Sadly no-one could convince him not to.
|
|
|
|
Post by ocdgarage on Aug 13, 2023 14:06:26 GMT -8
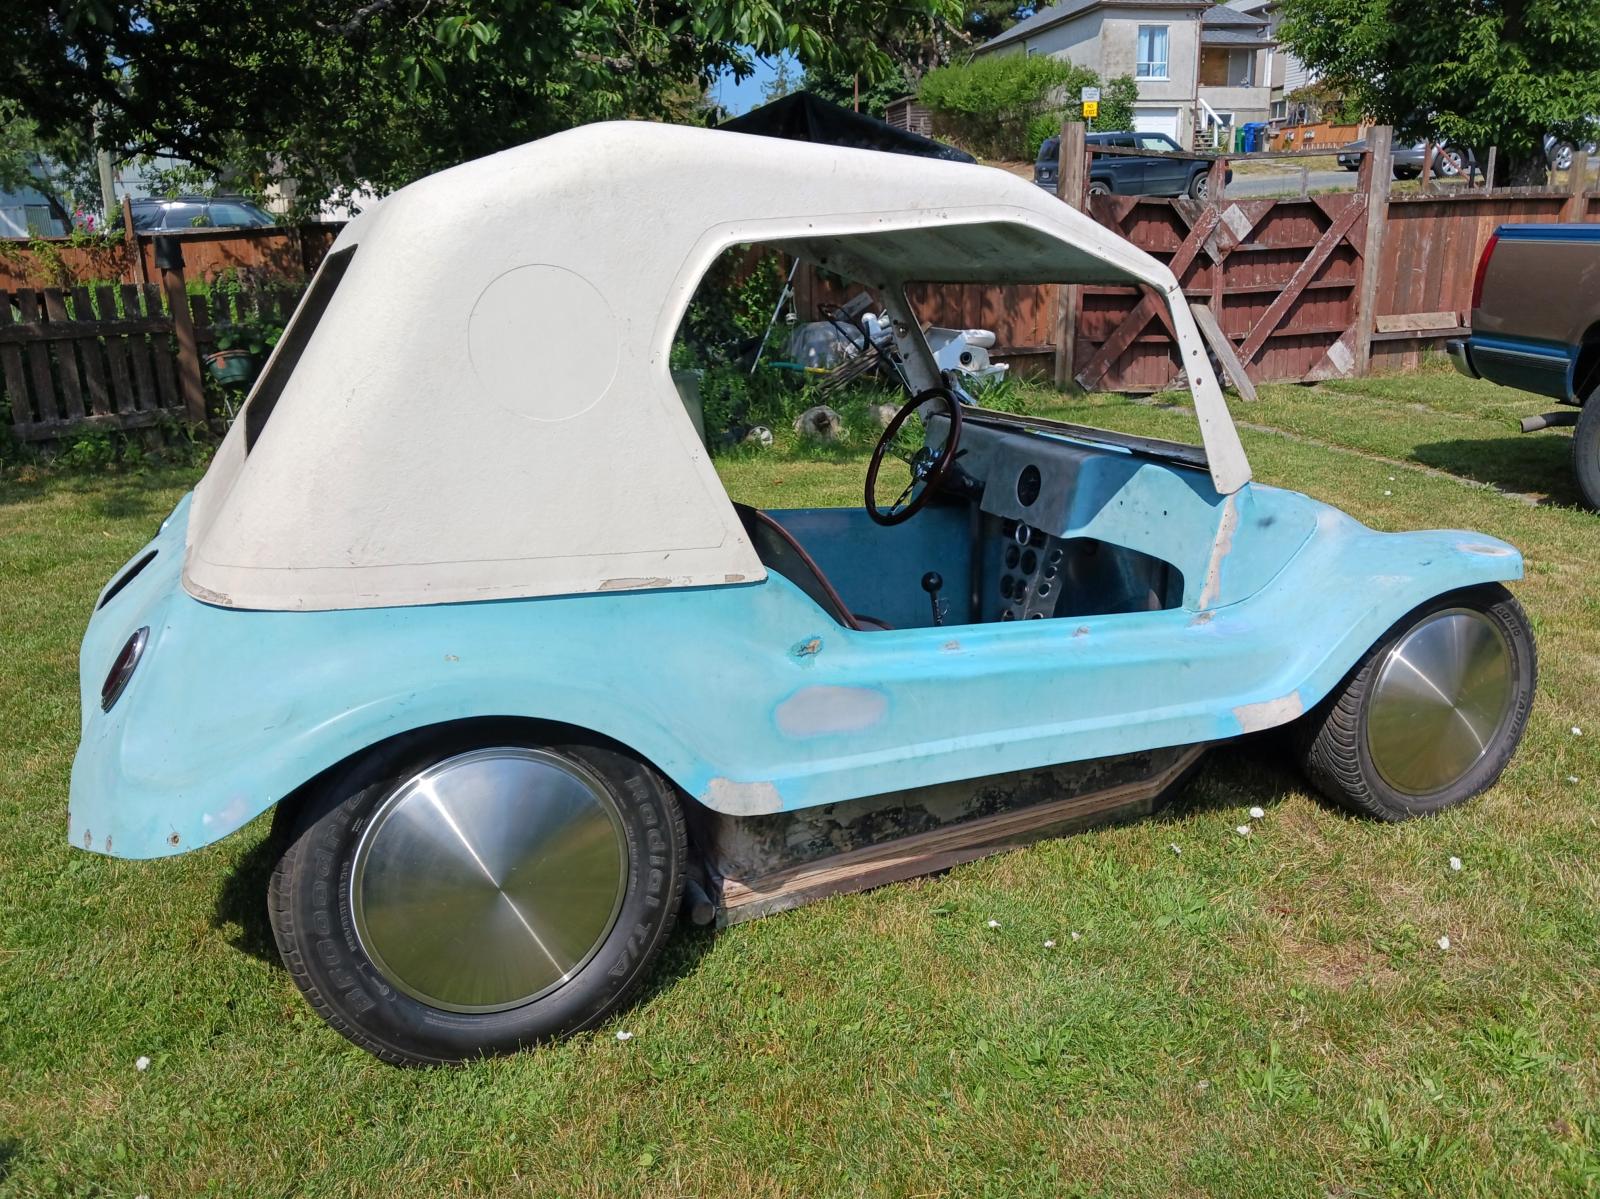
Cowl had holes for a set of Beetle turn signals as well as down on the front fenders at one point and the windshield wiper spacing was not from a Beetle. I've read the wipers from an Austin Mini were commonly used as it also has a short, narrow windshield with 2 wiper arms.   A shot from underneath. I had to wire wheel a lot of soft undercoating to get to the fiberglass for these repairs.  Lots of holes in the front of the tub to fill. Can't imagine what was bolted into them all.  Very few low spots left on the face of the dash. I may be able to block sand most out or at least a skim coat of Dura-Glass should finish it. 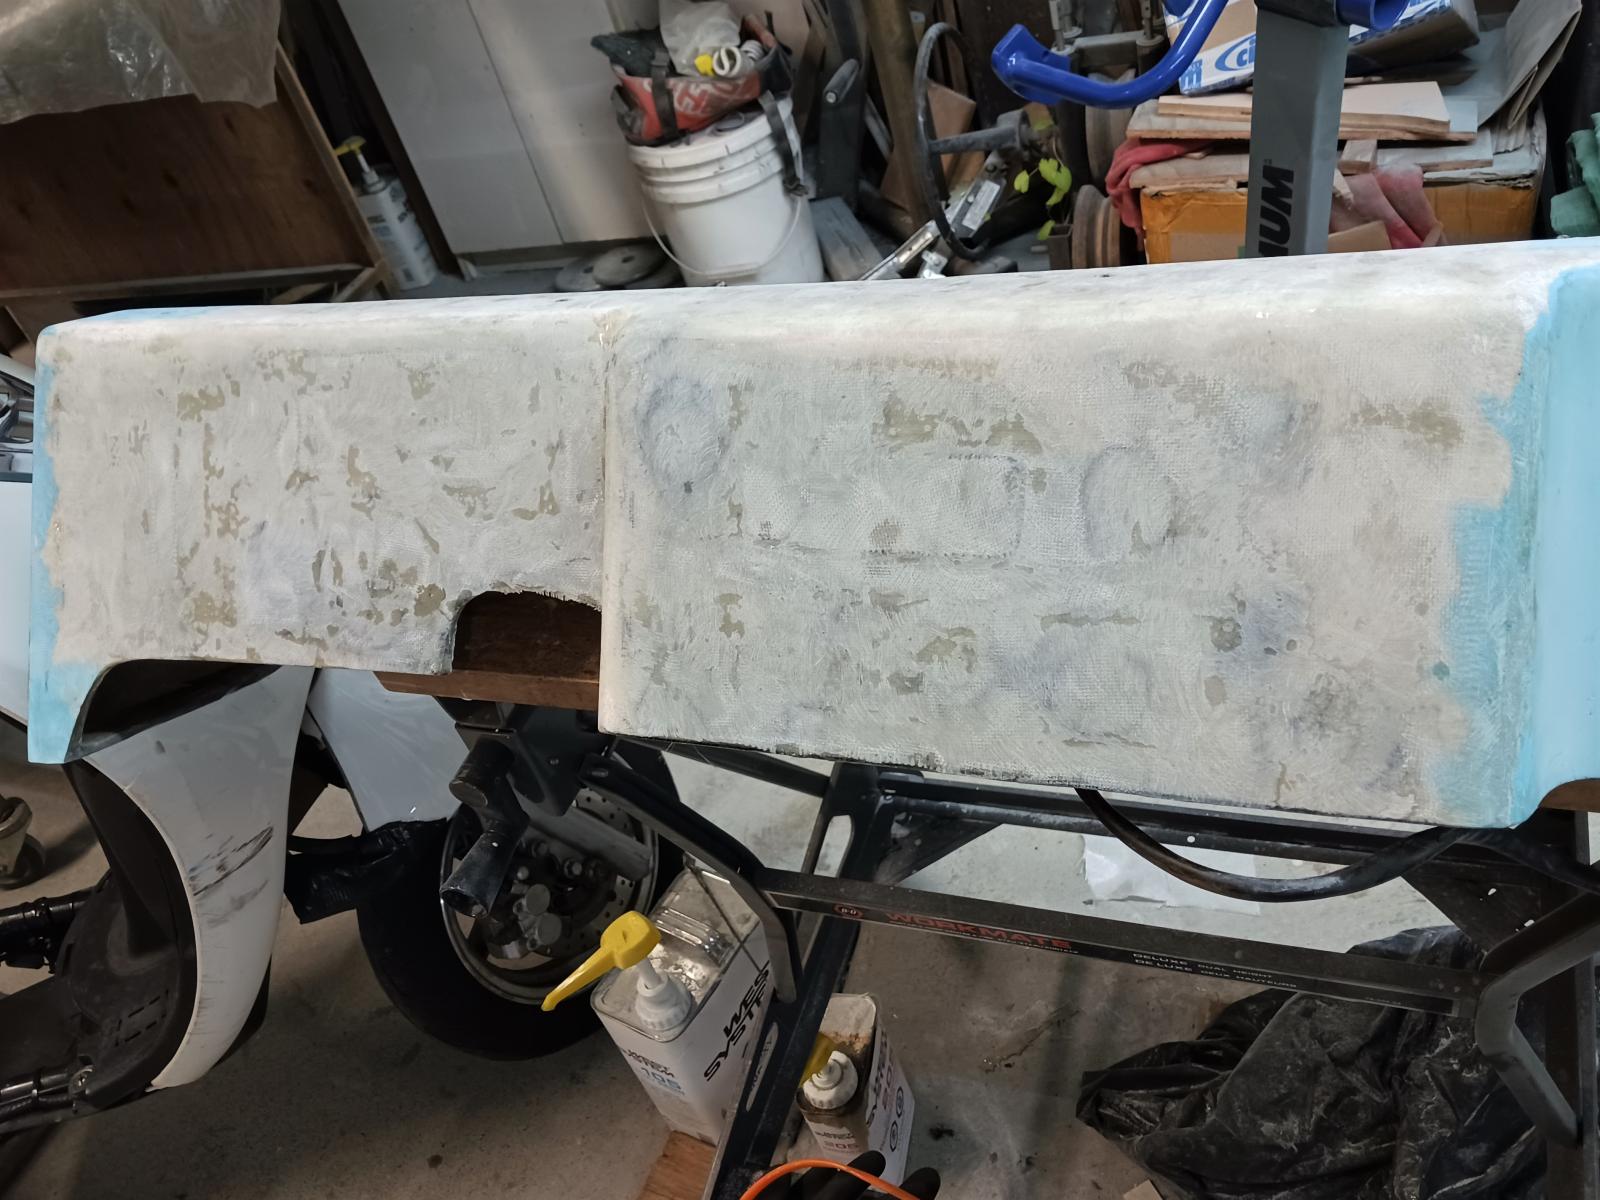 |
|
|
|
Post by ocdgarage on Aug 13, 2023 14:14:41 GMT -8
Small update: the cowl is bolted on, the wiper support mount is glassed in and the body is back on the chassis. Plan is to mark the location of the air ride switches/gauge and GPS speedo to be cut out. The dash face is only in 36 grit finish here, a good block sanding should get the last low spots. The dash opening for the steering column will need to be re-shaped before it can be mounted again. I'll likely add a flange to the front bulk head as a pass through for the column and put a leather shifter boot over it as a seal. Don't let all those holes worry you, there'll only be five gauges and a speedo. 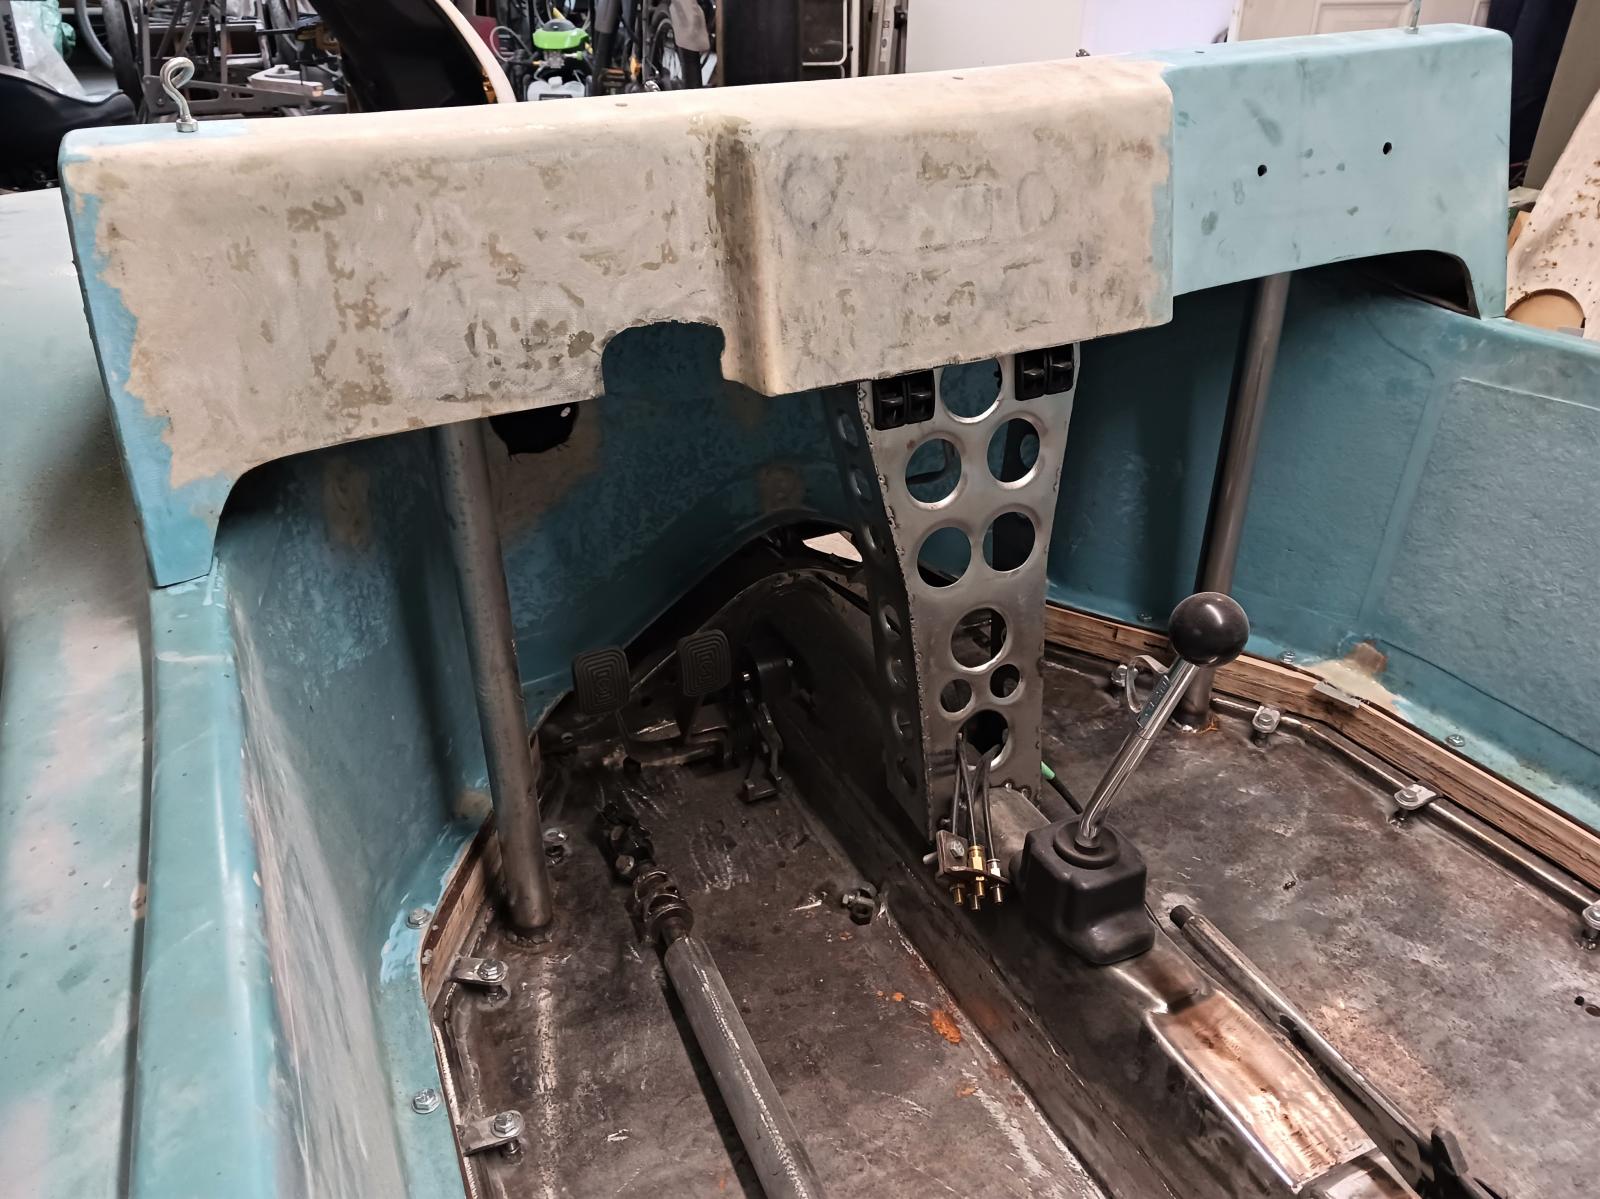 You can still see a few of the holes through the fiberglass. Of course, some of the shapes are from me drawing the patches with a black sharpie. The rear mounting flange was cut too narrow and originally the mounting holes were right on the edge and broken, so I widened it about 3/4" all the way across. There were extra mounting holes around the tub needing to be filled and the driver's side lower rear corner of the tub was cracked/weathered, along with the mid section flange on the passenger side. Battery tucks in nice and tight, leaving room for the roll bar on the outer side, later in the build. Slowly getting there.  |
|
|
|
Post by ocdgarage on Aug 13, 2023 14:16:43 GMT -8
Holes for gauges/switches in process today. The speedo opening needs to be about 1/2"-3/4" larger in diameter and the steering column opening needs trimming. Alternately I could drop the column about 1/4" so the cowl bolts down correctly. The bottom edge above the switches needs to be trimmed flush and the silver rimmed air ride gauge painted black to match the others.  |
|
|
|
Post by ocdgarage on Aug 13, 2023 14:21:05 GMT -8
Finished trimming around the steering column, now the cowl bolts on again without issues. Also trimmed the lower centre dash where the air ride switches and gauge are. 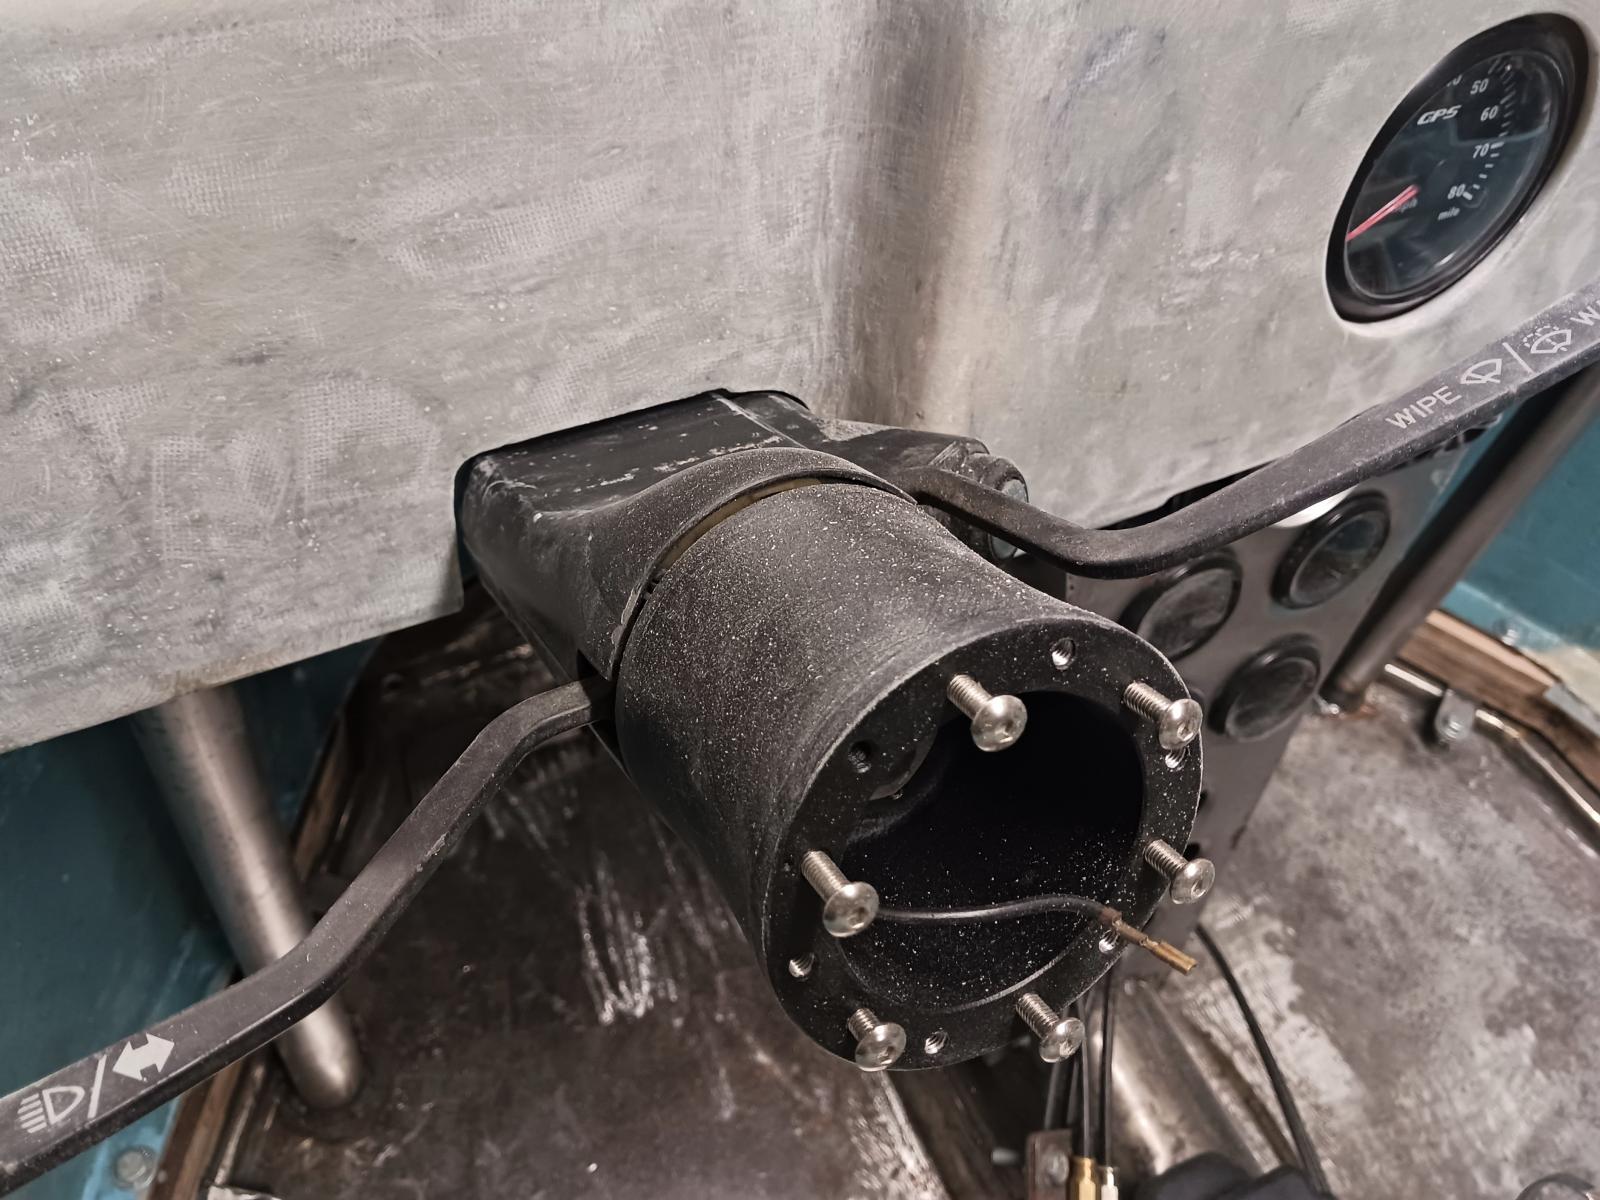 Once everything is bolted down tight with the roof and windshield in place, it may require trimming the speedo opening as the cowl/dash will likely flex, changing the location slightly. I've got the roof on now, trying to figure out my next move with the windshield modifications.  |
|
|
|
Post by ocdgarage on Aug 13, 2023 14:25:33 GMT -8
|
|
|
|
Post by ocdgarage on Aug 13, 2023 14:33:26 GMT -8
Someone once described it as looking like a "Clown Car" because the proportions are all off (in his eyes). I was originally planning to build a stand-alone windshield frame and going topless, but the roof kinda sets it apart and definitely adds rigidity to the body. Even the long wheel base version of this (rare) buggy did not get a roof. My revised plan is to modify the windshield mounting to eliminate the 1.5" wide black rubber seal which makes the windshield even smaller. I plan to widen it a couple inches and convert to a glue-in mount by adding a fiberglass lip similar to a modern car. I thought about using mild steel but felt it would add too much weight to an already heavy top. As you can see I used the edge of a length of 2x3" tube as my form, with a layer of duct tape as a release agent, fiberglass cloth I had on hand and epoxy.   I expect the fiberglass angle to be trimmed to about 5/8" x 5/8" as I'd like the windshield a bit more flush with less surrounding edge.  |
|
|
|
Post by ocdgarage on Aug 13, 2023 14:39:02 GMT -8
After trimming/shaping the upper section of angle, it was 'glassed into place and cleaned up once set, the bottom piece will be next, followed by the sides. Again, the flush trim bit was used, this time to enlarge the old opening along the top using the new angle as a guide. The new channels will create a framework that allows more frontal area without the 1.5" wide gasket obscuring the forward view. In addition to widening the windshield, the sides of the pillars will also be trimmed to make them look lighter in profile.  You can see where the old opening would have been, the windshield was designed to be very short with thick, heavy looking pillars and the fat rubber gasket helped make the glass even smaller. The side channels will be glassed in 3/4" from the inside of the pillar making the finished windshield 2" wider, 1" higher and 1/2" lower along the bottom.   |
|
|
|
Post by ocdgarage on Aug 13, 2023 14:41:29 GMT -8
Still building up layers to increase the strength of the frame and square the edges. Current plan is to round the corners similarly to the original windshield. There's a huge reduction in the blind spots which really opens up the forward view. I think the work will be worthwhile once finished.  |
|
|
|
Post by Volktales on Aug 13, 2023 21:07:14 GMT -8
Wow! You certainly have been busy! I like the fact that you are designing and fitting everything together carefully. If you had seen some of the buggies I have worked on in the past, then you would know most of them were built without any care or even common sense...
|
|
|
|
Post by ocdgarage on Aug 15, 2023 19:24:28 GMT -8
Thanks for the compliment. Not my first build, but may be the last major one if I ever plan to retire. I've been working a couple hours per day + weekends fairly steadily for about two years. This fiberglass work is time consuming as you can only do so much, wait for it to fully cure, grind a bit and resume. At least it will never rust! I'm having fun using my old skills, learning some new ones and connecting with others' in the hobby both locally and online. I hope to have it drivable/showable by next summer, finished the one after that. I'm sure you'll see me out at meetings once the workshop gets cold in the late fall, but until then every evening is work night!  |
|


 . It is a much different animal from polyester and as long as one sticks to proper measurements, it will set up fine. Might be less caustic, but please do wear gloves.