|
|
Post by PICTUP on Mar 16, 2016 17:03:39 GMT -8
Where was your mind?  That question is never to be asked of Tony   |
|
|
|
Post by PICTUP on Mar 27, 2016 8:49:25 GMT -8
|
|
|
|
Post by PICTUP on May 11, 2016 21:49:45 GMT -8
I figure I should finish this series off… First how does water exit the deck with full bulwarks? Scuppers of course! Now they can be cut in after, but why when they can more easily be done before everything is fastened down. So make up some patterns and with an eye to where water might sit/exit from the sheer line, along with what joints in the deck are below the openings, and where I have to put fasteners thru the bulwarks to the underpinnings below the decking. So here are the scupper patterns in place 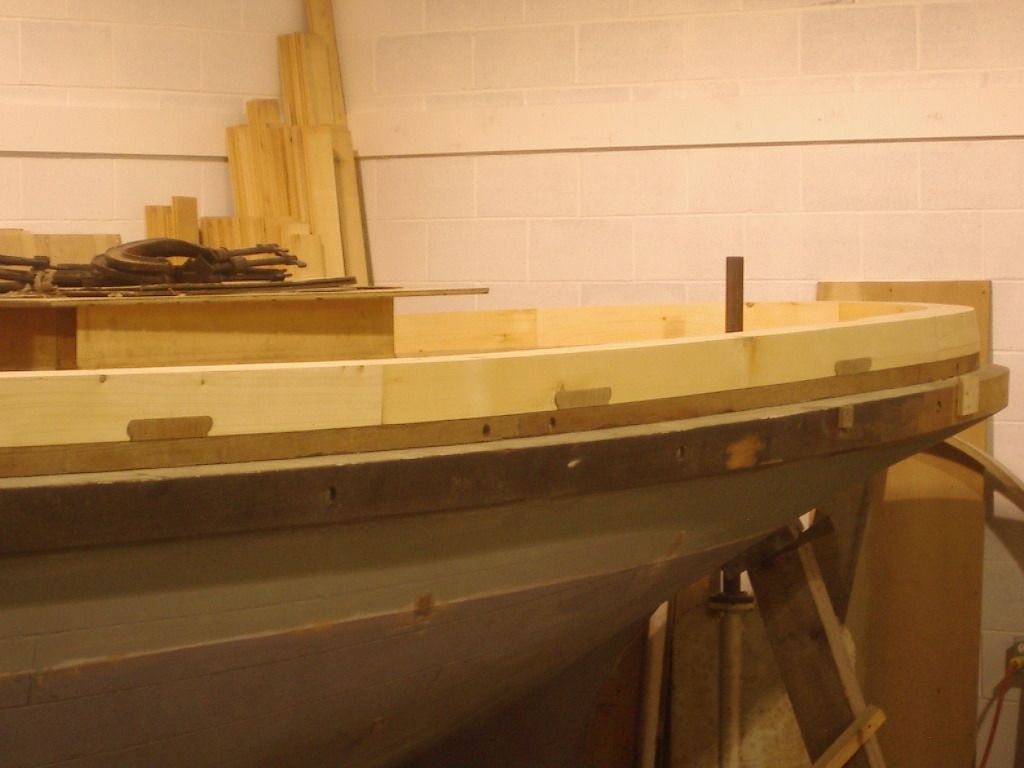 Cut a clean hole straight thru… start with a clean cutting big bit for 1/4" or so on both sides 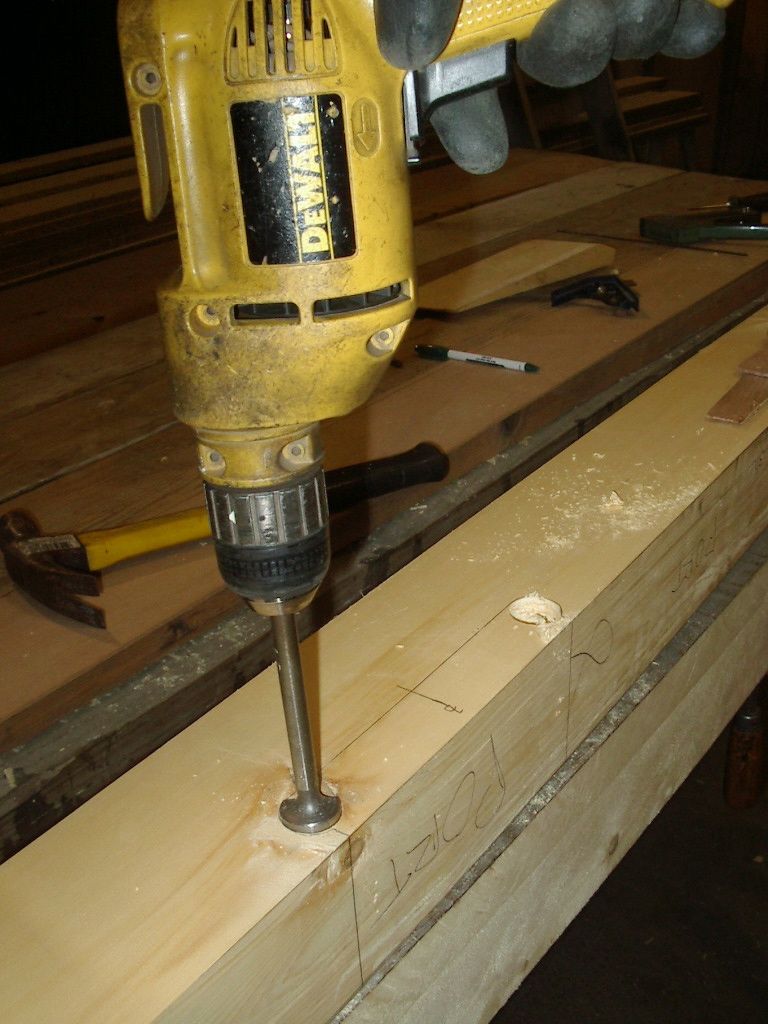 Ever seen a bit like this? They are very old and still very good! 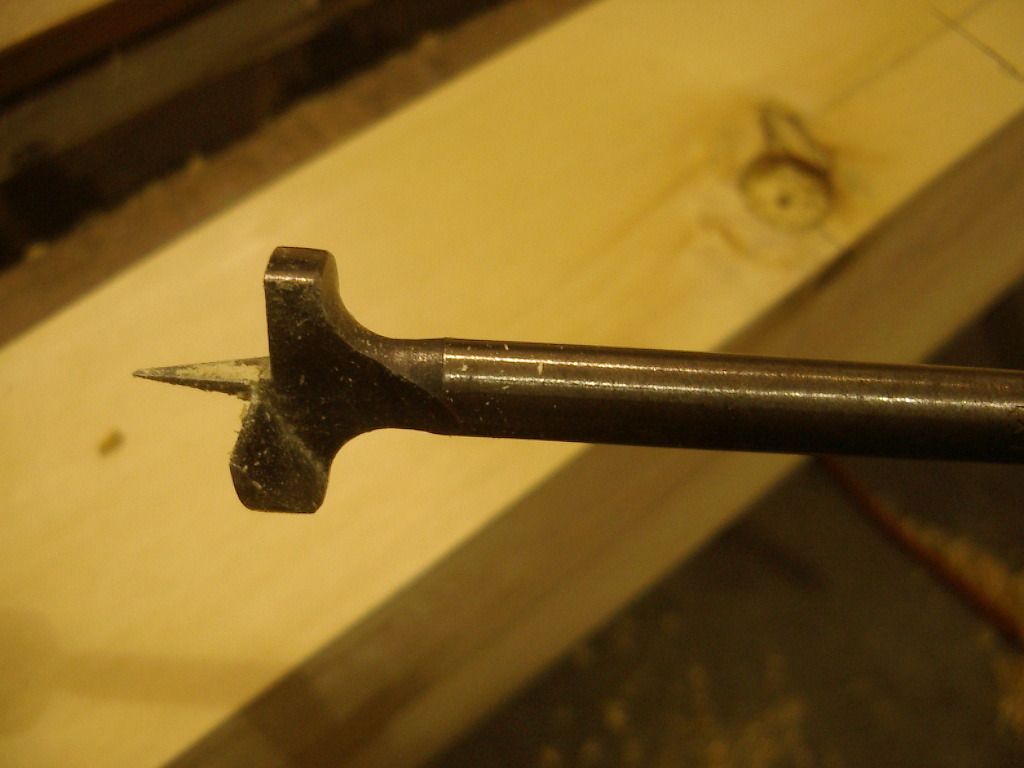 Join up the holes from both sides with a longer narrow bit  Use the small hole as a pilot hole and join up the larger bore  Make some relief cuts 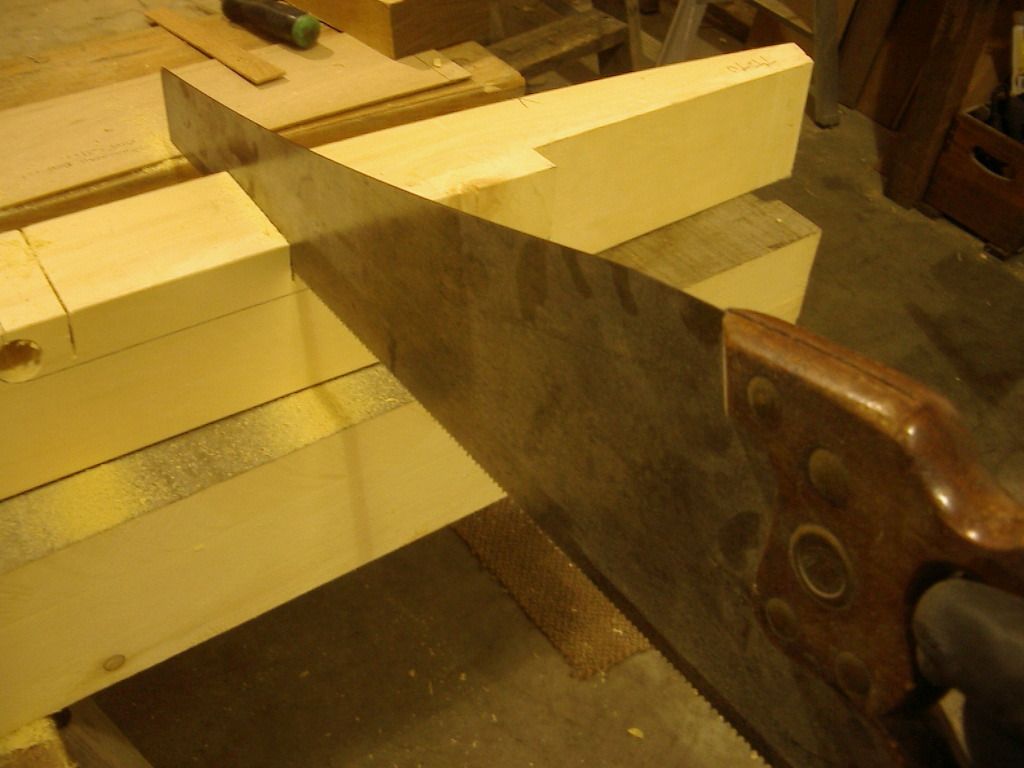 And remove the waste wood 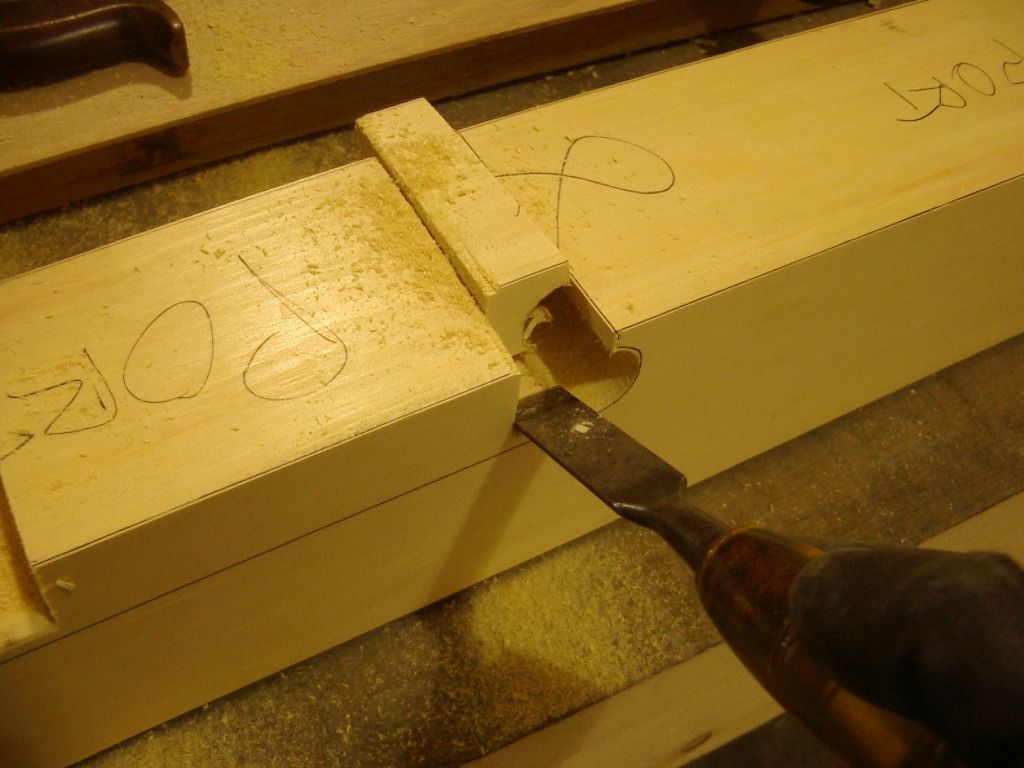 And after a bunch of careful edge tool work and ta-daa! Scuppers!  Then since the inside faces are hard to work on, the graving pieces had to be made to fill in any open knots. About a 1/4" deep did the trick and I epoxied the graving pieces into place after taping off so I didn't have a bunch of epoxy to clean off the wood(messy and dulls edge tools) 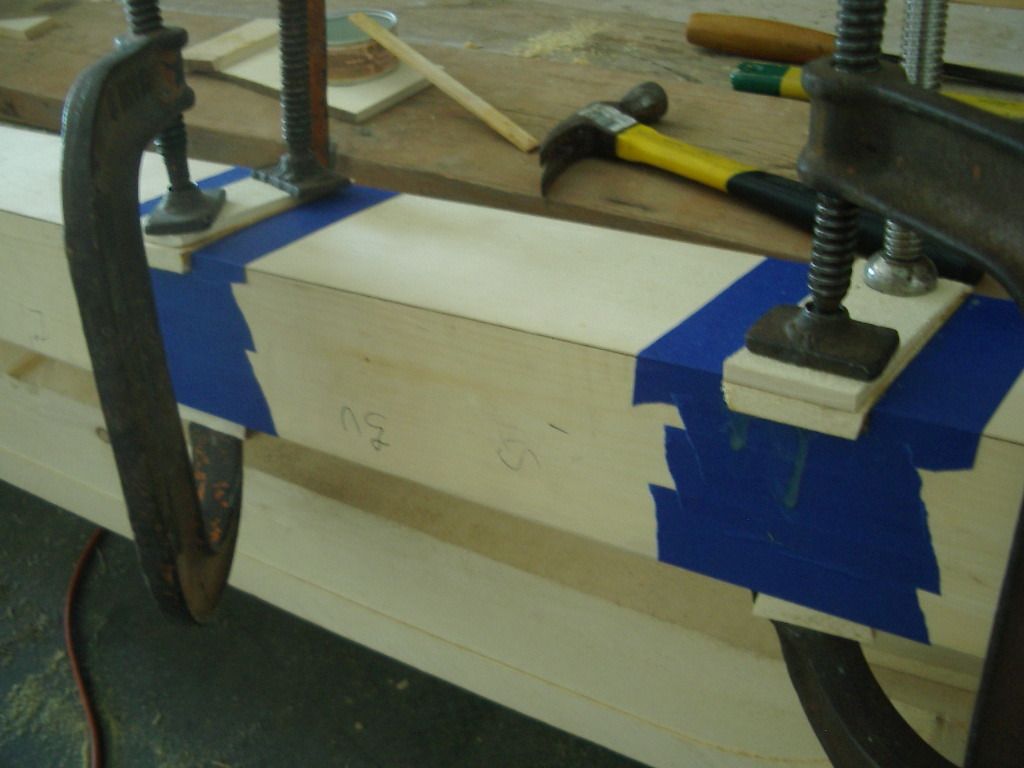  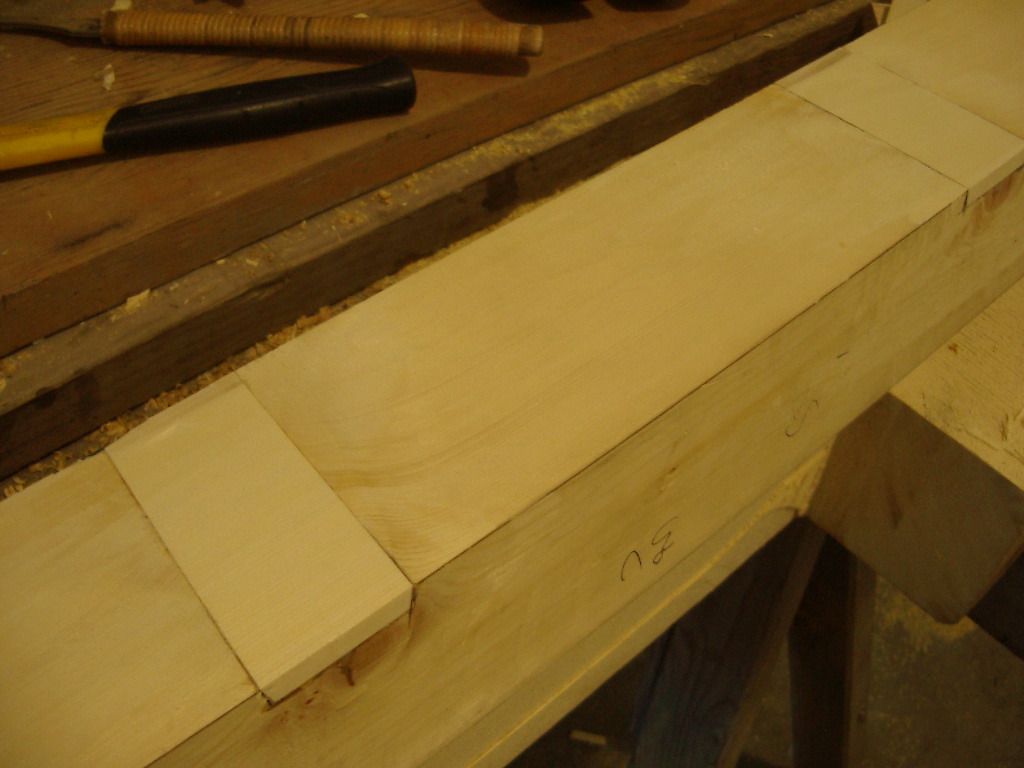 |
|
|
|
Post by PICTUP on May 11, 2016 22:26:47 GMT -8
|
|
|
|
Post by tony on May 12, 2016 6:08:43 GMT -8
Excellent tutorial for those of us planning on rebuilding an old wooden tugboat in the future......thanks Don |
|
|
|
Post by Volktales on May 12, 2016 6:56:02 GMT -8
Have you picked up your tugboat project, yet Tony?
|
|
|
|
Post by 68IIIbuggy on May 12, 2016 6:56:40 GMT -8
Wow, very impressed with your work  |
|
|
|
Post by Wongai on May 12, 2016 9:11:44 GMT -8
Man - That's looks awesome. I'd have that black stuff all over me and the deck of the boat in no time. Well done man!
B
|
|
|
|
Post by busaddict on May 14, 2016 1:02:59 GMT -8
The skill level here is impressive, great work Don! |
|
|
|
Post by PICTUP on May 14, 2016 9:35:19 GMT -8
Excellent tutorial for those of us planning on rebuilding an old wooden tugboat in the future......thanks Don Maybe I should do something like this guy does: www.ltv-vwc.org.uk/wheelspin/ws_sept_2000/Venice_Bug.htmExcept it would be a Schwimmwagen, because I will never be able to afford a real one  Man - That's looks awesome. I'd have that black stuff all over me and the deck of the boat in no time. Well done man! B You'd be surprised how many boatbuilders do just that. I have heard stories where guys in shops have played practical jokes on one another using more than their fair share of the goop in each others' tool boxes etc. Ugh, creeps me out! My darn fussy OCD doesn't let me be messy with sticky stuff if I can help it. That said I can be awfully messy other times… Wow, very impressed with your work The skill level here is impressive, great work Don! Thanks guys, I try. And to think I almost failed woodworking in grade 8 and up until the point I took up carving (then later wooden boats) I figured myself a failed woodworker. I used to say to people that a piece of wood placed in my hands would warp. It was only when I wanted a decoy so bad and started carving a piece of driftwood while working out "in the field", did I find I had some sort of potential latent talent.    |
|
|
|
Post by Volktales on May 14, 2016 20:44:30 GMT -8
Yah, Mr.Failure who carves amazing artwork and restores derelict wooded boats... Just remember that I am the master at failing anything to do with making stuff from wood. My motto to live by is "Measure once, cut three times, and fudge the gaps with sealer..."
|
|
|
|
Post by PICTUP on May 19, 2016 19:30:53 GMT -8
Well, the date is set for Burnaby to go to her own digs with her new owners, the Britannia Heritage Shipyard Society, so the pressure is on to finish the little jobs that I have been looking at for too long. The companionway, where you go down into the forward house of the boat has been something of a conundrum for me for some time. Just how to do it? I dunno about you, but having too much time to think about something is not a good thing. Once I finally got to focusing on the problem (plus obtaining the right rough knee) a plan of attack was truly formed. First I fit the post without the house beam in place. Then a pattern was made for cutting the notch the house beam would sit in. I was going to cut the house beam at the post, but I ended up thinking that for future options I should just let it run to the starboard side of the house. I can always cut it off if turns out that it interferes with passage down into the house. Regardless I did carve out the beam somewhat.  Next I made a pattern for the knee that will help take some of the weight of the eventual pilothouse windows. But I wanted the weight transfer not just to be hanging on a bolt, so I let it into the post. 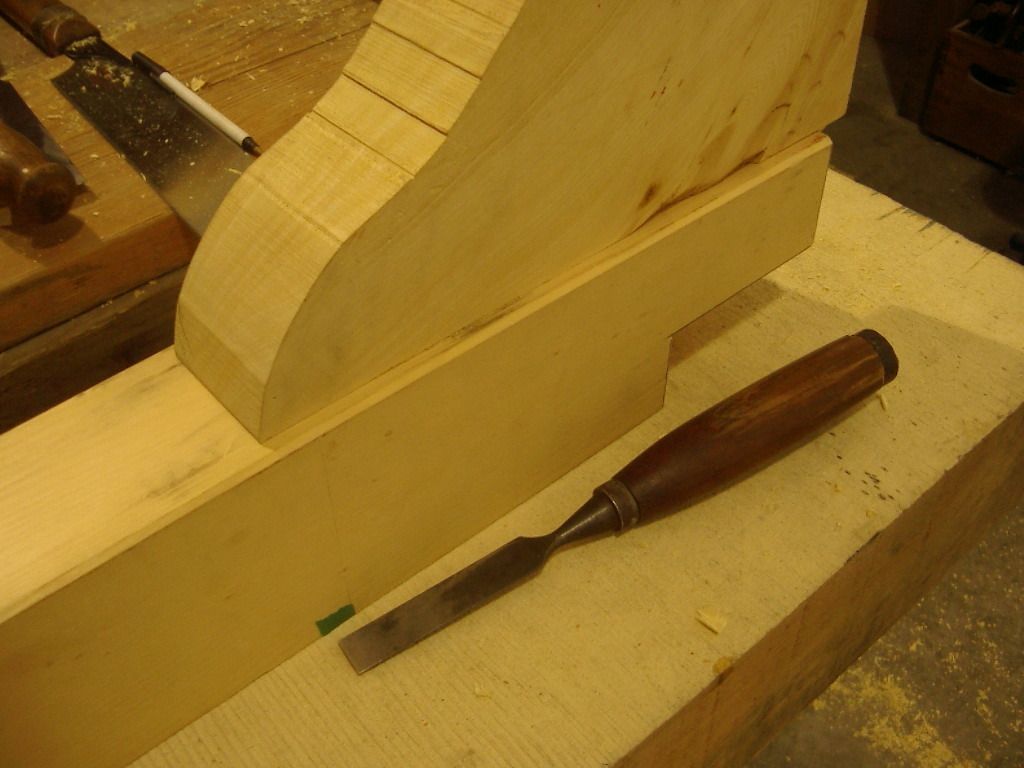 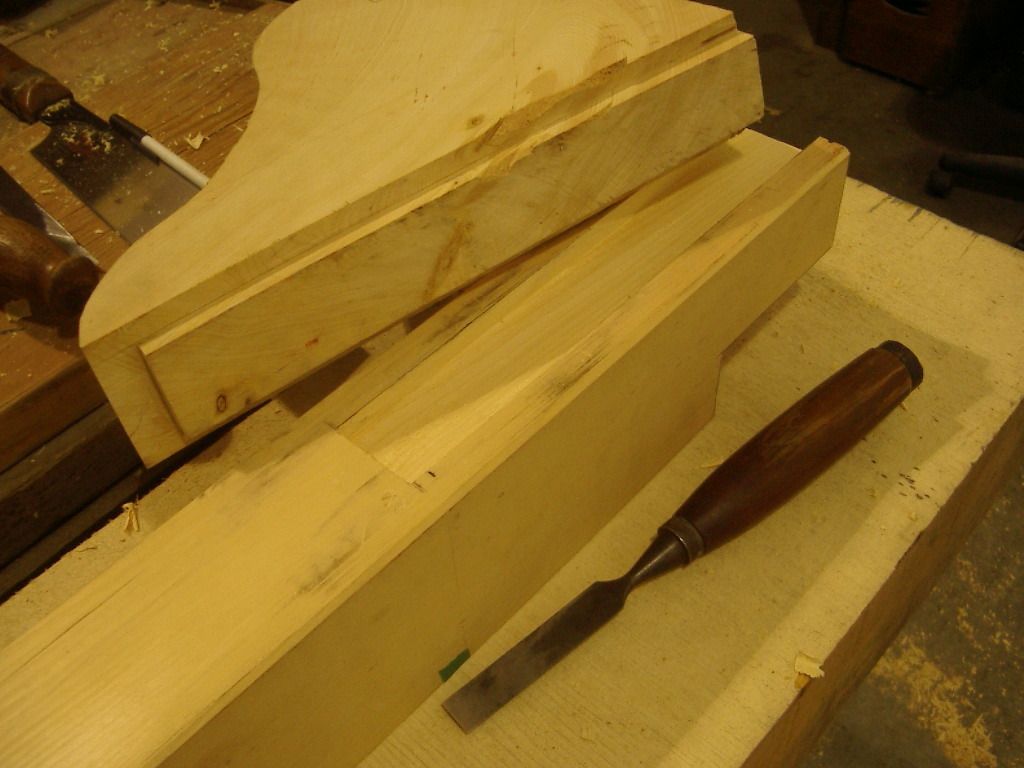 To get the knee notched for the forward deck beam took some careful measuring and bevel taking! This is why boatbuilders always need more clamps At this point it was still in rough form on the curve. 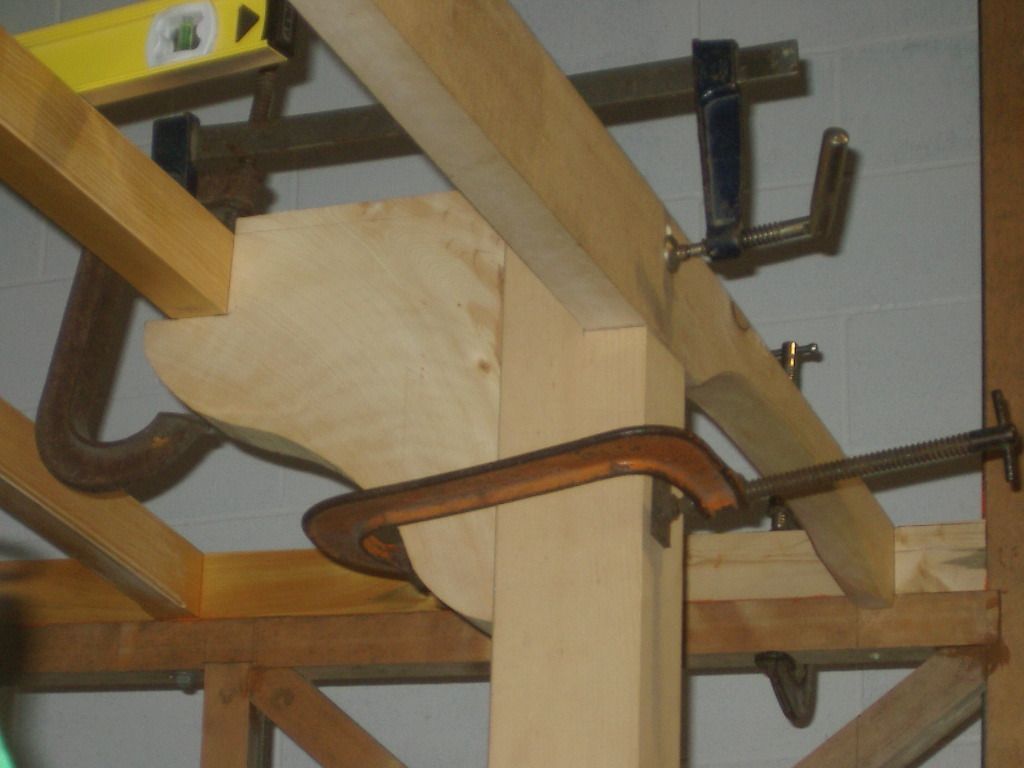 The bolt hole(12 inch carriage bolt) was drilled, then it was on to final shaping. I still might need my big blade so I decided to go with the relief cut method to cope(pun not intended) with the curves.  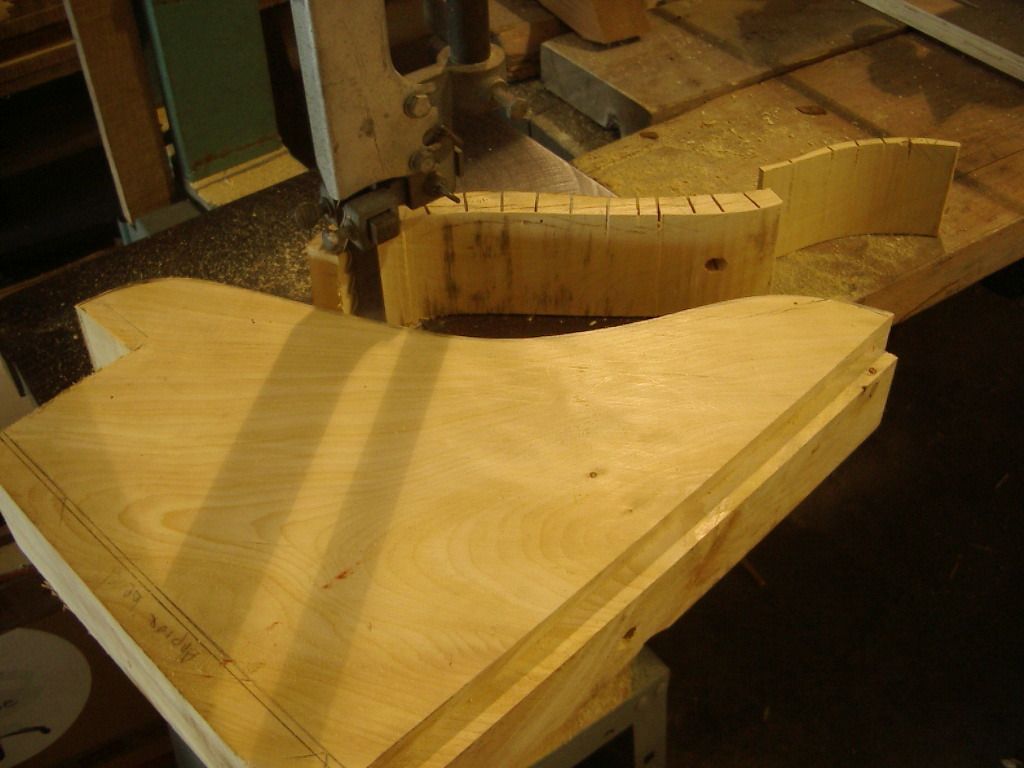 Then I had to countersink for where the washer and nut will seat. More creative clamping before the forstner bit(not that isn't a typo). 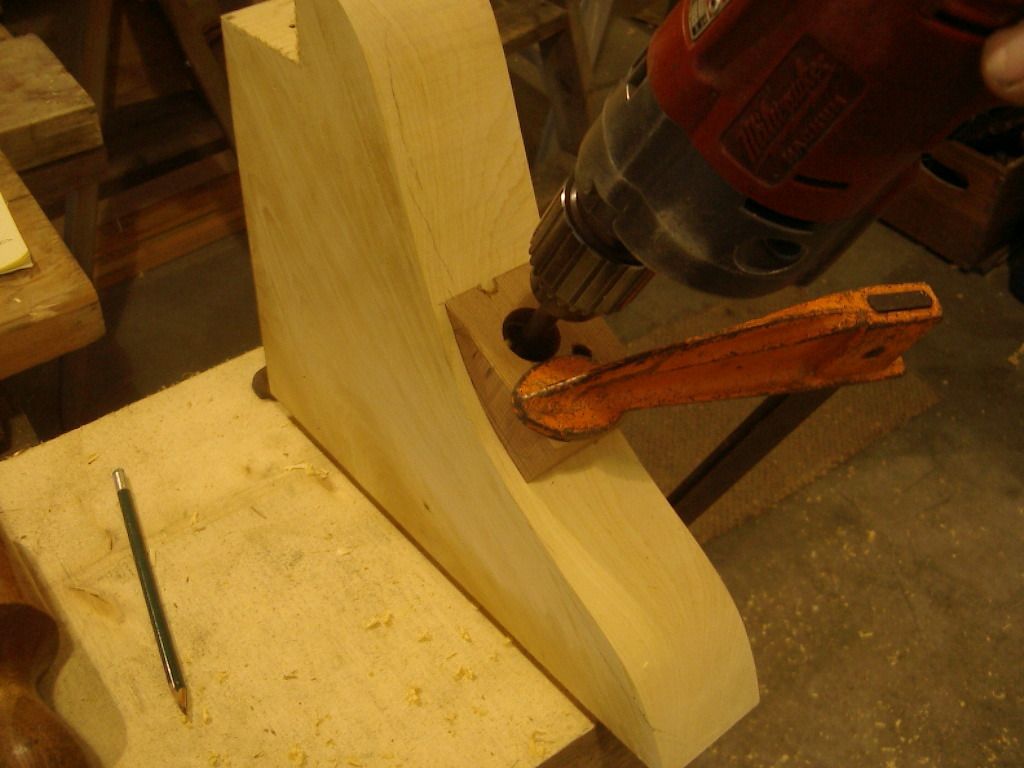 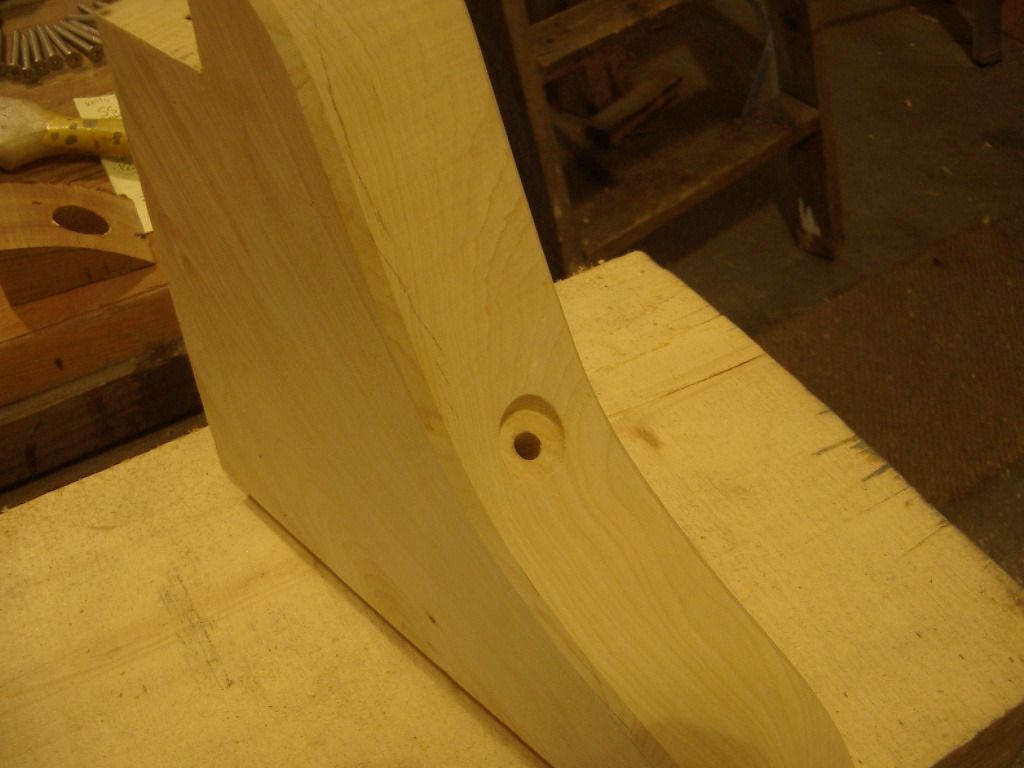 The final shape 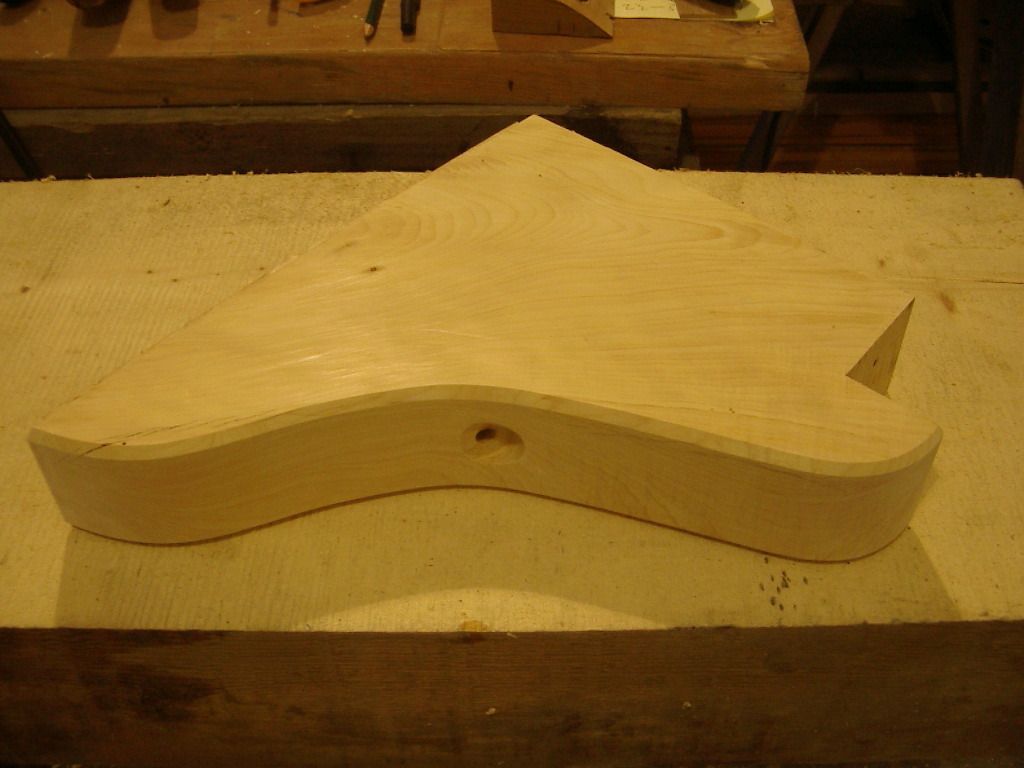 Since it fit tight, I just used sealer for "bedding" 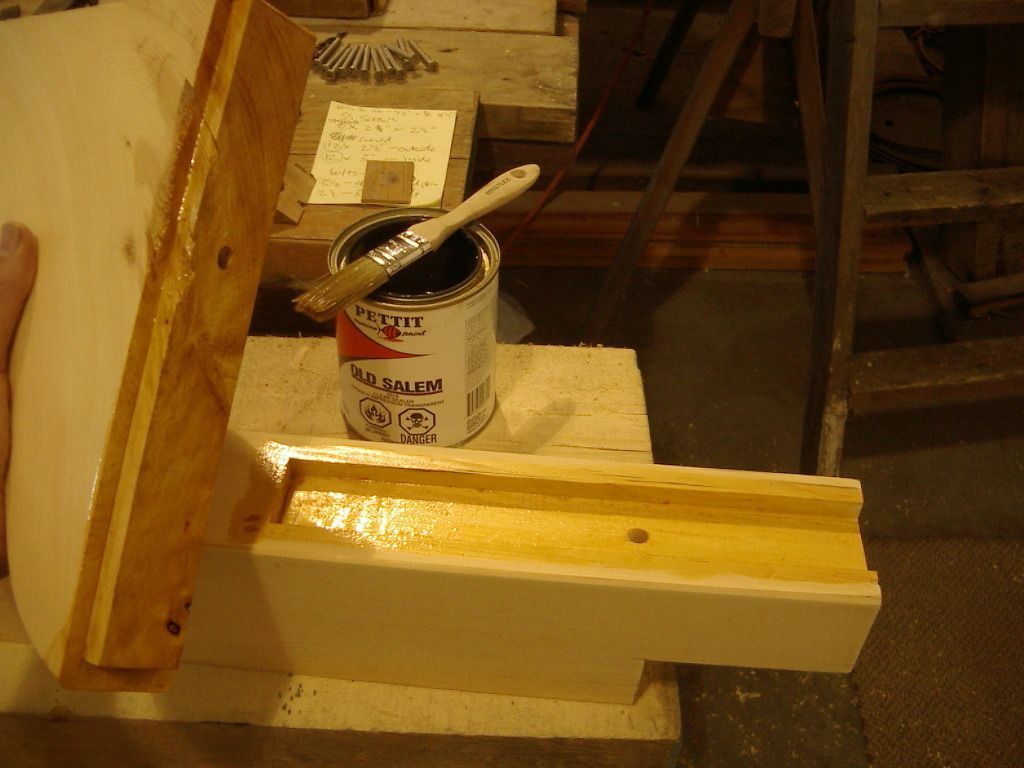 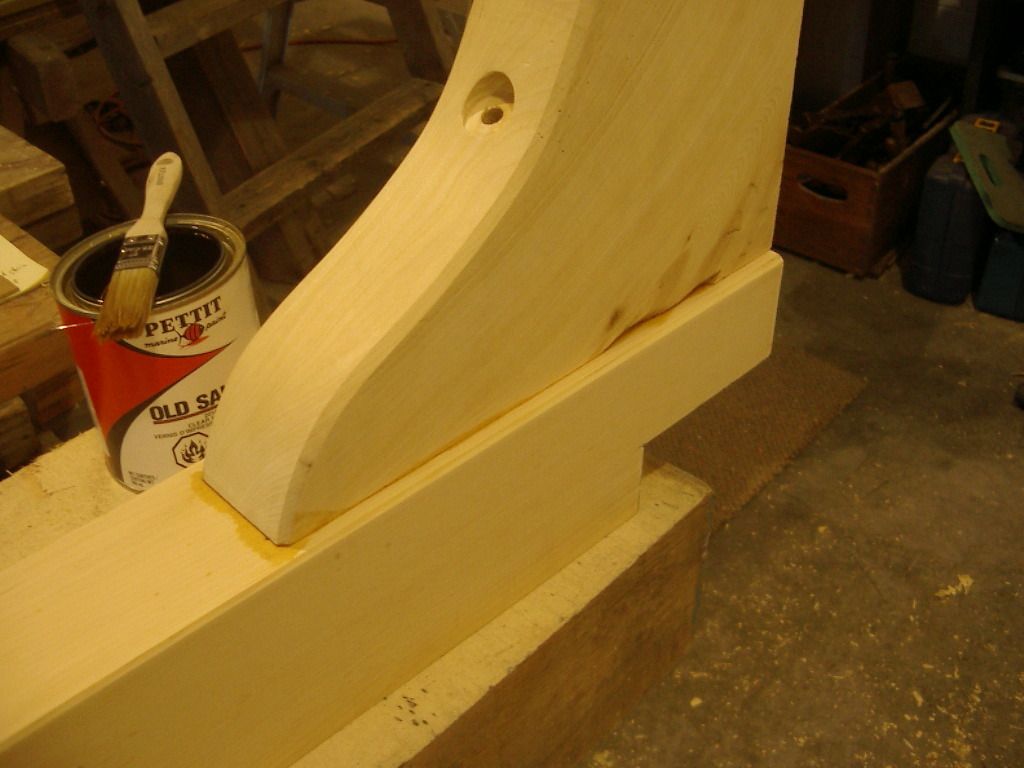 Bit of puzzle to put together…but installed. Even found a square nut 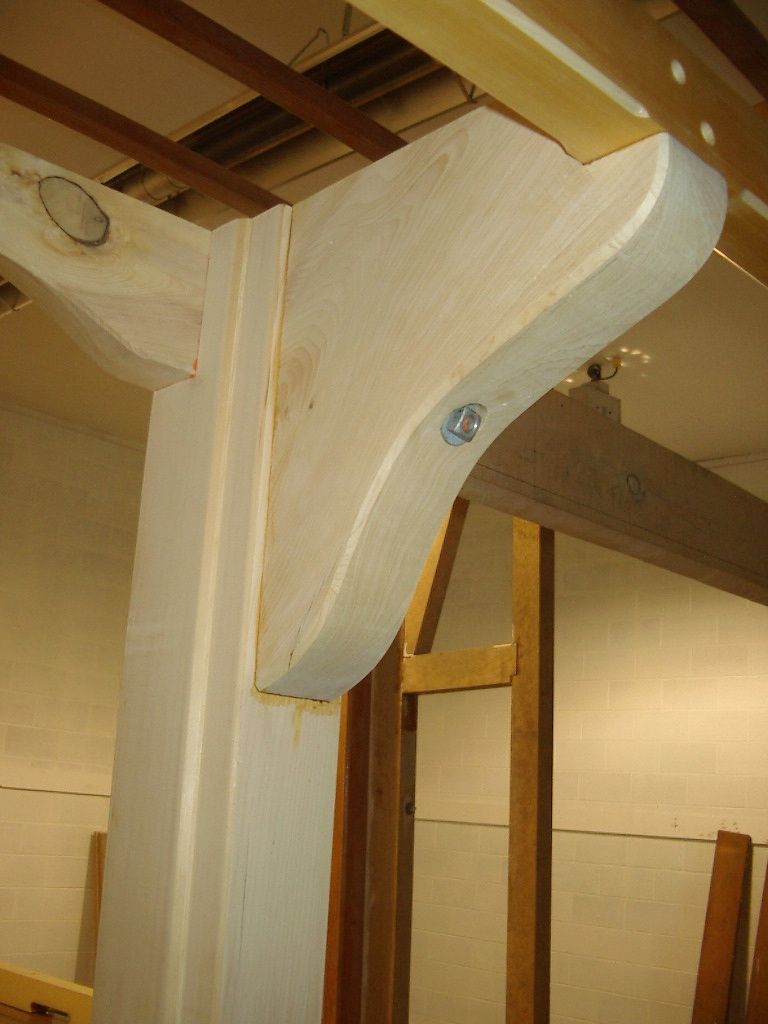 With first coat of finish 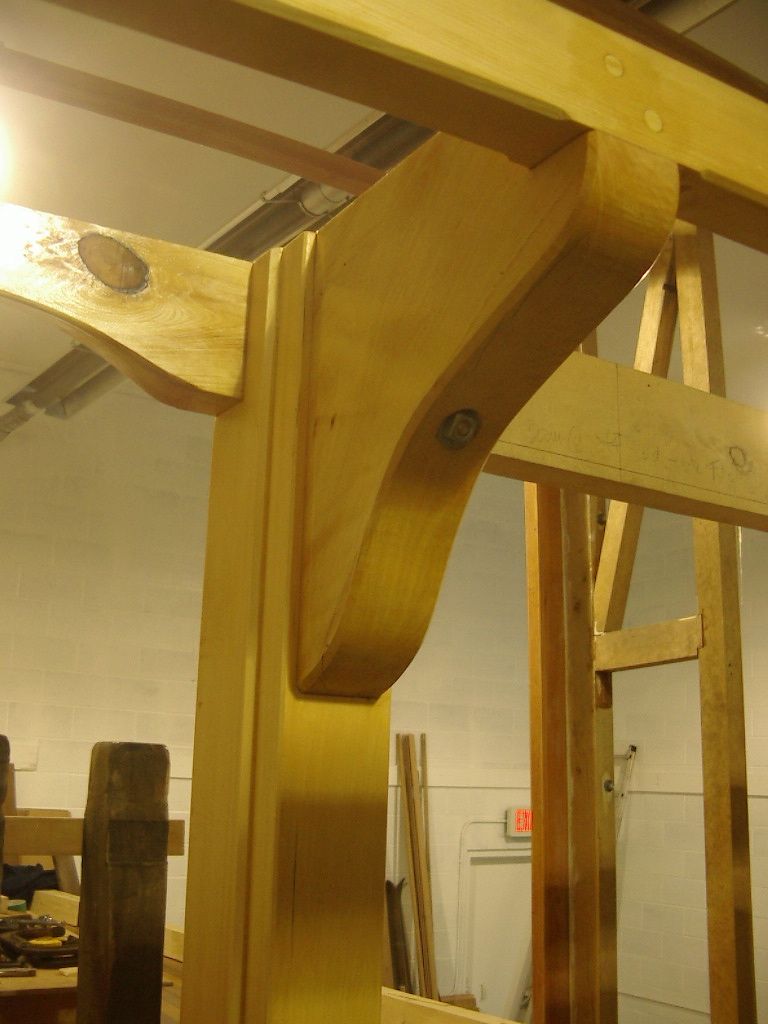 |
|
|
|
Post by tony on May 19, 2016 19:48:10 GMT -8
Looking pretty nice Don!  |
|
|
|
Post by mitchy965 on May 19, 2016 20:02:38 GMT -8
your skill is amazing Don. the only thing i can build out of wood is a good fire
|
|
|
|
Post by CrazyBrit on May 19, 2016 21:24:32 GMT -8
I'll bet that the work you have put into this boat will be of a higher standard than that with which she left the yard when new. It is incredible.
You must be very happy to know that she will soon be moving on, although with the amount of work that you have in her and the length of time that you have owned her, I also expect that it must be hard to see her go. What will you do with all your time and money???
|
|


