|
|
Post by stude on Feb 6, 2016 10:02:00 GMT -8
STUDE GOES TO AUTO BODY COURSE Ya anyway I thought I would share it is a one month course 8 classes hands on 2 hours each time the first class was intro and tools it is held in a body shop and paint booths only 3 people showed up Chevelle guy Tractor guy and me VW guy the instructor said it is a bad time of year but would still put on the class. We all had a panel to repair Chevelle guy had a door Tractor guy a hood/grill and I have a decklid. 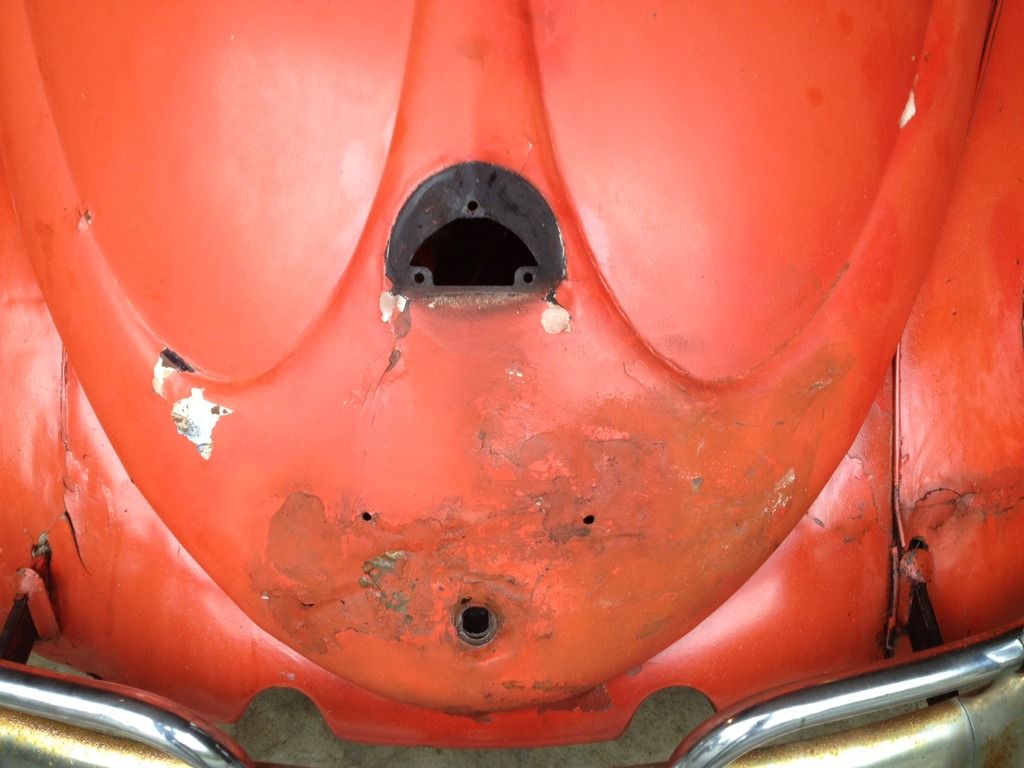 We all laid out our projects and got instruction to progress Chevelle door is in bad shape and was instructed to bring in car to see if the door on the car was better than this one Tractor was told to get molding off and strip paint he has a solid project with big dents I was instructed to drill out the inner support and sand blast clean. We were all told to buy bigger body hammers and dollies plus a gallon of NAPA Gold body filler. |
|
|
|
Post by stude on Feb 6, 2016 10:22:57 GMT -8
I rushed into town next morning and bought the tools and filler plus airplane paint stripper I felt sick after paying for the tools.I was told to drill out the spot welds with a 3/8th drill and to find the spots by sanding with sand paper the show up as small indents once found I was shown that if I drill once the drill has started drill around in a circle to open up the hole but not going as deep. 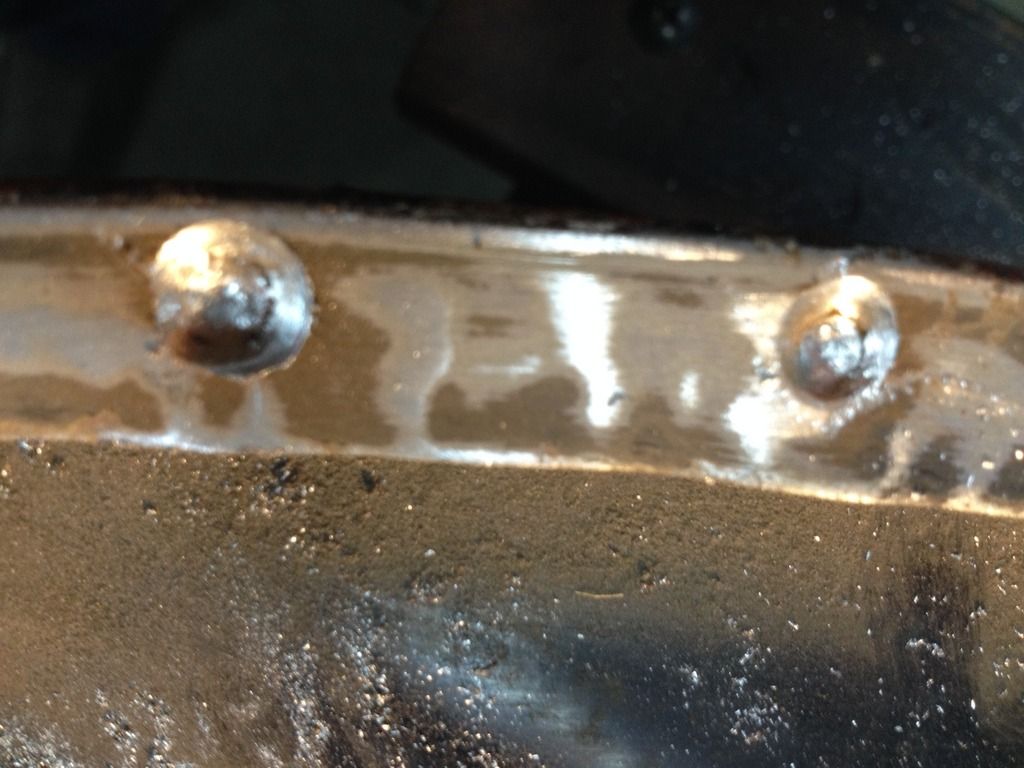 I found that the spots were around 1 inch apart except at the ends where they had a couple close together. 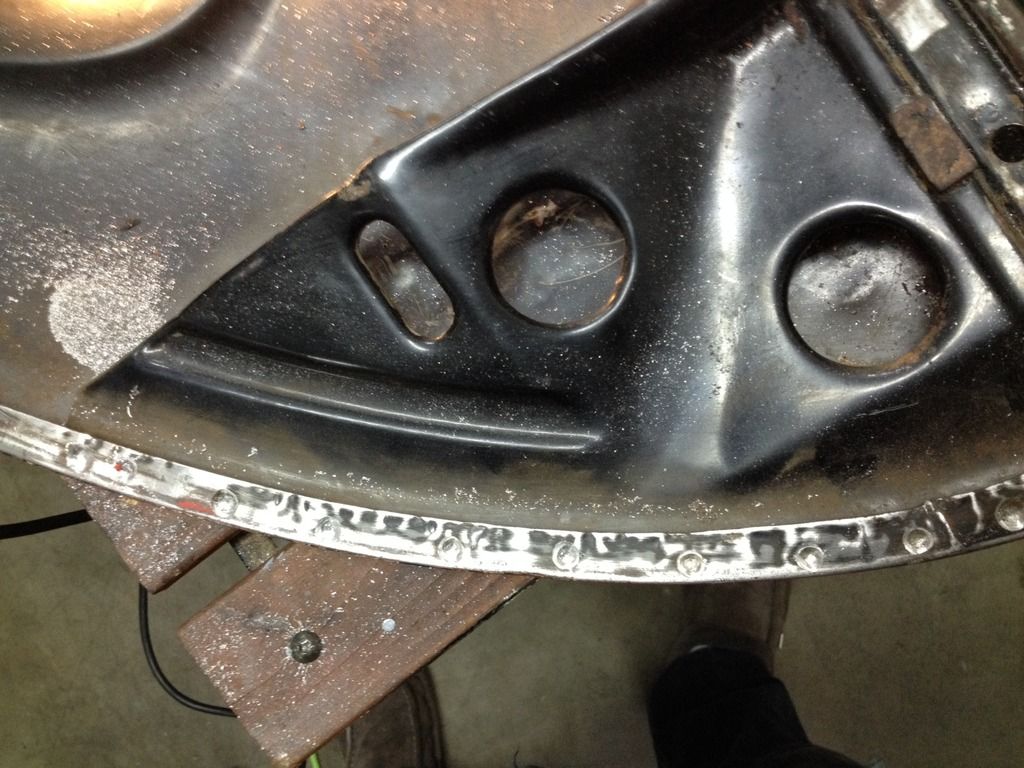 By the afternoon I had it apart using a screwdriver big and small ones and a chisel with a hook shaped end like claw shape. 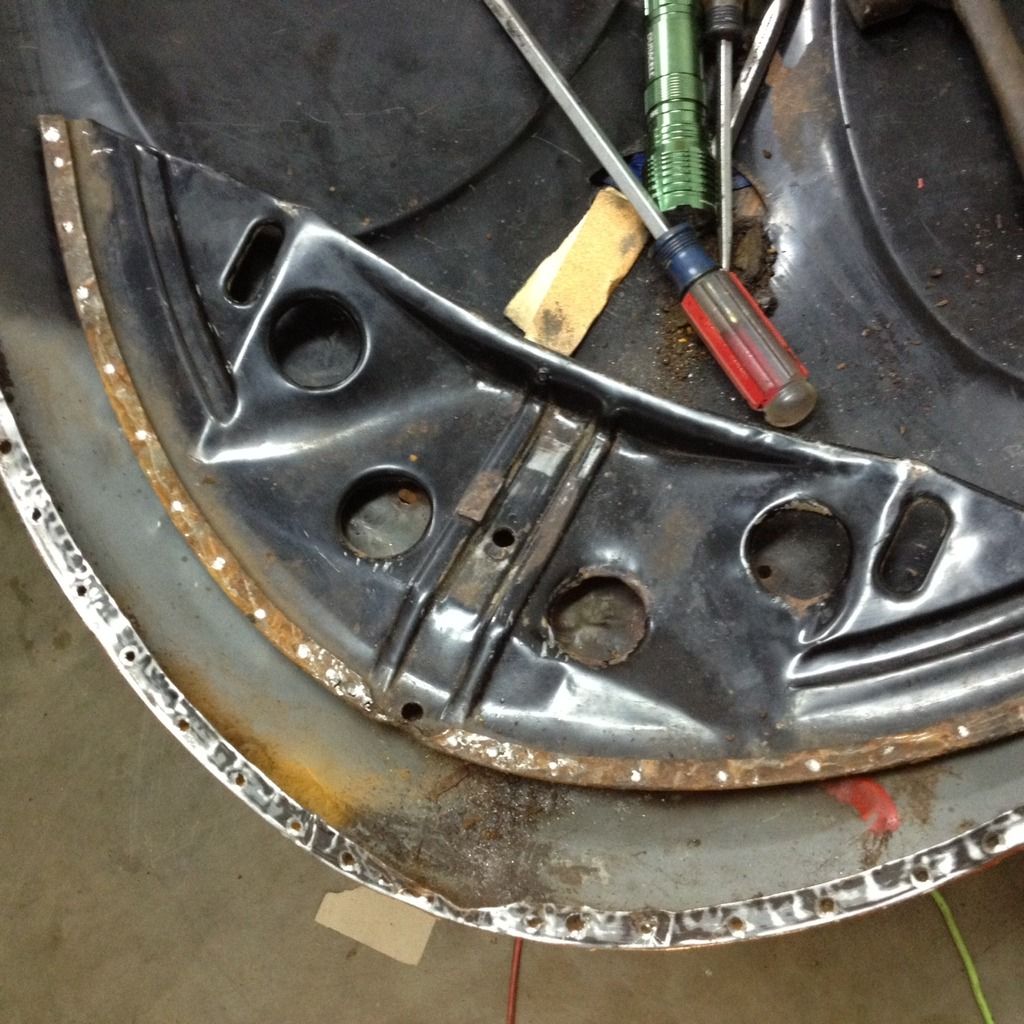 The center piece for the handle had no spot welds. 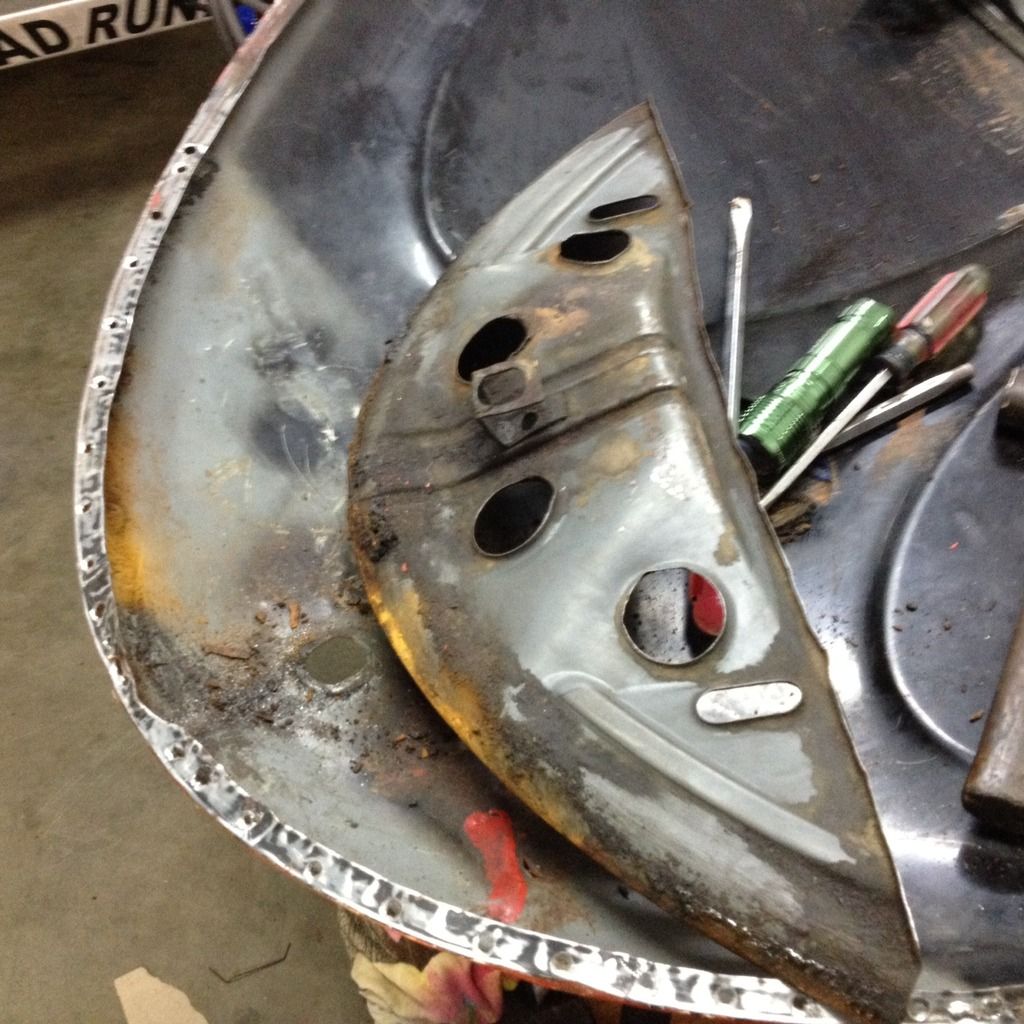 |
|
|
|
Post by stude on Feb 6, 2016 10:38:00 GMT -8
Next day I have another class so I have to get it stripped by tonight so I painted it with the stripper and power washed a few times that stuff doesn't take long. It worked really well on the inside where there was only one coat of paint but the outside there were numerous coat red coral primer white primer black and then gray primer it took a few goes. 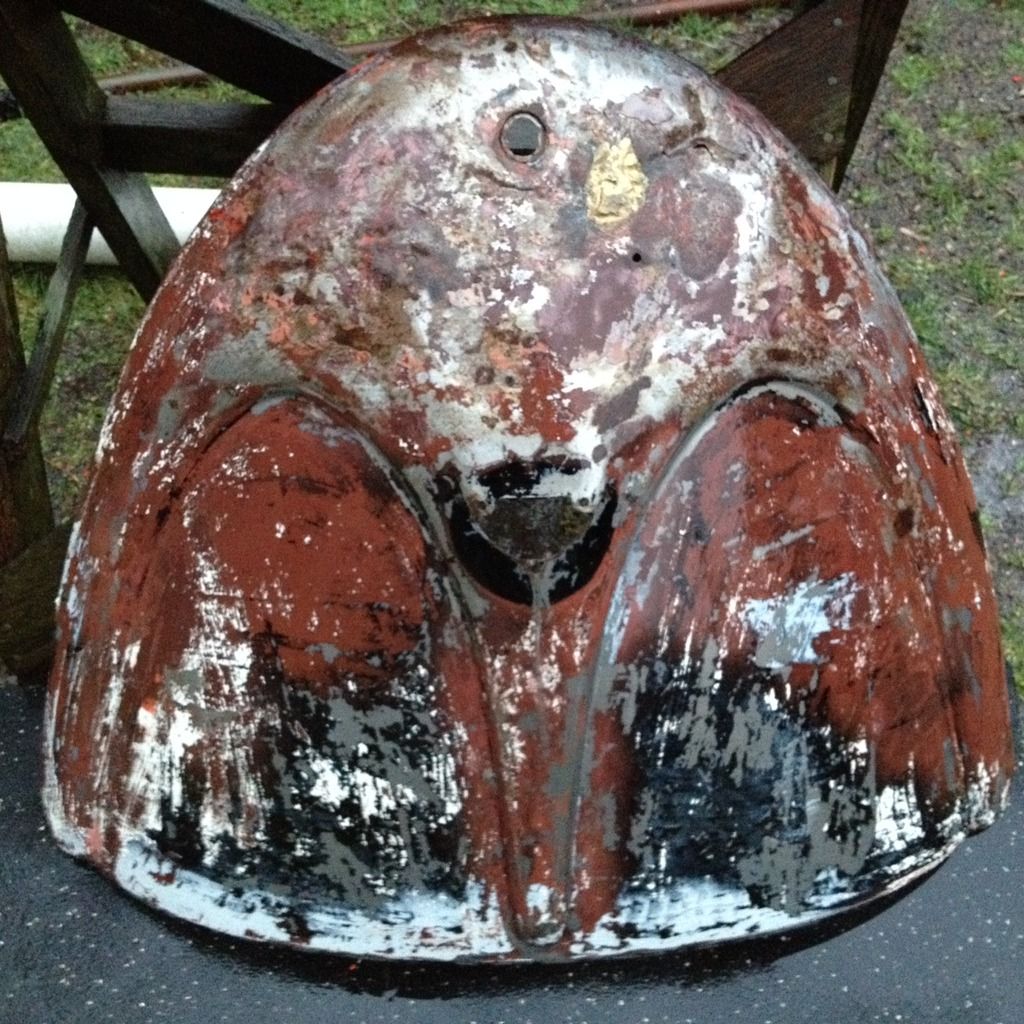 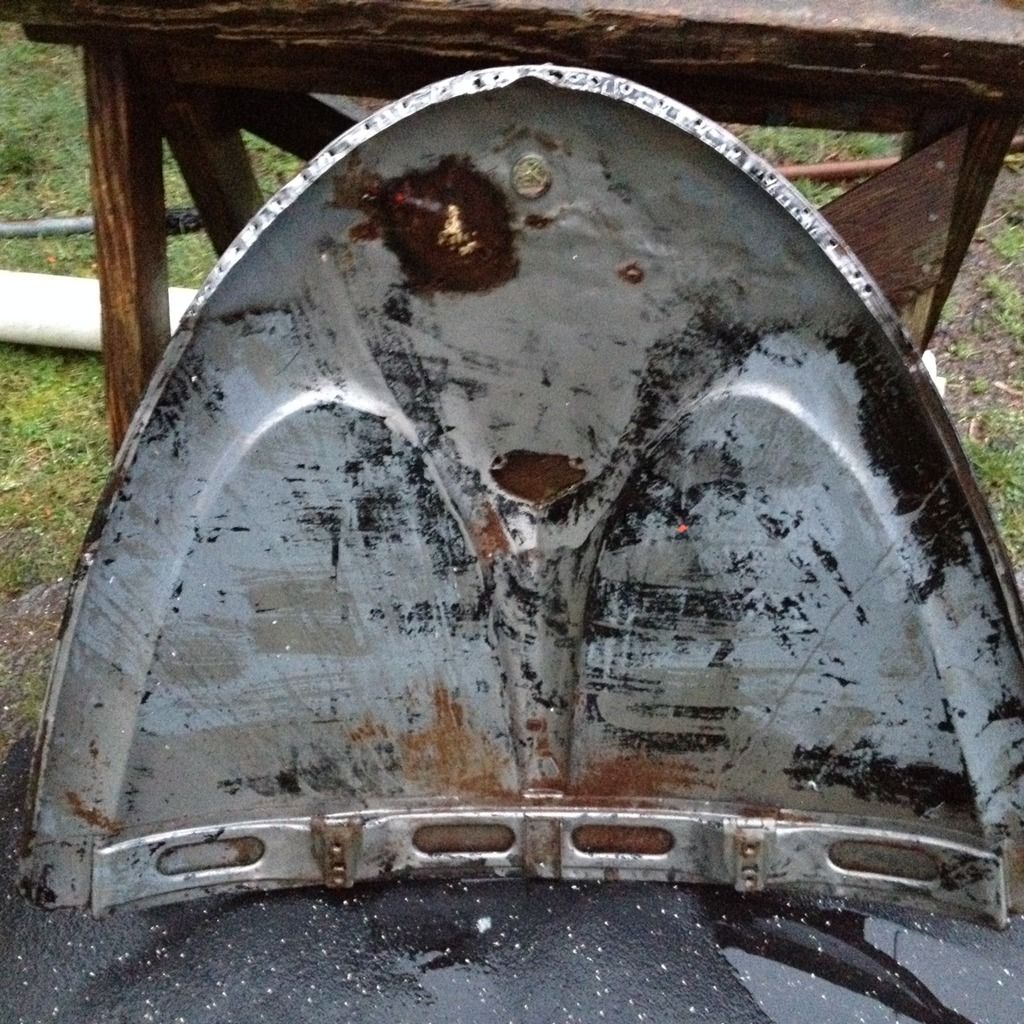 Here is some stamping from the factory on the inside of the support. 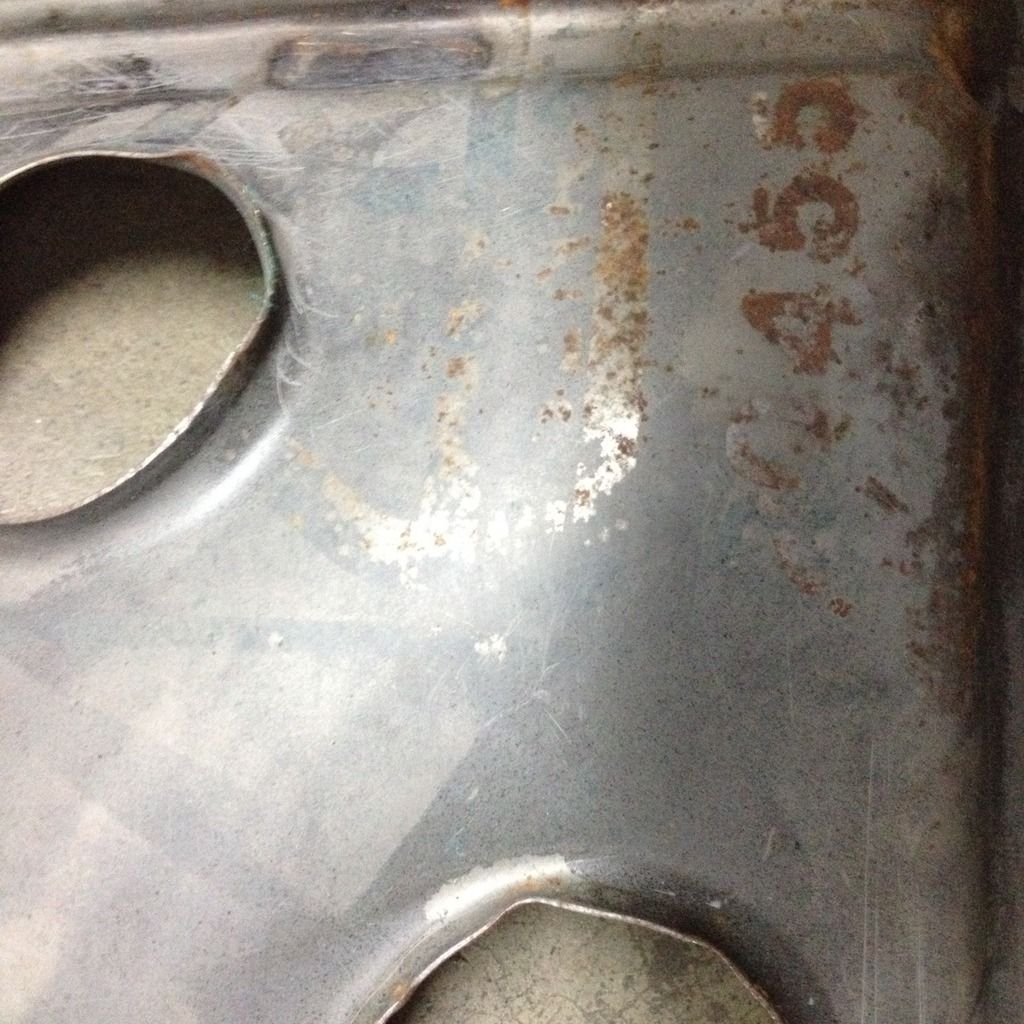 |
|
|
|
Post by stude on Feb 6, 2016 10:53:52 GMT -8
I did some wire wheel work on it before class. That night at class Chevelle guy had his car there and so we looked at the door and the rest of the car the door is no better than his work piece the rest of the car could use some work also and it is decided that for class that he will learn on his work piece and is instructed to tear it down as the window was still in and strip it the Tractor guy didn't bring his piece in as it is welding night.We did welds butt T filled spot welds and holes the T weld were hardest who knew. We looked at my decklid and it was decided that the brazing work in the piece had to be cut and patched.We also used a poly pad on a grinder kind of a heavy poly mesh to remove paint and cleaned up pretty good. 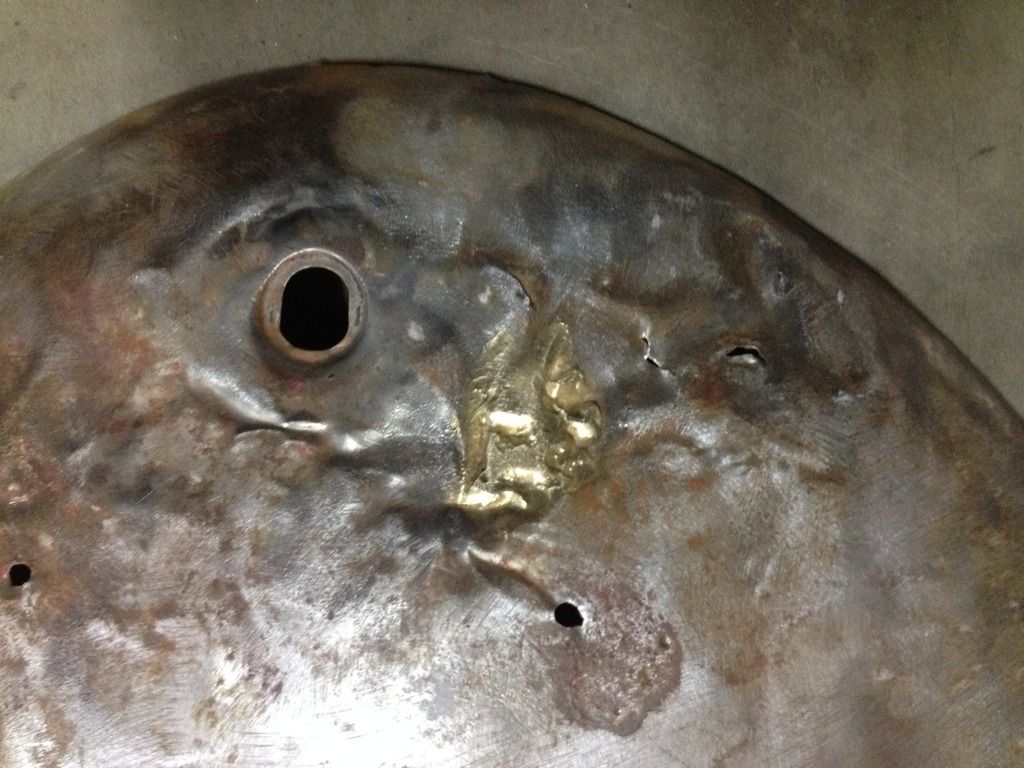 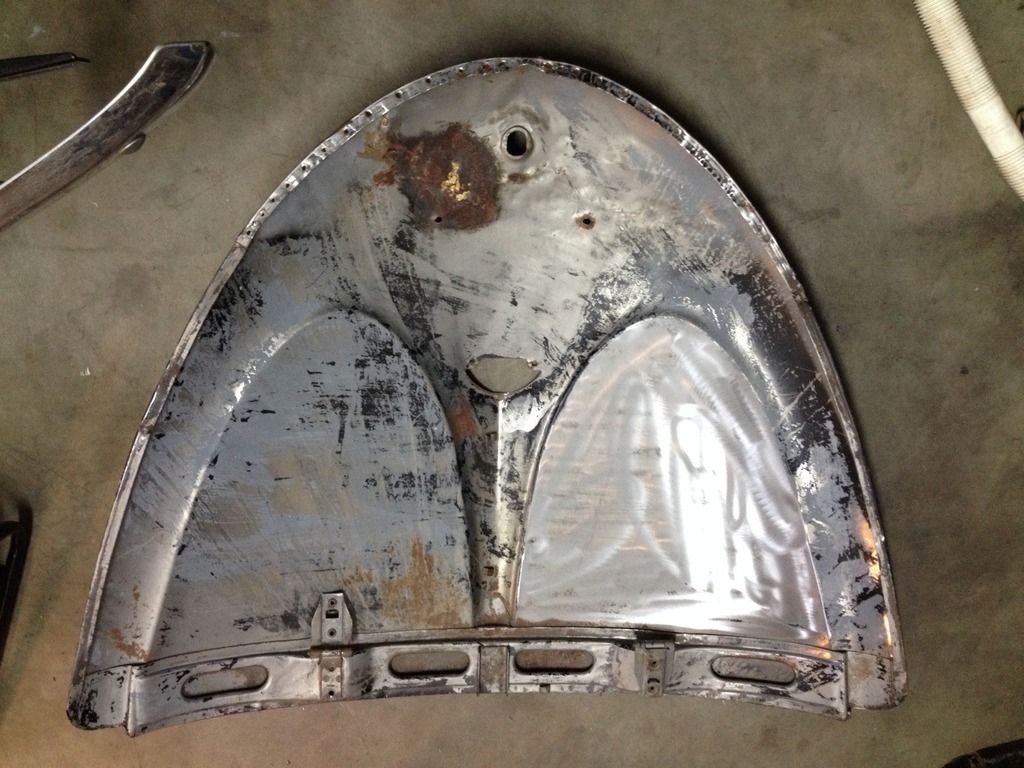 |
|
|
|
Post by stude on Feb 6, 2016 11:25:16 GMT -8
Yesterday was pouring all day so I could do any work outside I choose to crank up the stereo in the garage and start scrape the remaining paint down with razor window scraper I finished up with a orbital sander with a vacuum attachment by this time the stereo cranked I was playing my old cassettes and all of this topped nice dinner with the wife.I have a few days before my next class I am going to get it outside and sandblast the cracks and edges. 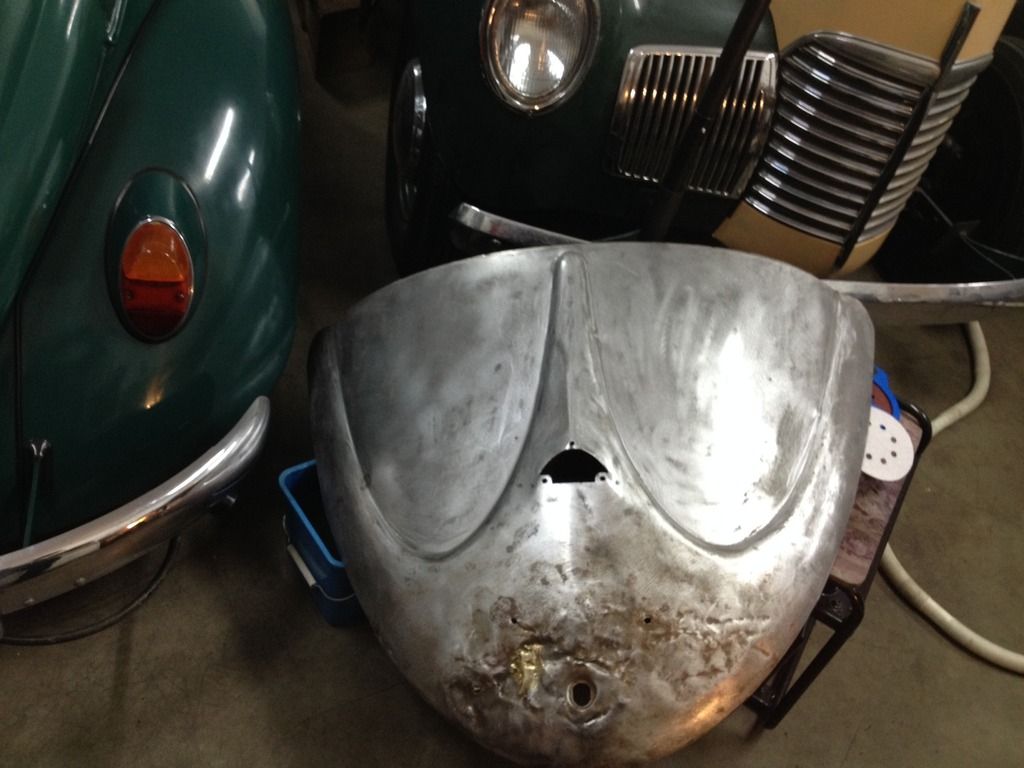 |
|
|
|
Post by PICTUP on Feb 6, 2016 13:22:19 GMT -8
Looks like great fun Terry! Who exactly puts this course on, North Island College?
|
|
|
|
Post by Volktales on Feb 6, 2016 20:19:42 GMT -8
Looks interesting so far. I am interested to see how you will deal with that brazed section...
|
|
|
|
Post by tony on Feb 6, 2016 21:06:16 GMT -8
A few dozen coats of that high fill primer , she'll be as good as new!  |
|
|
|
Post by mitchy965 on Feb 7, 2016 7:51:24 GMT -8
it'll buff out
|
|
|
|
Post by stude on Feb 7, 2016 8:26:45 GMT -8
The course is in Black Creek put on by Larry Landry he has a shop by the Black Creek Hall has been doing body work for many years and also puts on a prep and paint course Larry also will come to your house and work with you on your projects. Sounds like Larry is very good at installing windows and headliners his rate is very reasonable per hour.  |
|
|
|
Post by stude on Feb 10, 2016 11:24:22 GMT -8
So I had another class there was a new guy starting we will call him El Camino he is doing a car something like this blog.advanceautoparts.com/wp-content/uploads/2015/08/1984-el-camino-ss.jpg sounds like he has a nice shop he brought in a front fender that had been kicked in and instructed to strip it. Chevelle guy bought in his trunk lid that he started to strip and it was decided that a patch was in order and he is going to strip more before advancing. Tractor guy had stripped his hood and we banged out dents including a cross brace he will strip more paint before filling also special guest we were joined by the instructors son nice guy and very helpful. VW guy me had done a ton of more stripping mostly with a orbit sander with a vac attachment and a few hours with a razor blade window scraper type then I put up a huge tarp and draped up in my garage door and sand blasted I used a fan to blow dust outside and the instructor had suggested using an old spray can lid with a hole cut in the center to cover my blaster tip to control the sand from blowing everywhere I just taped it in place it worked good when I was finish I was able to collect the sand from the tarp vacuumed up the over spray and leaf blower to finish blowing it away. One thing I should say is that I should have put a tarp down before I power washed earlier as I ended up with Coke Cola Red paint flakes all though my lawn and I spent an hour trying to vac it up because I new that I could not stand looking at it the the next few years. Thought the sand blasting was going to kill my compressor the instructor suggest a small tip and also pointed out the C Tire has one on sale this week 25 bucks. After sand blasting I picked more with the razor and a pick plus some hand sanding before class. Prep before class. 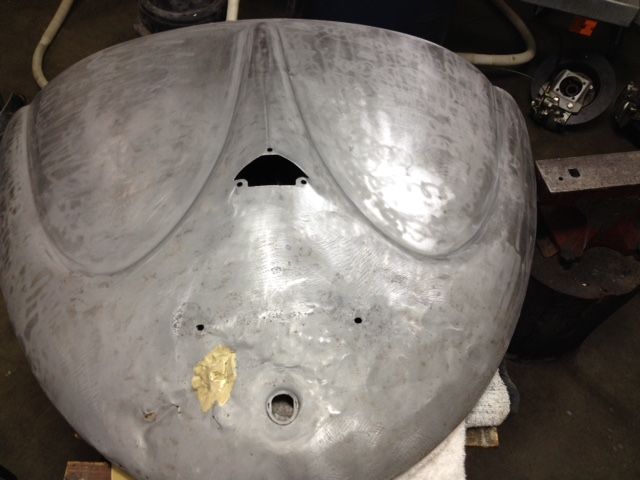 We cut the brazing out with a 4" hole saw and then did hammer and dolly to smooth out the damage I then made a patch first by beating on the patch with a hammer against an anvil the stretch metal and shape it cupped once I got the right shape I held it in the hole traced it and cut it with aviation tin snips. 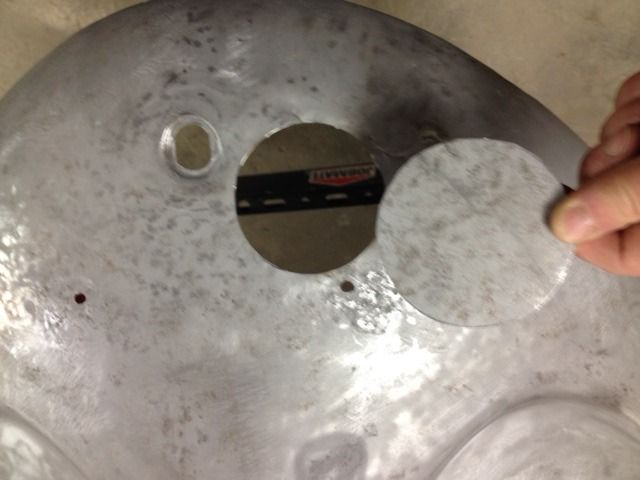 |
|
|
|
Post by stude on Feb 10, 2016 11:36:09 GMT -8
I used some masking tape on both sides to suspend the patch in the hole till it was tacked once tacked it was removed then I went around the patch with hammer a dolly to butt edges flush then tack around once that was done in numerous spots I filled in between I chased a couple holes but it went pretty good. 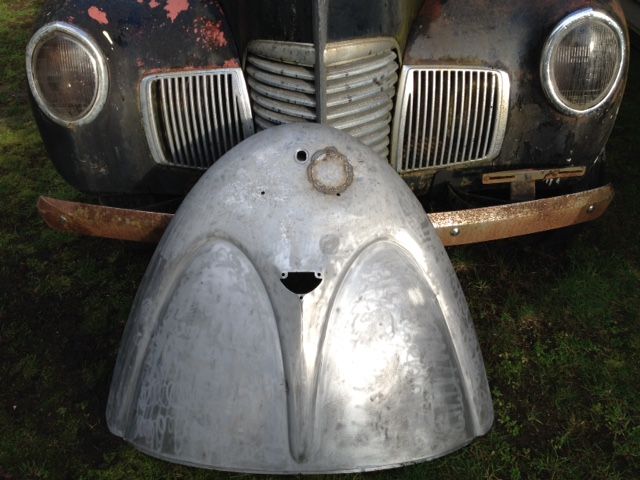 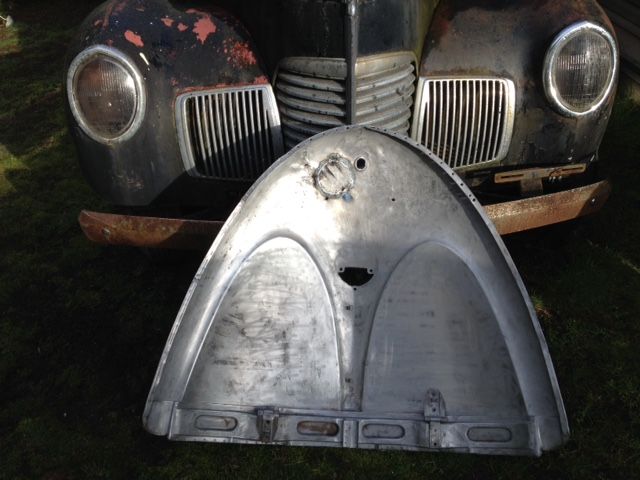 So today I will grind down the welds level it once again then attempt to fill the tears that are still there and sand blast some pits in prep for filler.  |
|
|
|
Post by tony on Feb 10, 2016 12:15:29 GMT -8
Looking good , don't do too good of a job your first time out or nobody will believe you did the repair! ;D
|
|
|
|
Post by camplug on Feb 10, 2016 20:20:32 GMT -8
Love the neighbours who vac their lawn....talk about yard care!!!!
Looks good Terry. Is this practice for the non VW project?
|
|
|
|
Post by stude on Feb 11, 2016 10:00:52 GMT -8
Looking good , don't do too good of a job your first time out or nobody will believe you did the repair! ;D Your are right Tony obviously you have seen my work and camplug I have been stuck for a year on my Studebaker I have to pull the windshield and dash and don't have the confidence in myself to get the job done and back together I was thinking I could do some networking find someone to help with windows and headliner hopefully I can do that.There is another class after this one that deals with prep and I think paint if I take that class I will be able to keep my foot in the door for a least awhile. The welds have been ground and I welded up 2 tears 2 spots where I punched through with a screwdriver separating the spot welds 3 cracks in the edge and 4 or 5 through pits I have to pound the welds down now (hammer welding) before grinding some more on the welds there are a few more through pits to weld up yet. I used a small copper plug behind the tears and pits before welding for heat sink the instructor say he doesn't bother with anything behind. 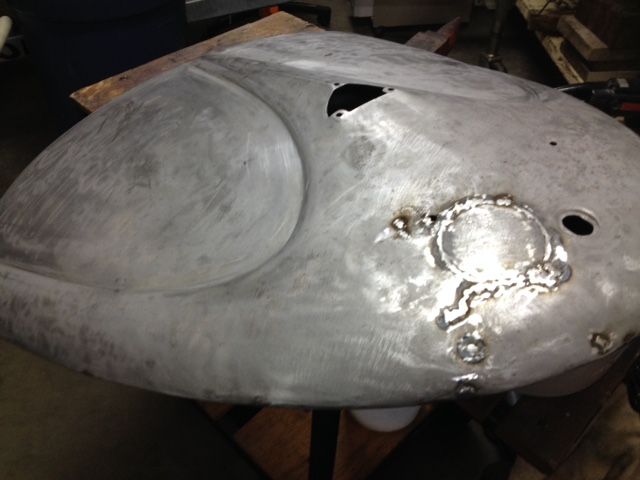 |
|


